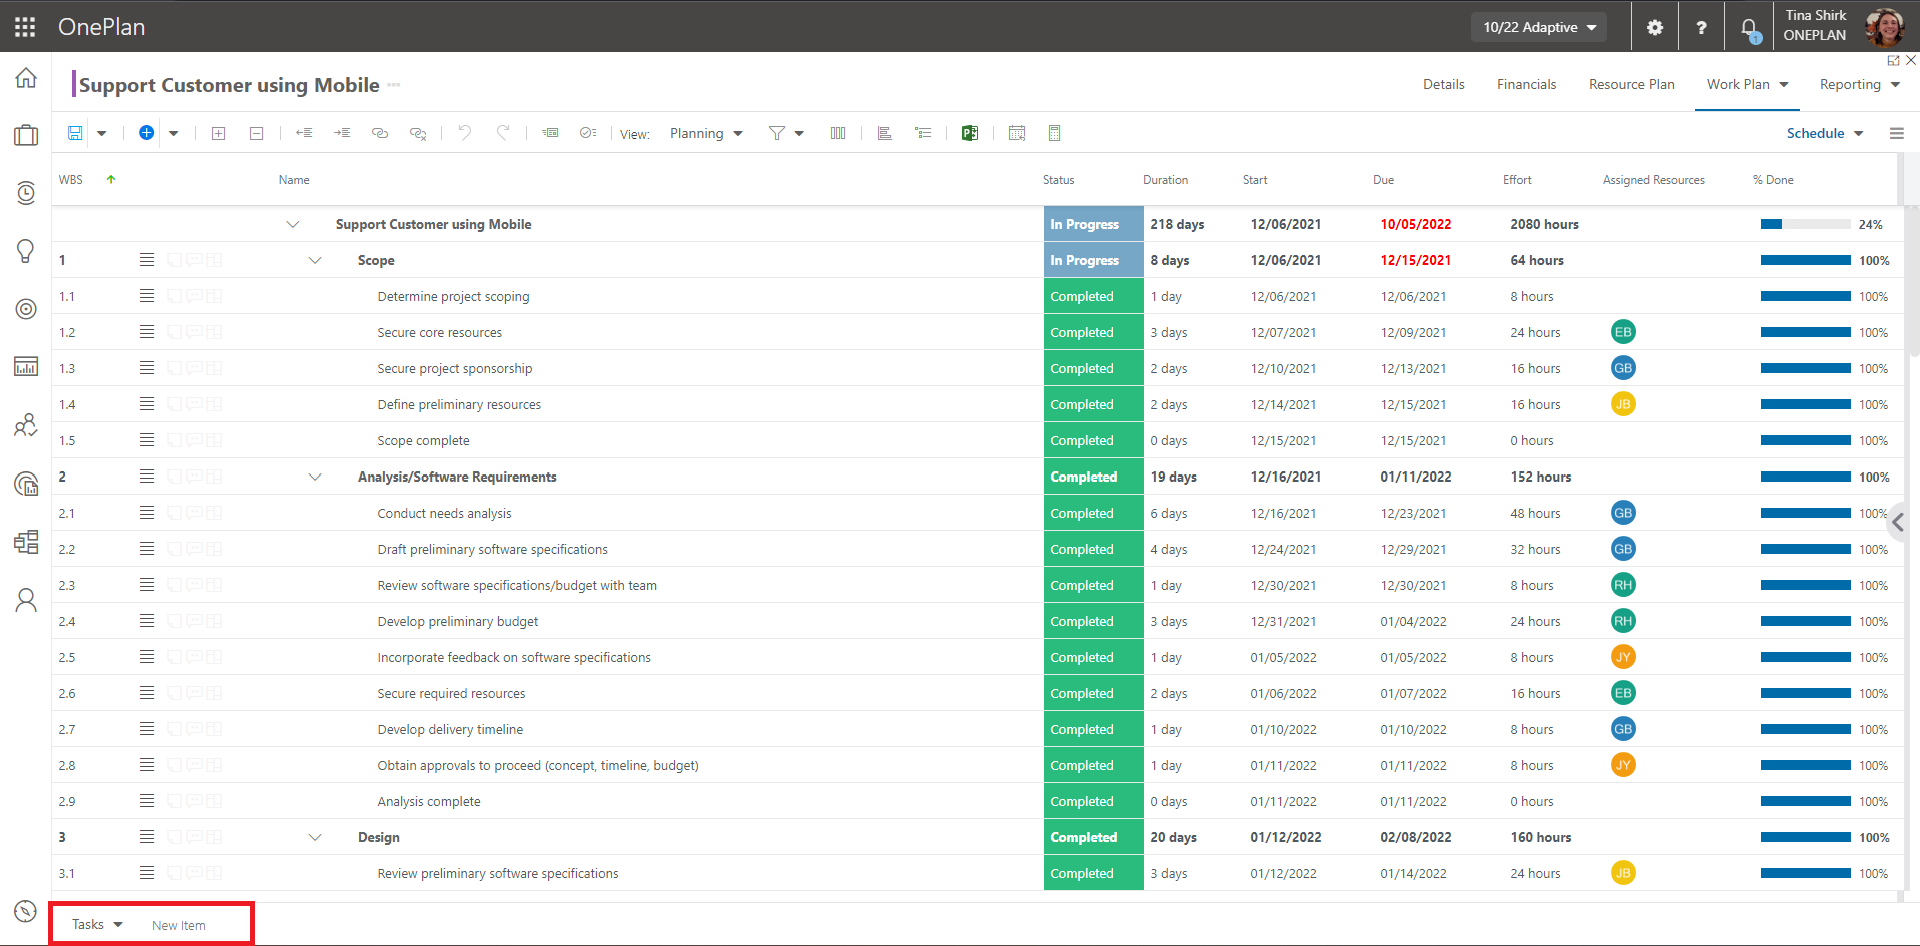
Work Plan List Header Buttons and Menus
This article explains the icons and functionality of the header in the Work Plan List page. Depending on the work type selected, the icons may be different, as certain functionality applies only to certain work type.

Video Length - 4:17
Save the Work Plan
After you make changes to your plan, you will need to click the Save button to save those changes.

The work plan will not save right away, allowing users to review their plans prior to saving. The save button also allows users to revert the plan (not save) if they do not like the changes they made
The save button Improves performance when editing a work plan since it will not have to wait for auto save.
Add Work Items
Note
You cannot add new work items when Grouping is on.
Click the Add Item button to add tasks, or other work items to your work plan. OnePlan supports many kinds of work items to best suit your work method.
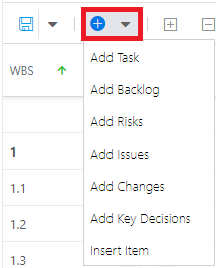
You can also add items from the form at the bottom of the screen.
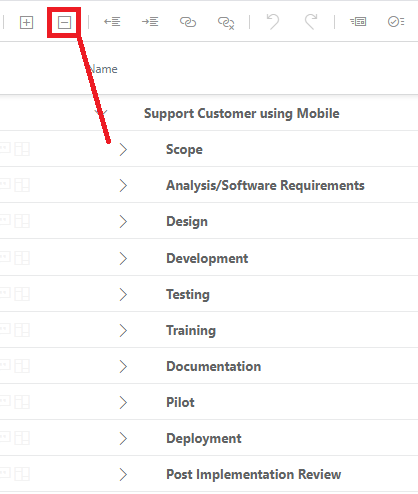
Expand and Collapse Work Items
Note
You cannot expand or collapse your work plan if Grouping is on.
Click the Expand icon to show all work items and sub-items in the Work Plan.
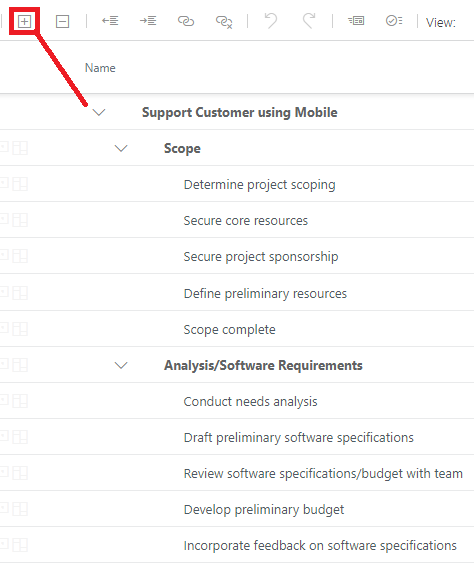
Click the Collapse icon to minimize the work items.
Indent and Outdent Work Items
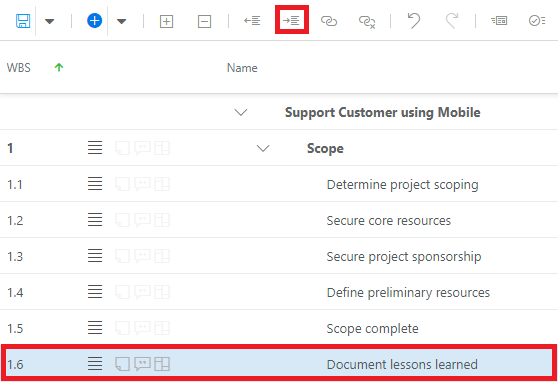
Use the Indent and Outdent icons to build out the work breakdown structure (WBS). Indenting makes an item a child item.
Important
To indent or outdent the tasks, you must sort the WBS column first. Once the tasks are in WBS order, you will be able to indent and outdent tasks.
Note
You cannot indent or outdent work items when Grouping is on.
Note
When you indent or outdent a work item with Timesheet Hours, a message will prompt you to recalculate your schedule to update timesheet hour calculations. This serves as a helpful reminder, ensuring that users are aware of the potential impact on timesheet hours and prompting them to recalculate for accurate scheduling information.
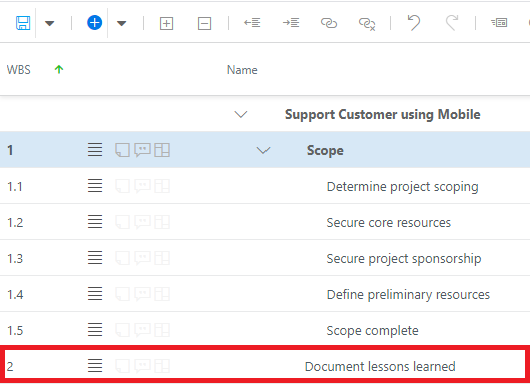
In the example below, Document lessons learned is at the same level as Scope. When we indent Document lessons learned, it becomes a child of Scope. Notice the WBS order number has changes from 2 to 1.6, indicating that Documenting lessons learned is the sixth child of Scope.
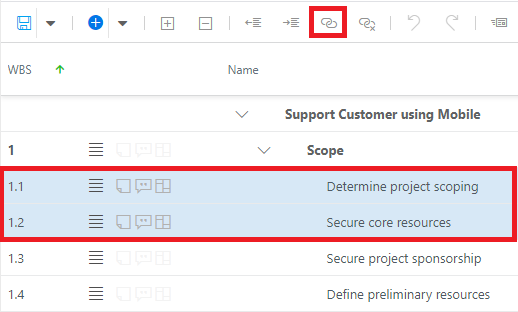
Link and Unlink Work Items
Note
It is best practice to sort the WBS column before you link tasks.
To link items:
Hold down the CTRL key to select two items.
Click the Link icon. The second item becomes the dependent item.
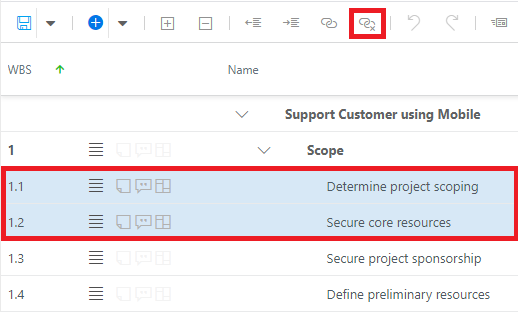
To unlink items:
Select the dependent task only.
Click the Unlink icon.
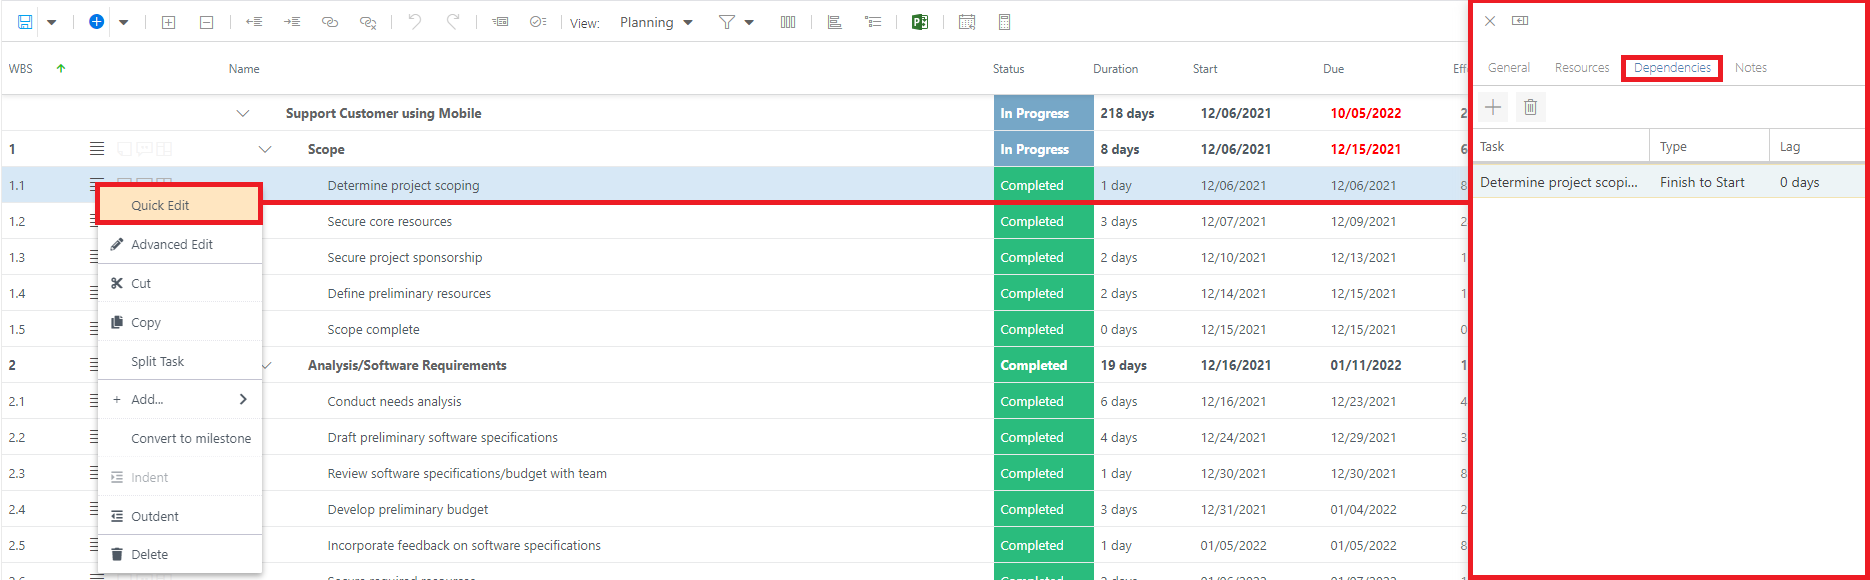
If using the Link icon, the relationship is automatically Finish-to-Start relationship with 0 lag days. If you want to specify different link type or lag time, select the parent item and open the Quick Edit window. Go to the Dependencies tab to make your changes.
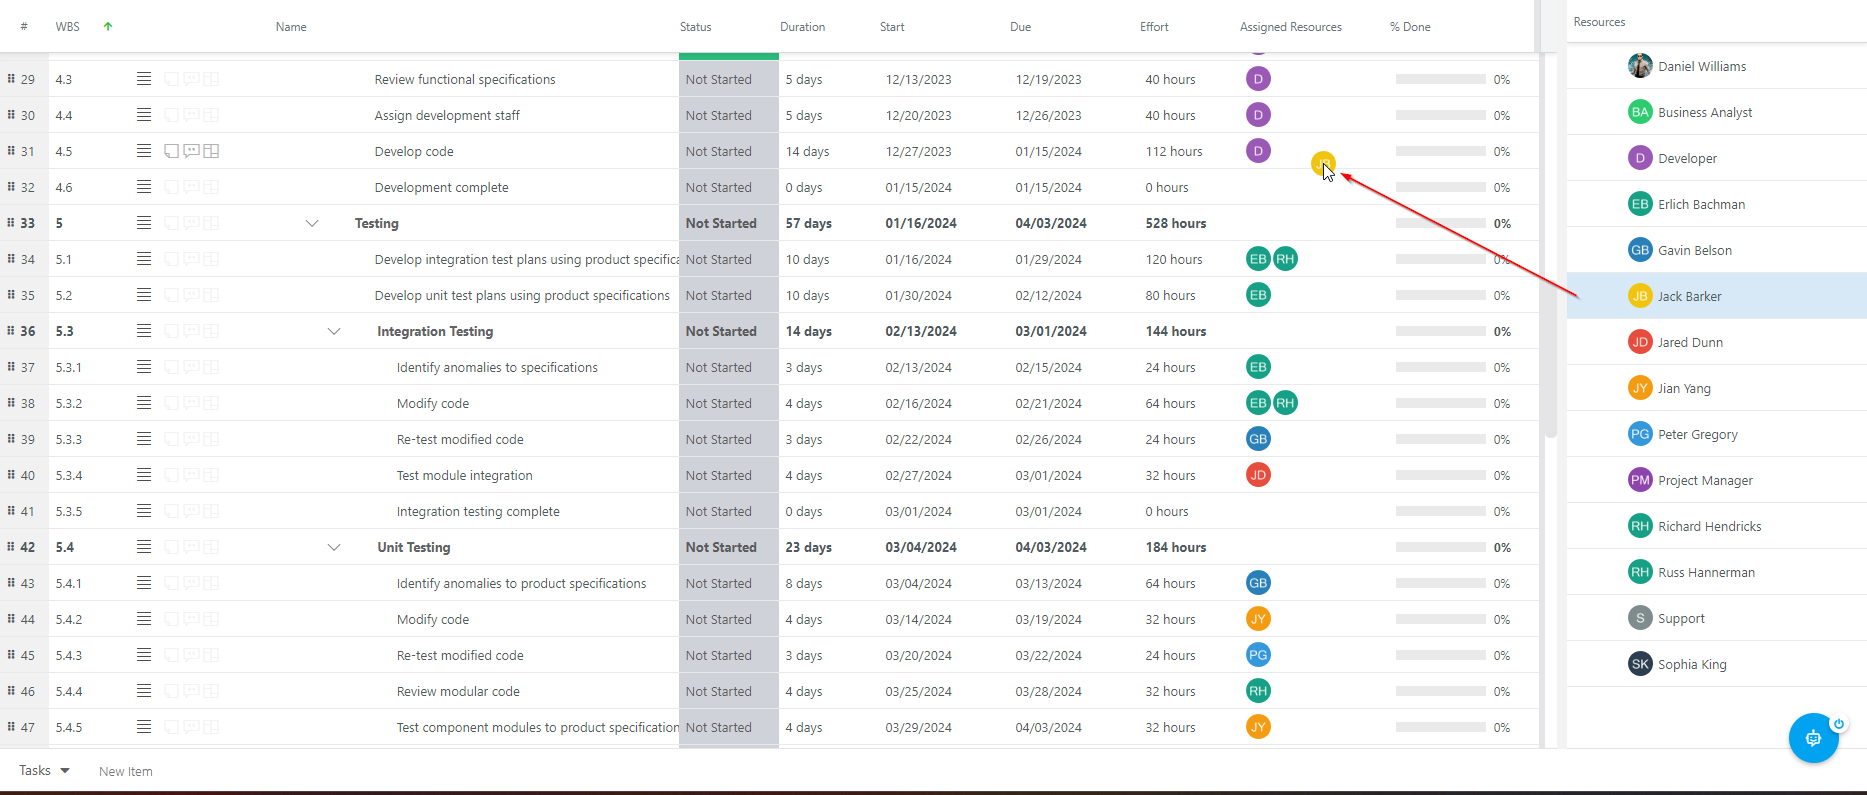
Open the Resources Panel
Click the Resources icon to open the Resources panel for the plan. You can then drag and drop resources from the panel onto Work Items to assign the resources to the item.
Undo and Redo
Click the Undo and Redo icons to undo or redo actions as needed.

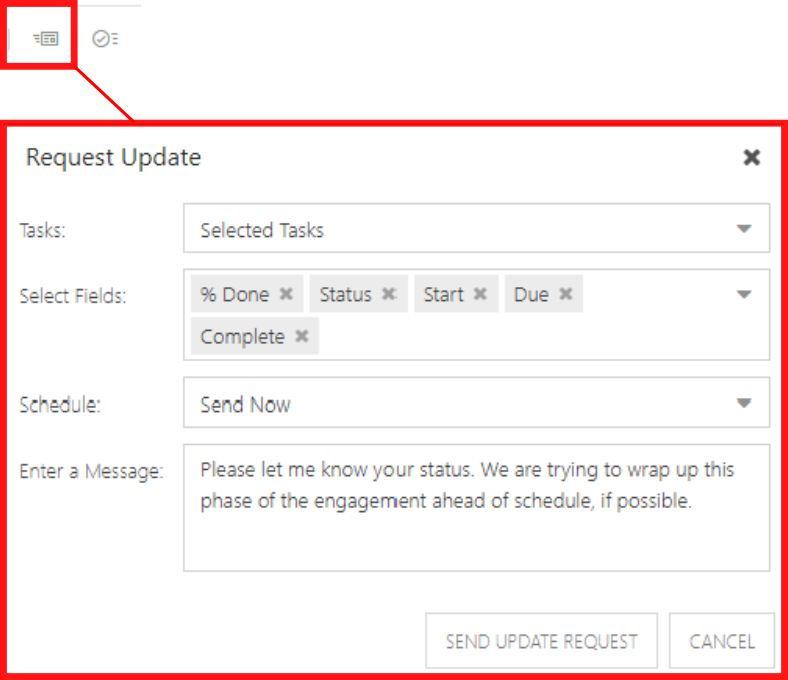
Request Updates
Click the Updates icon.
Complete the Request Update form. Click Send Update Request button when ready.
Tasks: Select either Selected Tasks or Tasks Assigned to Me. You may want to select Tasks Assigned to Me to send yourself regular reminders to update your status.
Select Fields: Use the drop down menu to choose which fields you want updated by the recipient(s).
Schedule: Select either Send Now, Daily (specific days & time), or Monthly (specific day of the month).
Enter a Message: This message will be in the email body requesting updates.
Review Status Updates
Click the Status Updates icon. The Status Updates pop-up will open.
In the Status Updates pop-up, you can view all of your status updates.
Check the check box next to the desired updates to select. You can select multiple updates at a time.
Click Accept to accept the selected updates, or Reject to reject the selected updates.

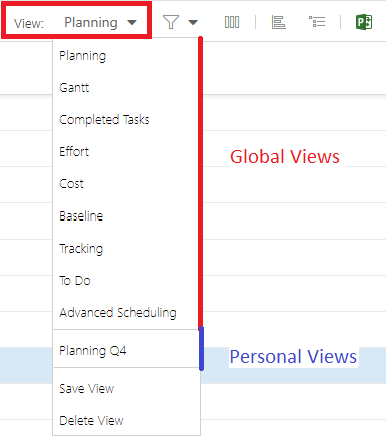
View Menu
Select the View menu drop down to change views, save views, and delete views. Global views show in the first section. Only administrators can save global views. Personal views show in the second section, if you have any saved.
See Modify and save Views in the Work Plan Grid for instructions to edit, save, and delete views.
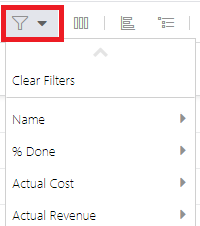
Apply Filters
Click the Filters icon to select and apply filters to the Work Plan Grid. You can select multiple filters.
Click Clear Filters to clear all filters.
Note
As of February 2024, you can filter your Work Plan on Assigned Resources. This improvement enhances the filtering options, providing a more refined and efficient way to focus on work items associated with specific resources.
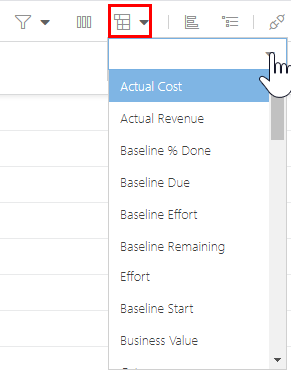
Group Work Items
Click the Group By icon to select a field to group the work items by in the grid.
Note
When grouping is enabled, scheduling actions such as drag and drop, indenting, adding work items, etc., are temporarily disabled to maintain the integrity of the grouped view.
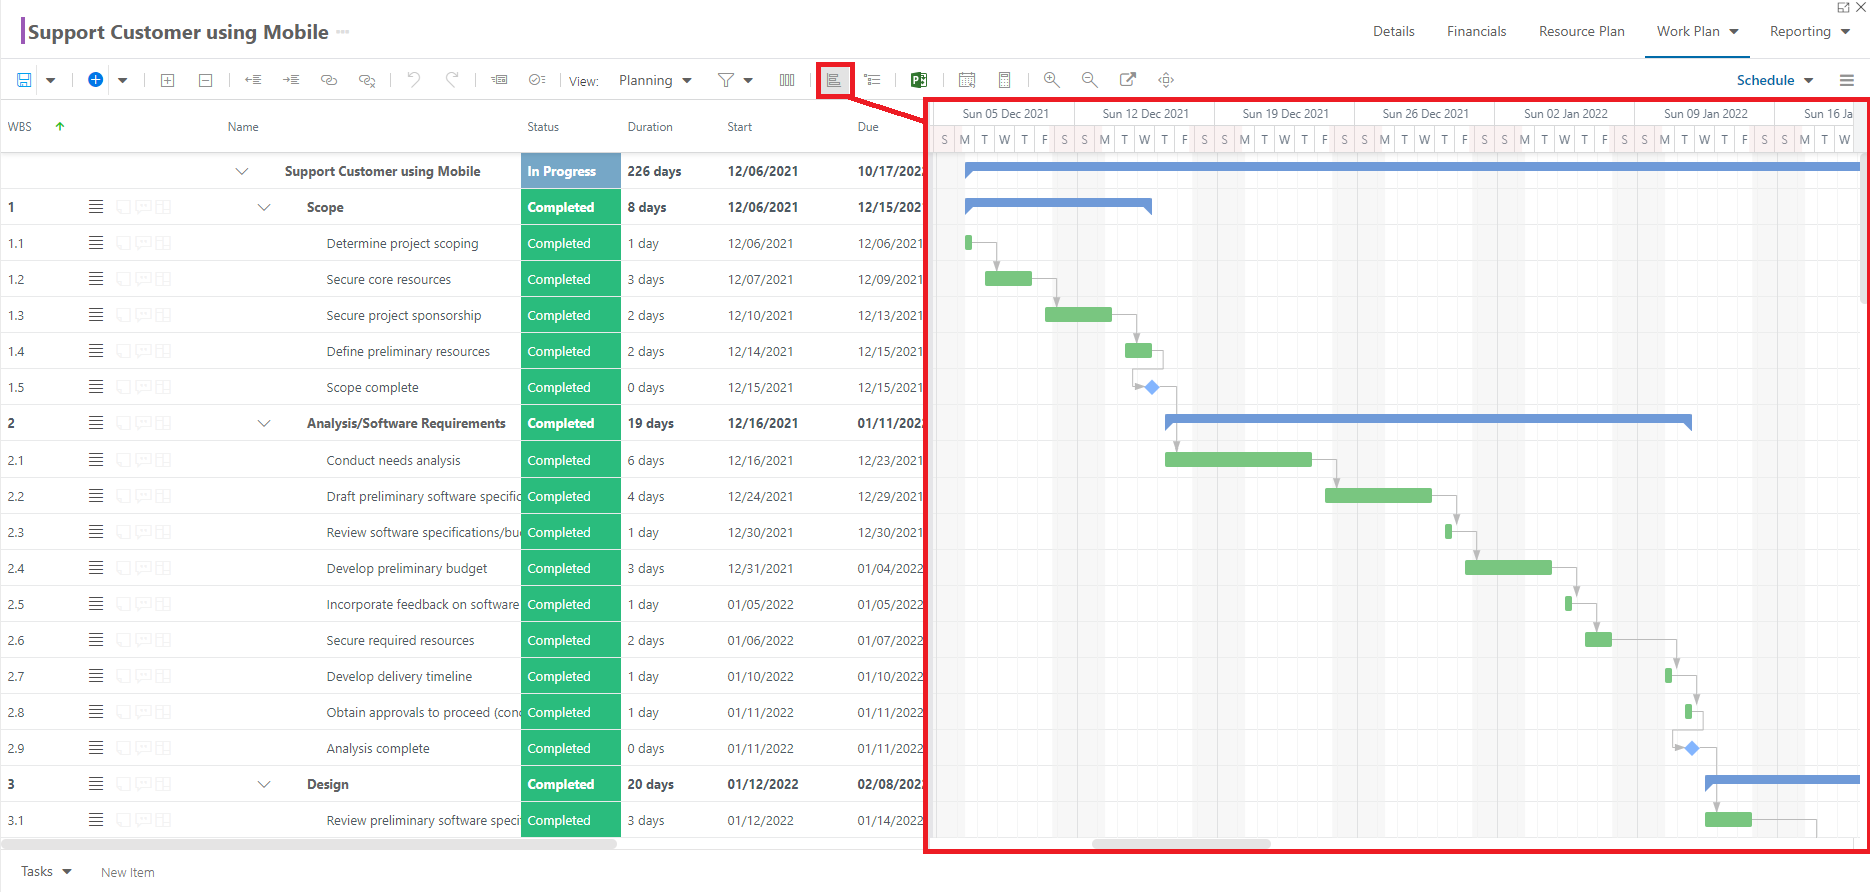
Open the Gantt
Select the Gantt icon to show the Gantt chart. Select it again to close the Gantt chart.
When the Gantt chart is open, additional icons will show for Gantt view controls including: Zoom In, Zoom Out, Scroll To, and Zoom Fit.
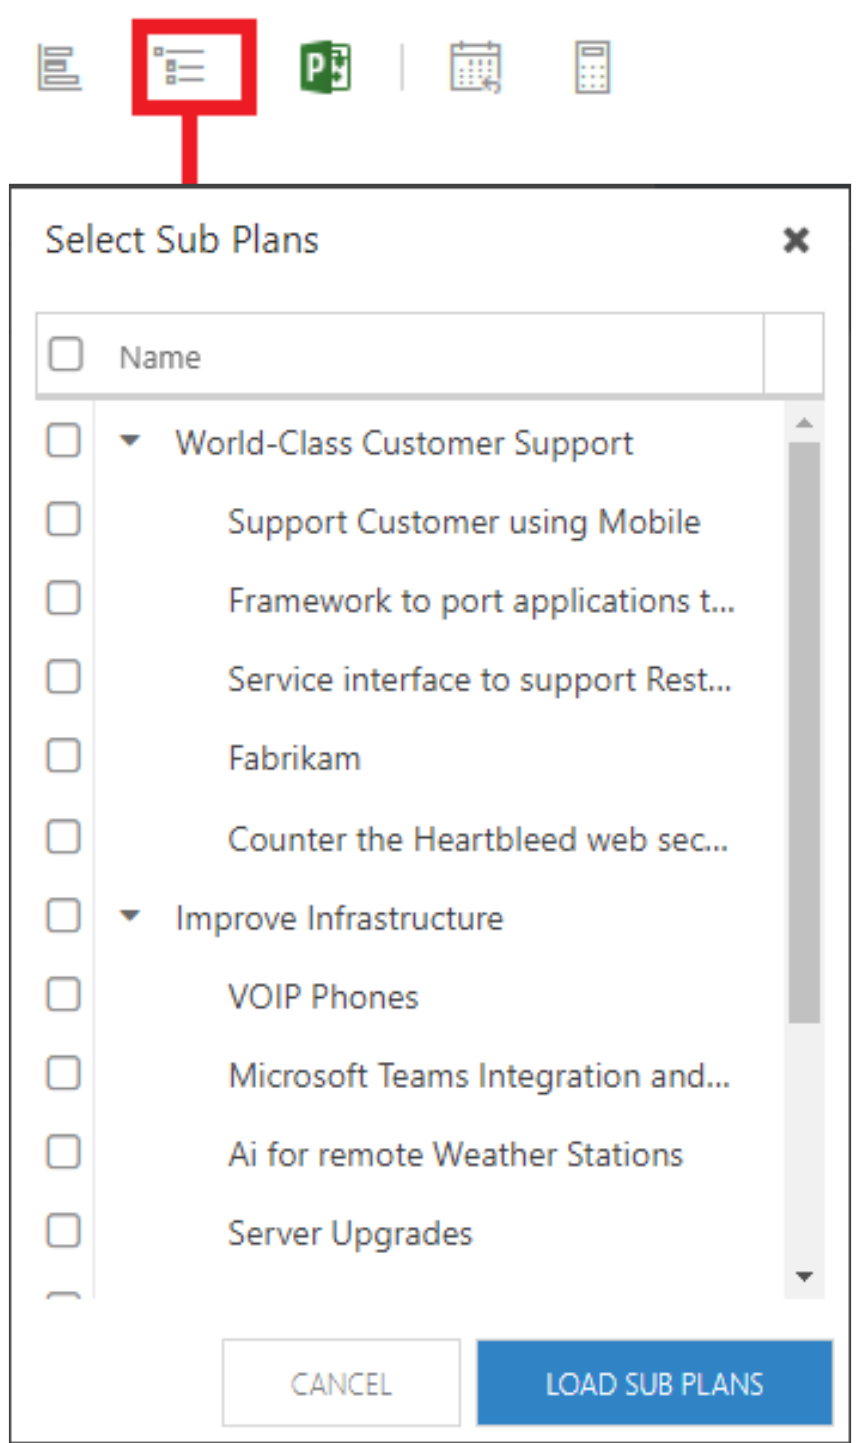
Sub Plans
Click the Sub Plans icon. The Select Sub Plans form will open.
If the current plan has sub plans, you can load them into the current Work Plan. Check the check box next to the sub plans you would like to add. Click Load Sub Plans. The selected sub plans will be added to the current Work Plan Grid.
Connected Systems
You may have additional systems integrated with OnePlan, such as Project Desktop, Project for the Web, Azure DevOps, etc. If so, a Connected Systems icon will show on the header to connect this plan to its integrated counterpart in the other system.

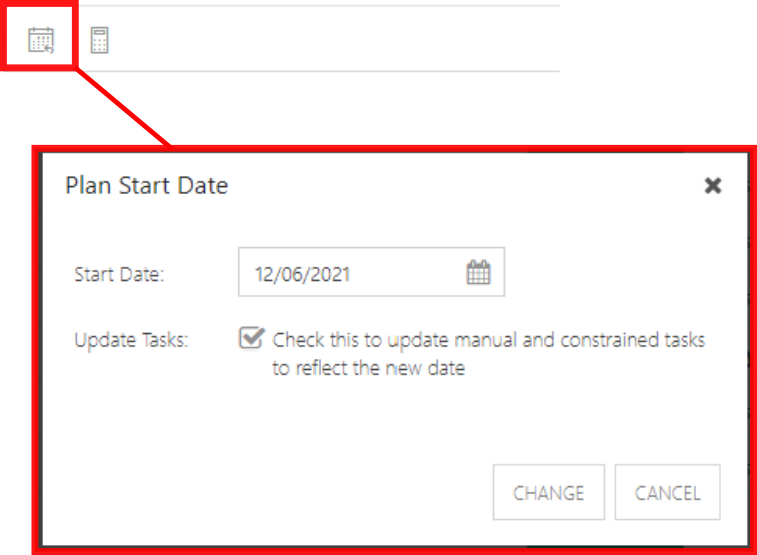
Project Start Date
Click the Project Start Date icon to adjust the selected project start date. You can select a new date and choose to move manual and constrained tasks or not. Automatic tasks will automatically be rescheduled.
Recalculate
Click the Recalculate icon to manually recalculate calculated fields in the Work Plan.
