Resource Plans Overview
This article an overview of the OnePlan Resource Plans. OnePlan has both plan-level and organization-wide resource planning capabilities.
Global Resource Plan
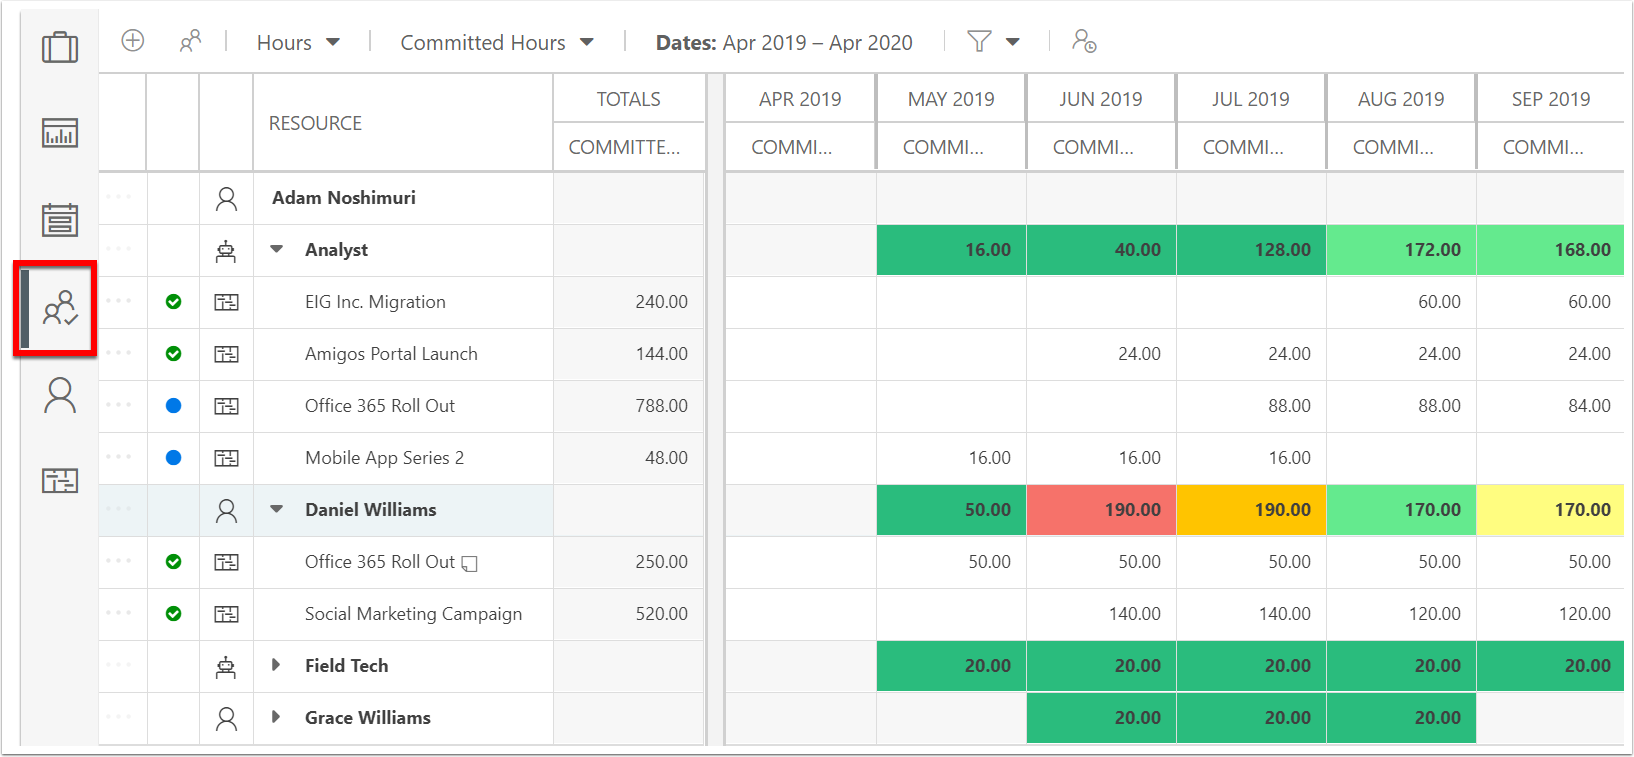
The Global Resource Plan shows all resource allocation across all the plans. This is a useful page for managers to review allocation across multiple plans.
If your organization is using the Negotiations feature, the email notifications contain a link to the Resource Plan page, filtered for that plan's resources. You can also navigate to the page directly via the Resource Plan icon on the OnePlan navigation menu.
Global Resource Plan Overview Video (03:52)
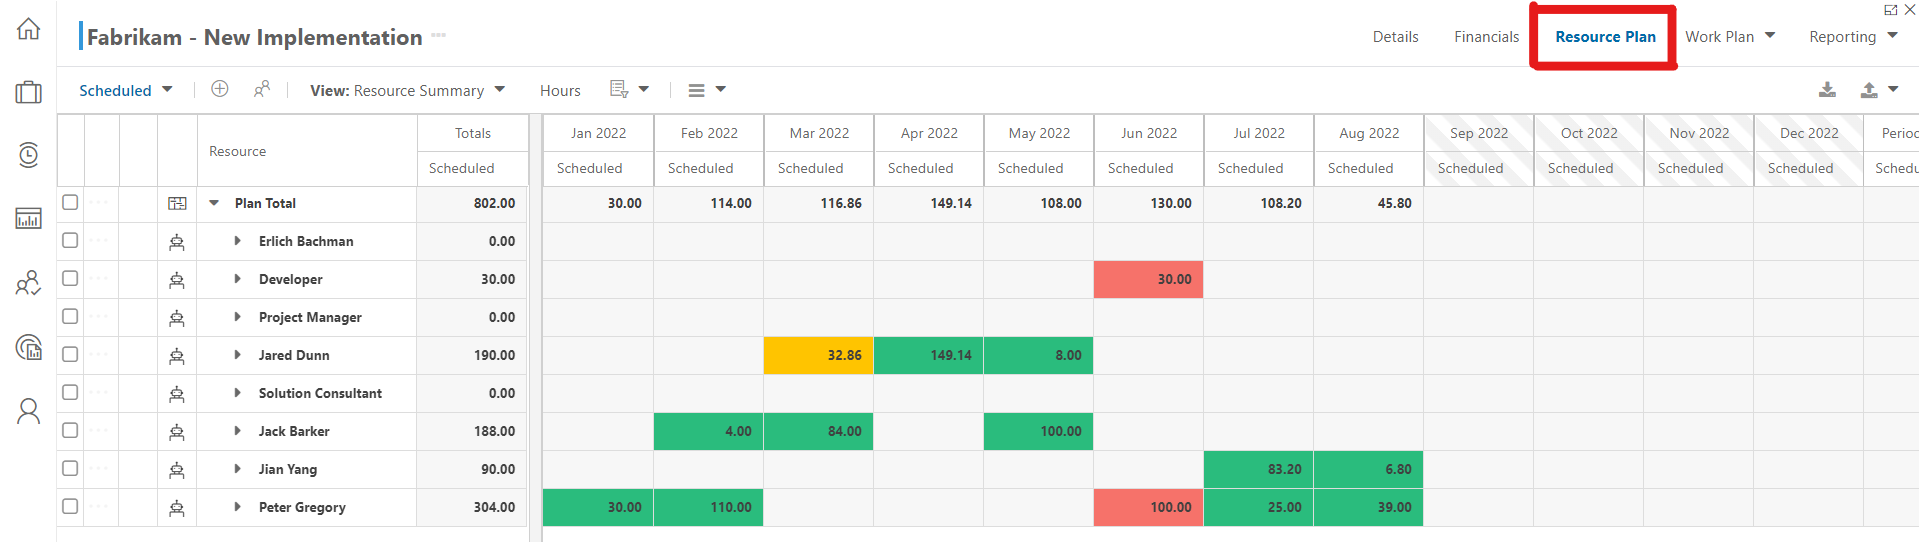
Plan-Level Resource Plan
The plan-level Resource Plan shows resource allocation for a particular plan.
Plan-Level Resource Plan Overview Video (04:39)
Pre-filters
Select a pre-filter to review desired resource types. Pre-filters are configured by your administrator. Pre-filters can be required or optional. When pre-filters are required, no resources will be displayed in the Global Resource Plan page until a pre-filter is applied.

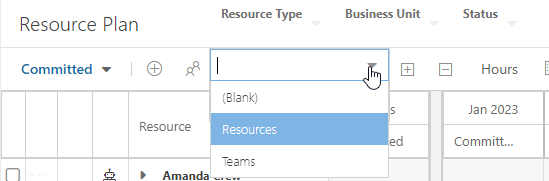
Resource Type Pre-Filter
You can filter the Global Resource Planner by Resource Type so you can view either individual resource allocations or team allocations.
Important
You can only view Resources or Teams allocations. You cannot view both at the same time.
Resource Manager Pre-Filter
The resource manager pre-filter is a server-side filter that loads resources into the Resource Plan area and/or Resource Center area based on user permissions and Resource Managers admin settings. See How the Resource Manager pre-filter works for more information.
Icon Menu

Icons listed in order from left to right:
Icon | Name | Description |
|---|---|---|
| Cost Types Menu | Toggle between Resource Plan cost types. Cost Types are configured per business use case. These allow for analysis of how resources are initially planned compared to how they are actually assigned and work. |
| Add Booking | Click this icon to launch the booking form. |
| Candidates List | Click the icon to toggle showing the Candidates List on the bottom half of the screen. See How do I use the Resource Pane? for more details. |
| Views | Select the View menu drop down to change views, save views, and delete views. |
| Planning Units Mode Menu | Select Hours, % (Percent), or FTE (Full Time Equivalent). |
| Modify View Menu | Settings in this menu include:
|
| Resource Plan Advanced Menu | Options in this menu include:
|
| Refresh | Click to update the data in your resource plan. |


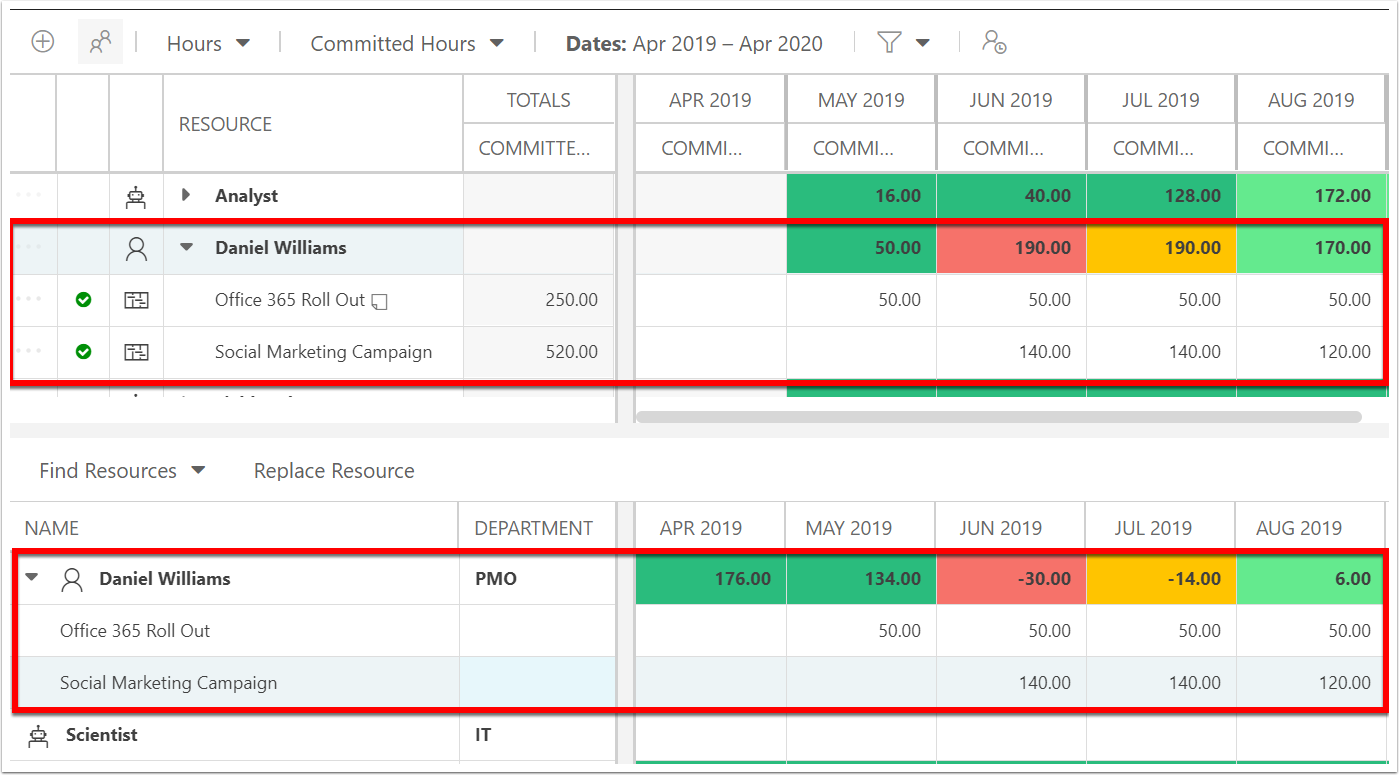
Resource Plan Details
The bookings are grouped under each resource. Public rows (if the public/private feature is enabled) show.
The summary rows show the total allocation for each resource. The colors are based on their percentage of availability utilized (how much of their time is taken).
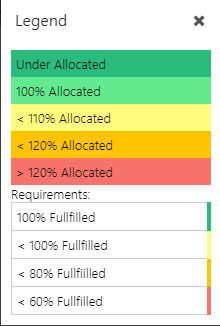
Resource Plan Color Legend:
Green Cell: Less than 100% Availability Used
Light Green Cell: 100% Availability Used
Yellow Cell: Greater than 100% --- to --- Less than or Equal to 110% Availability Used
Orange Cell: Greater than 110% --- to --- Less than 120% Availability Used
Red Cell: Greater than 120% Availability Used
Green Tab: Resource requirement 100% fulfilled
Yellow Tab: Resource requirement is greater than 80% -- to -- less than 100% fulfilled
Orange Tab: Resource requirement is greater than 60% -- to -- less than 80% fulfilled
Red Tab: Resource requirement less than 60% fulfilled
Resource Plan Details and Candidates List
If you show the Candidates List in the lower half of the screen, each resource's summary row shows remaining availability. The color legend is the same as noted above. See Resource Plan Candidates List Overview for more information about the candidates list.
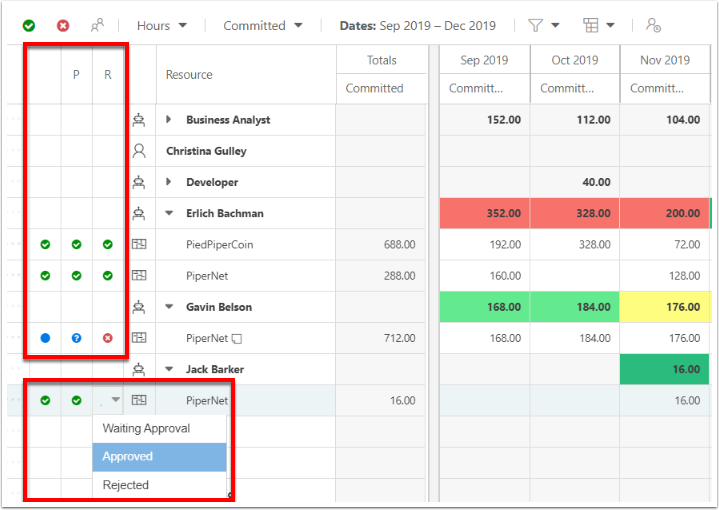
Resource Approvals with Negotiations
When the Negotiations feature is enabled, the additional status and approval columns show. See How is resource planning done with the Negotiations feature enabled? for more information about the notifications and approvals with negotiations.