Enter Time on My Timesheet
This article explains how to enter time using the OnePlan timesheets.
Note
Resources must be assigned a role to import timesheet hours into the resource plan.
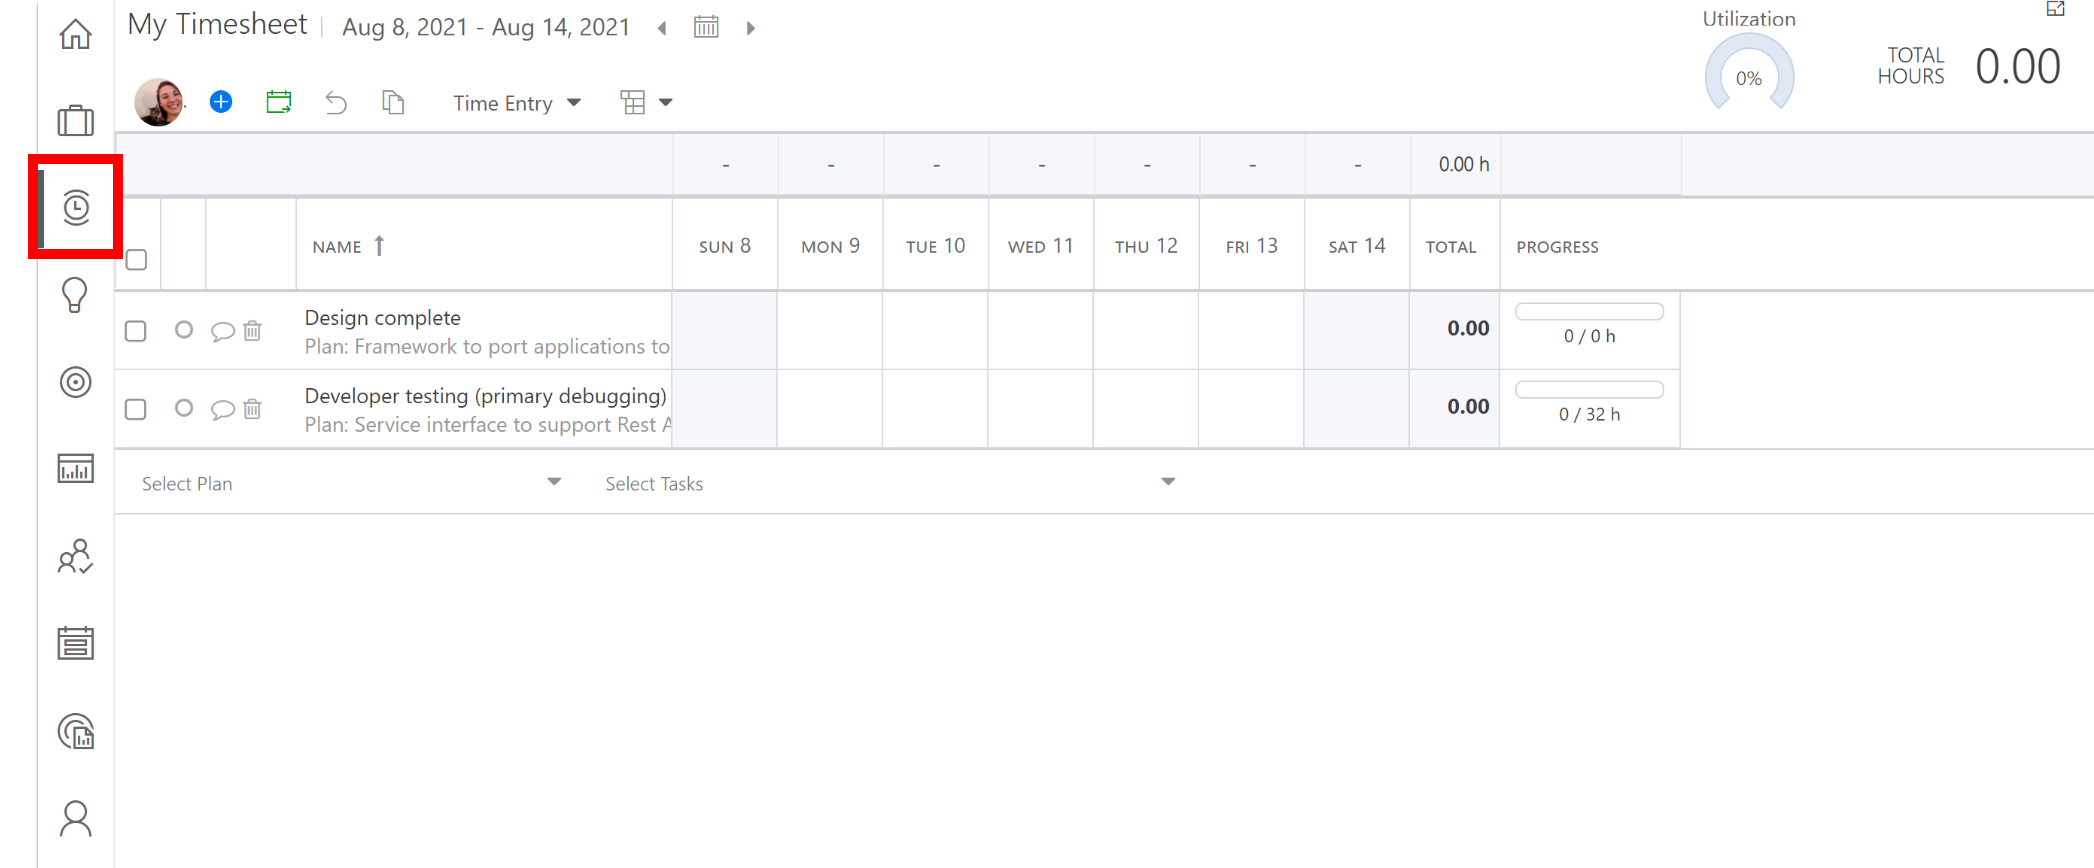
Access Your Timesheet
Click on the Timesheets icon in the navigation. You will begin in the "Time Entry" mode. This is where Team Members track time on their work assignments.
Any items that are assigned to you and are scheduled during the current time period will automatically load into your timesheet the FIRST TIME you open the timesheet for that period. You will need to import or add additional timesheet times the next time you log into your timesheet.
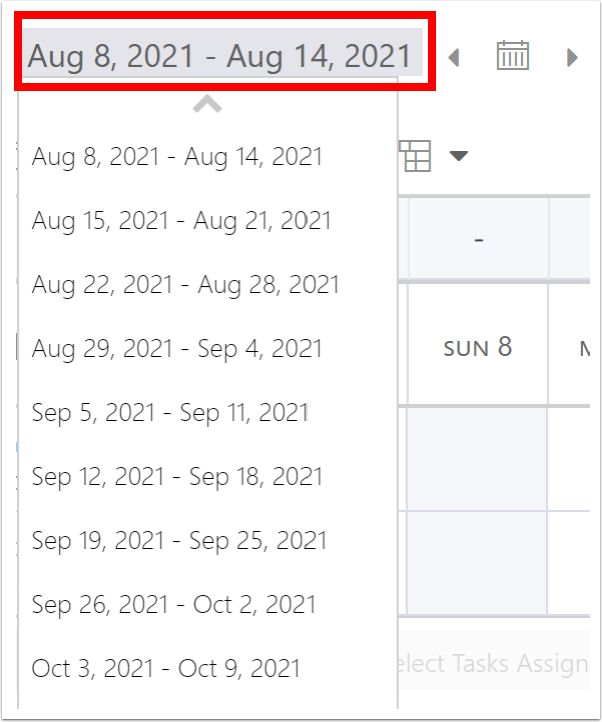
Change Timesheet Periods
When you first go to your timesheet, you'll navigate to the current timesheet period. If needed, you may navigate to another timesheet period.
Click on the period dates. A drop down will show all open/unlocked timesheet periods. If the admin has locked a period, you can no longer navigate to it.
Use the period navigation icons to quickly move to the previous period, the current/"today" period, or the next period.

Copy or Import Timesheet Items
The OnePlan timesheet allows you to import any work items that are assigned to you to make management of your tasks easy. Additionally, the OnePlan timesheet allows you to copy your timesheet from one time period to another to simplify management and time tracking on repetitive tasks.
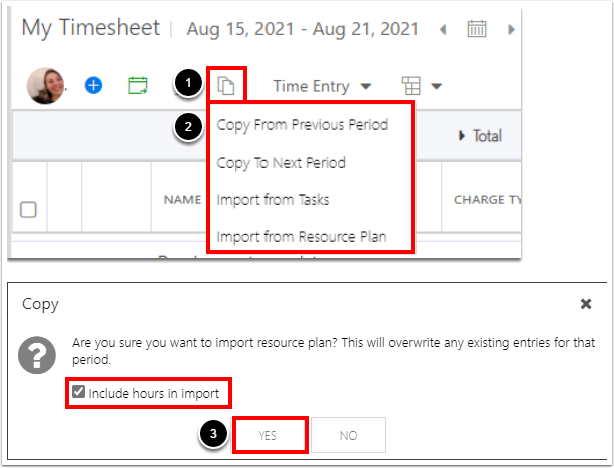
To copy or import timesheet items into your timesheet:
Click the Copy Timesheet icon
 .
.Select the desired copy or import method:
Copy From Previous Period: Select to copy items from the previous timesheet period into the current timesheet period. This will overwrite any existing entries for this period.
Copy To Next Period: Select to copy items from the current timesheet period to the next timesheet period. This will overwrite any existing entries for that period.
Import from Tasks: Select to import any tasks to your timesheet you are currently assigned to for the current period.
Import from Resource Plan: Select to import items that have been assigned to you in the Resource Plan. This will overwrite any existing entries for that period.
Note
The timesheet will automatically import any tasks assigned to you the FIRST TIME you access the timesheet for the current period. After the first time, you will need to use the Import from Tasks or Import from Resource Plan functions to bring in any additional tasks that are assigned to you in the current timesheet period.
Click YES on the warning pop up to confirm the copy.
Note
If using the Import from Resource Plan method, check the "Include hours in import" check box to import hours from the Resource Plan into the timesheet.
Important
When copying work items from one period to another, work items that are no longer assigned to you (and the plan is set to only allow adding time to assigned work items) will not be copied.
Add Tasks and Work Items to Your Timesheet
Important
If a Plan is open to the team or assigned to specific individuals, only team members or those assigned to the plan will have the ability to add time. This restricts access for Managers and Owners, ensuring that time entry is limited to those directly involved with the Plan, contributing to a more focused and controlled time-tracking process.
There are multiple methods to add a task to your timesheet.
Add Timesheet Items Using the Add Item Button from the Header
Click the Add Item icon
 . The Add Tasks window will open.
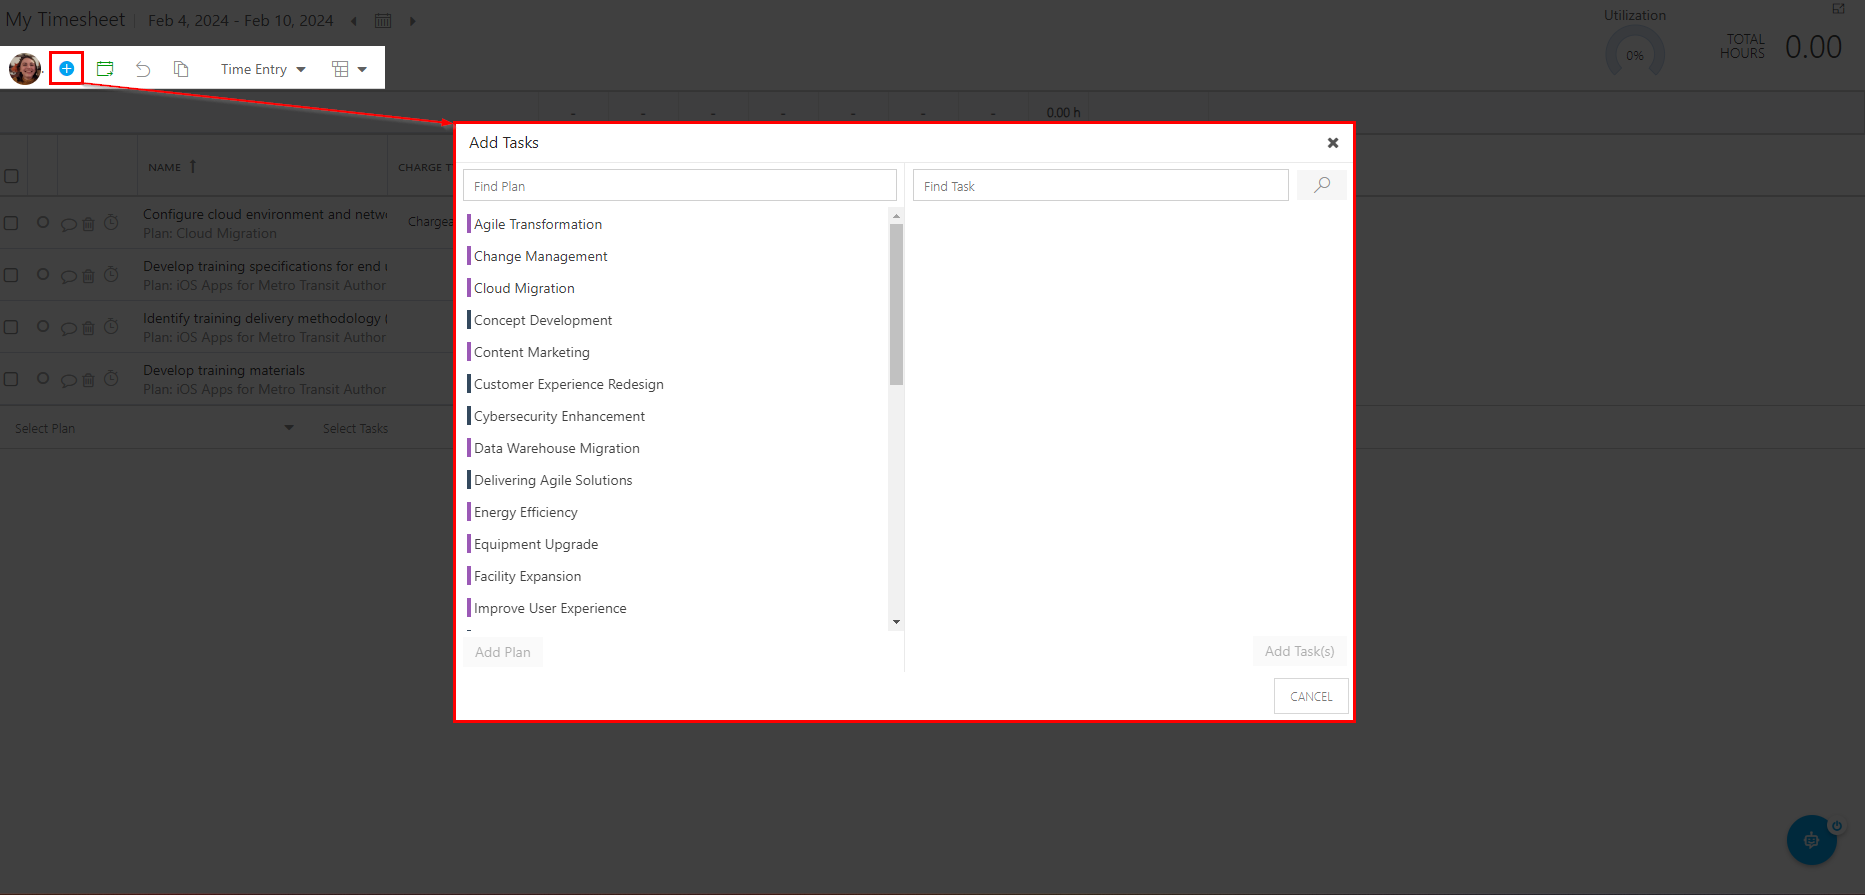
Search for and select the desired plan. Either type in the plan name into the Find Plan field, or select a plan from the list of plans. The Task section of the form will populate with all of the available tasks from the selected plan.
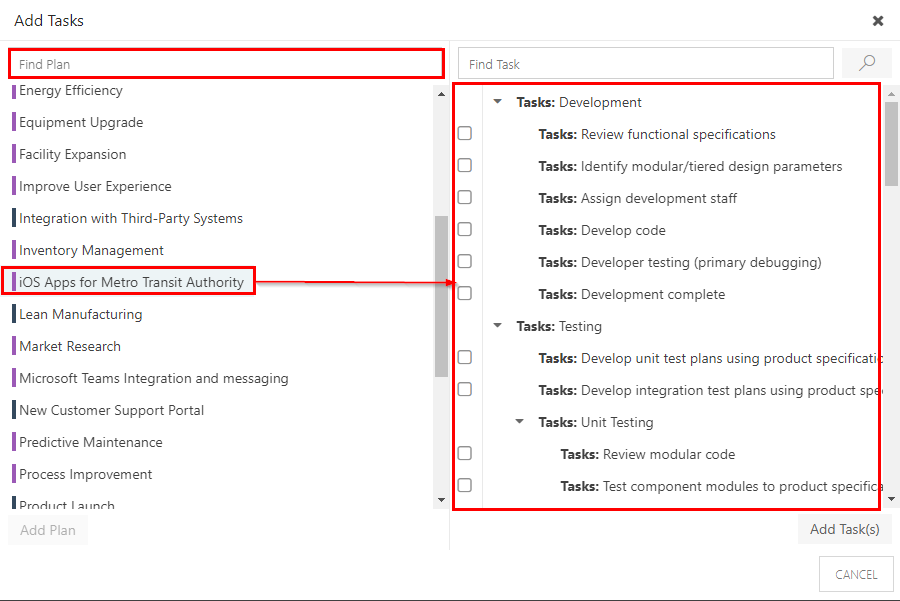
Search for and select the desired task. Either type in the task name into the Find Task field, or select a task from the list of tasks.
Note
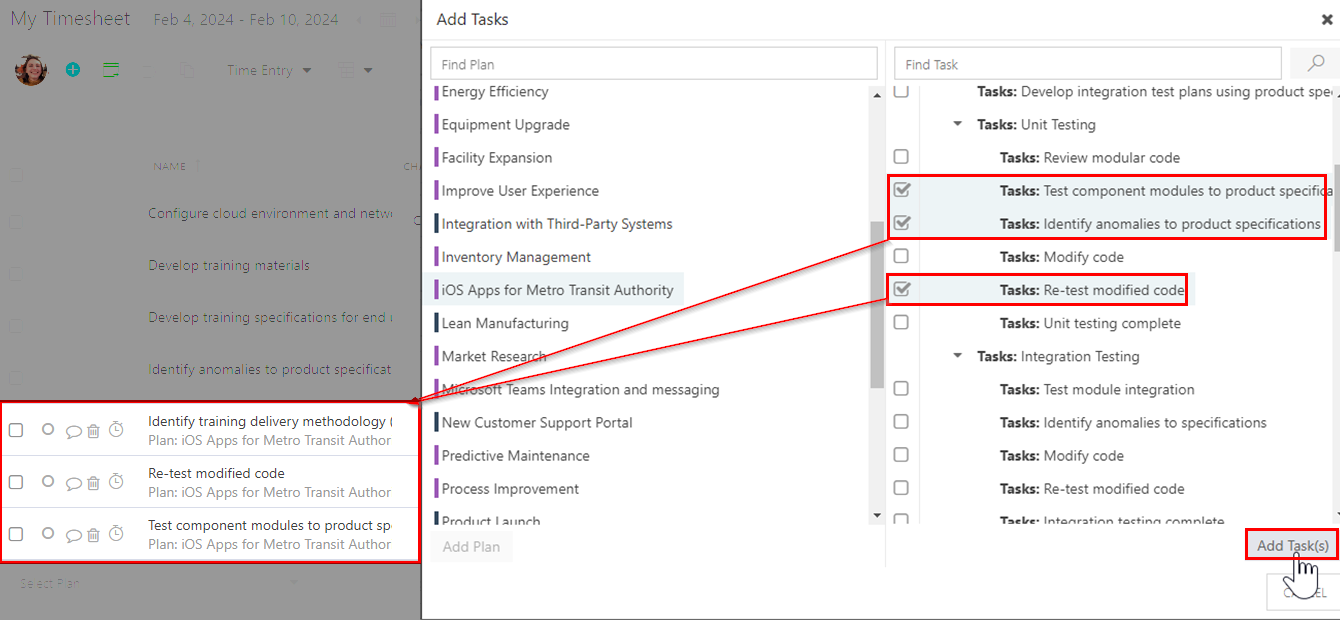
You can select multiple tasks to add into your timesheet.
Note
The timesheet interface excludes check boxes next to work items, like summary tasks, that cannot be added to your timesheet.
Click Add Task(s) to add the selected task(s) to your timesheet.
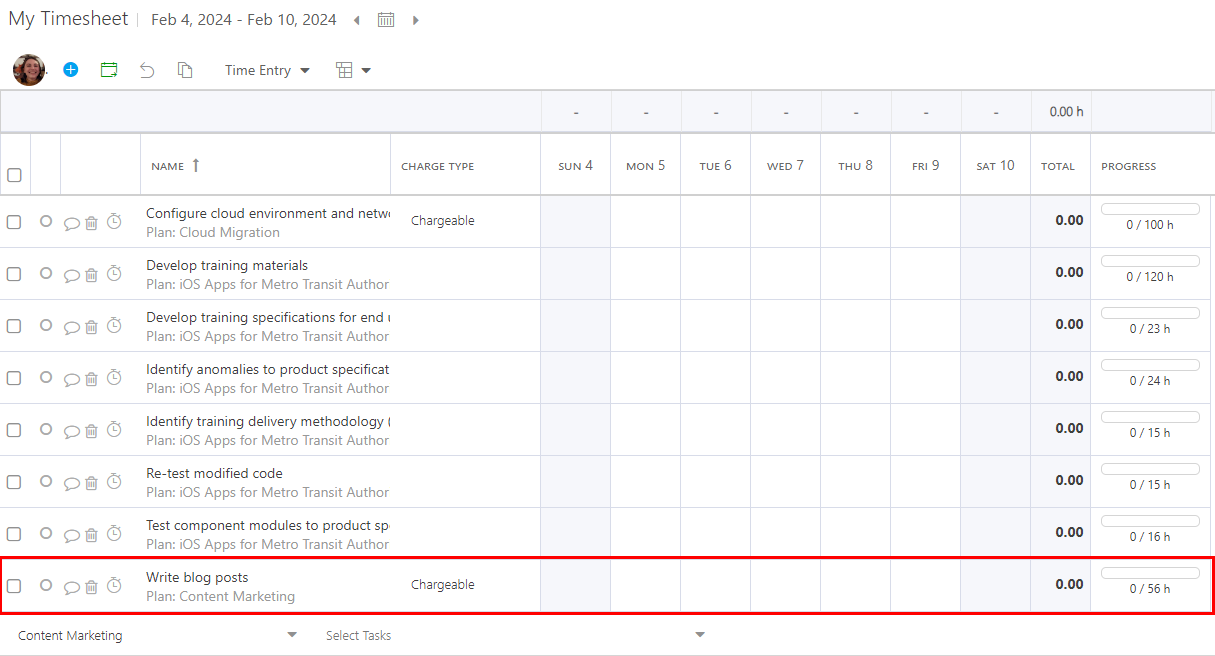
Add Timesheet Items Using the Add Item Bar at the Bottom of the Timesheet
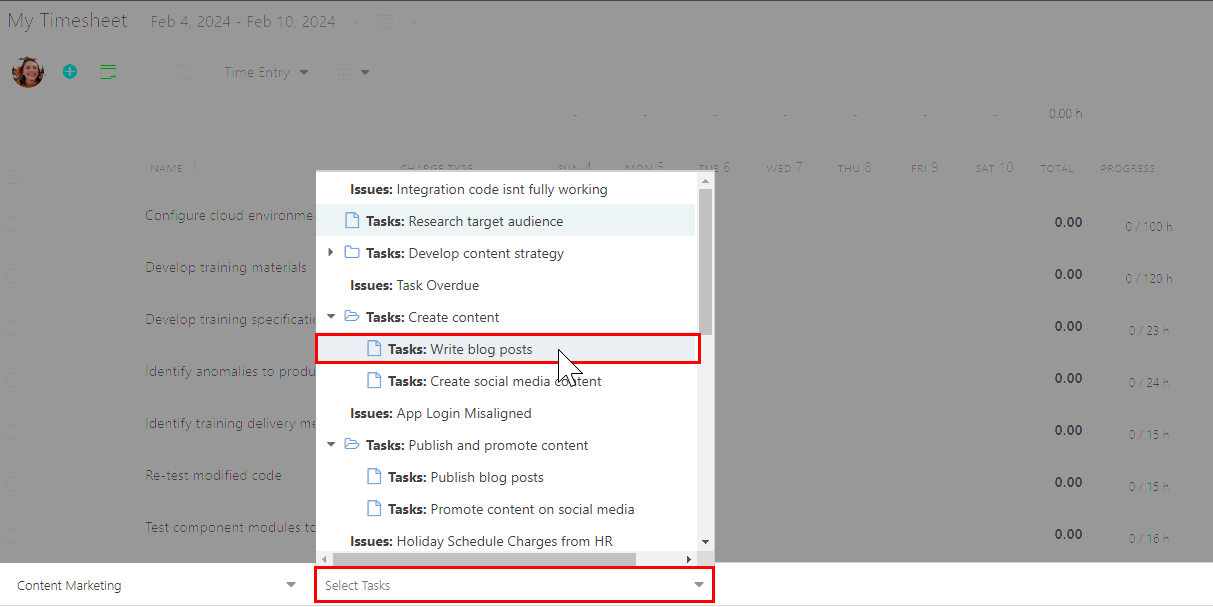
Search for or select the desired plan. Either type in the plan name into the Select Plan field, or open the drop down menu and select a plan from the list of plans.

Select the desired task from the Select Tasks drop down menu. When a task is selected, it will be added to your timesheet.
Note
Tasks that are eligible to be added to your timesheet have a paper icon next to them
 . Summary tasks, which cannot be added to your timesheet, have a folder icon next to them
  . When a summary task is collapsed the folder icon is closed, indicating there are child tasks below the item
  .
.
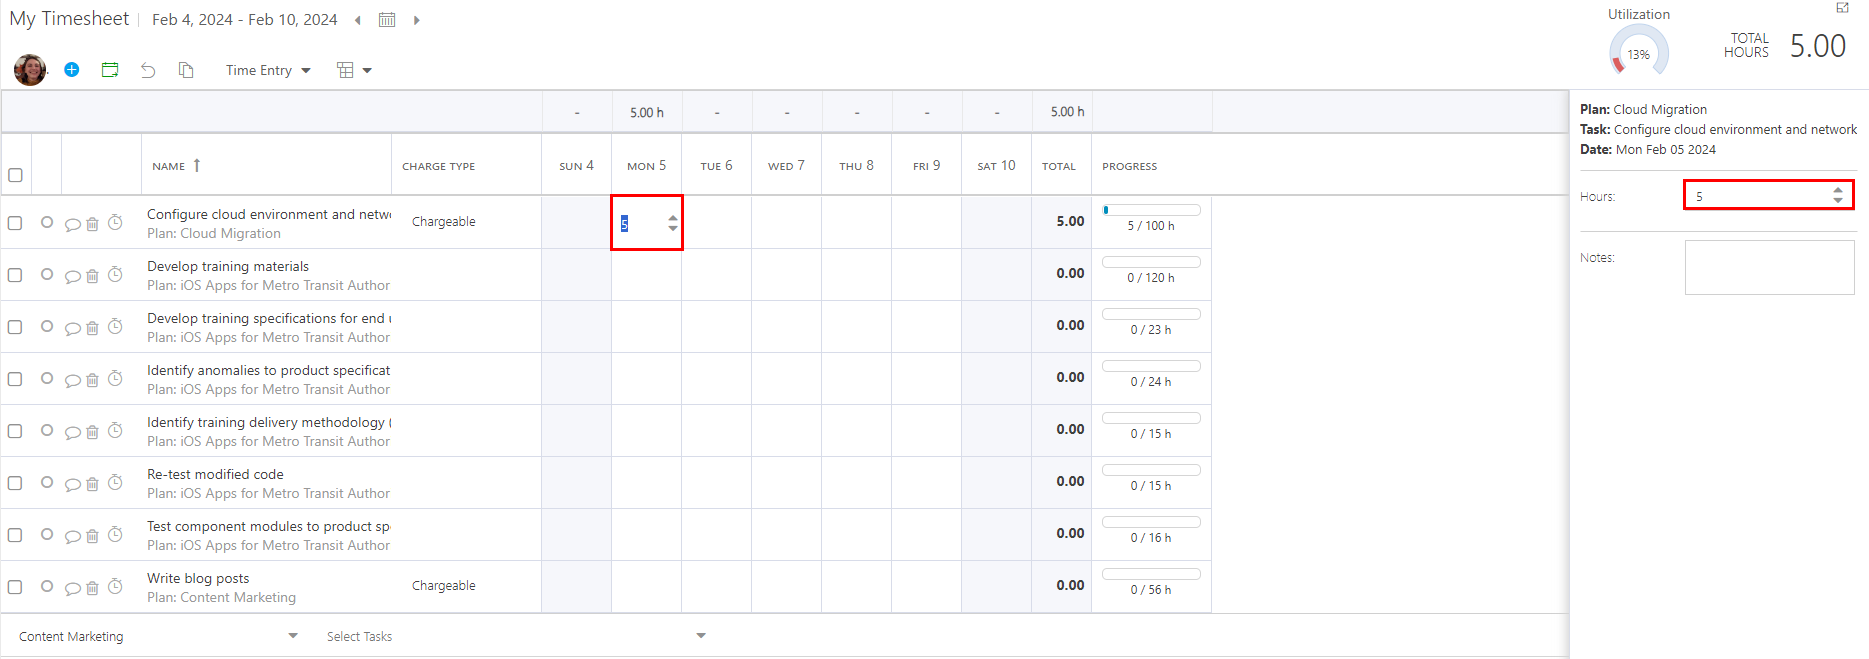
Track Time in Your Timesheet
Now that you have all of your tasks in your timesheet, you need to enter the time you actually spend on these tasks.
Click into the desired date cell for a timesheet item. When you click in a cell, the task info pops open on the right side with the following: Plan, Task, Date, Hours, and Notes. Enter your time value directly into the cell or into the Hours field in the task pop up on the right.
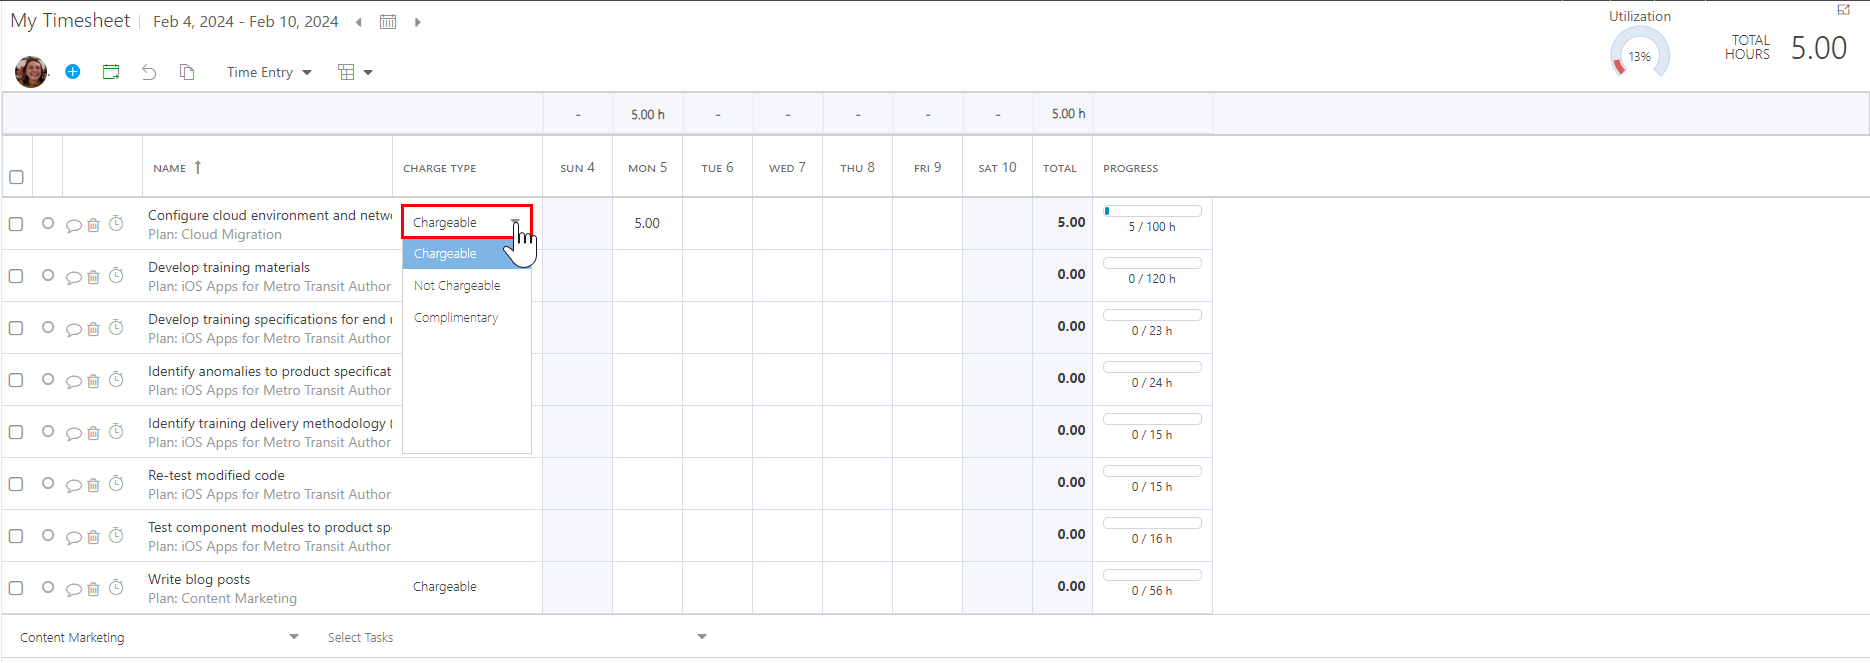
Some timesheet entries require you to provide additional information about your entries, such as the Charge Type (indicating whether your time entries for that task are chargeable or not). Select the appropriate values for the additional fields if required.
Note
Additional fields vary by organization and are setup by your administrator.
Once your time entries are complete, submit your timesheet for review.
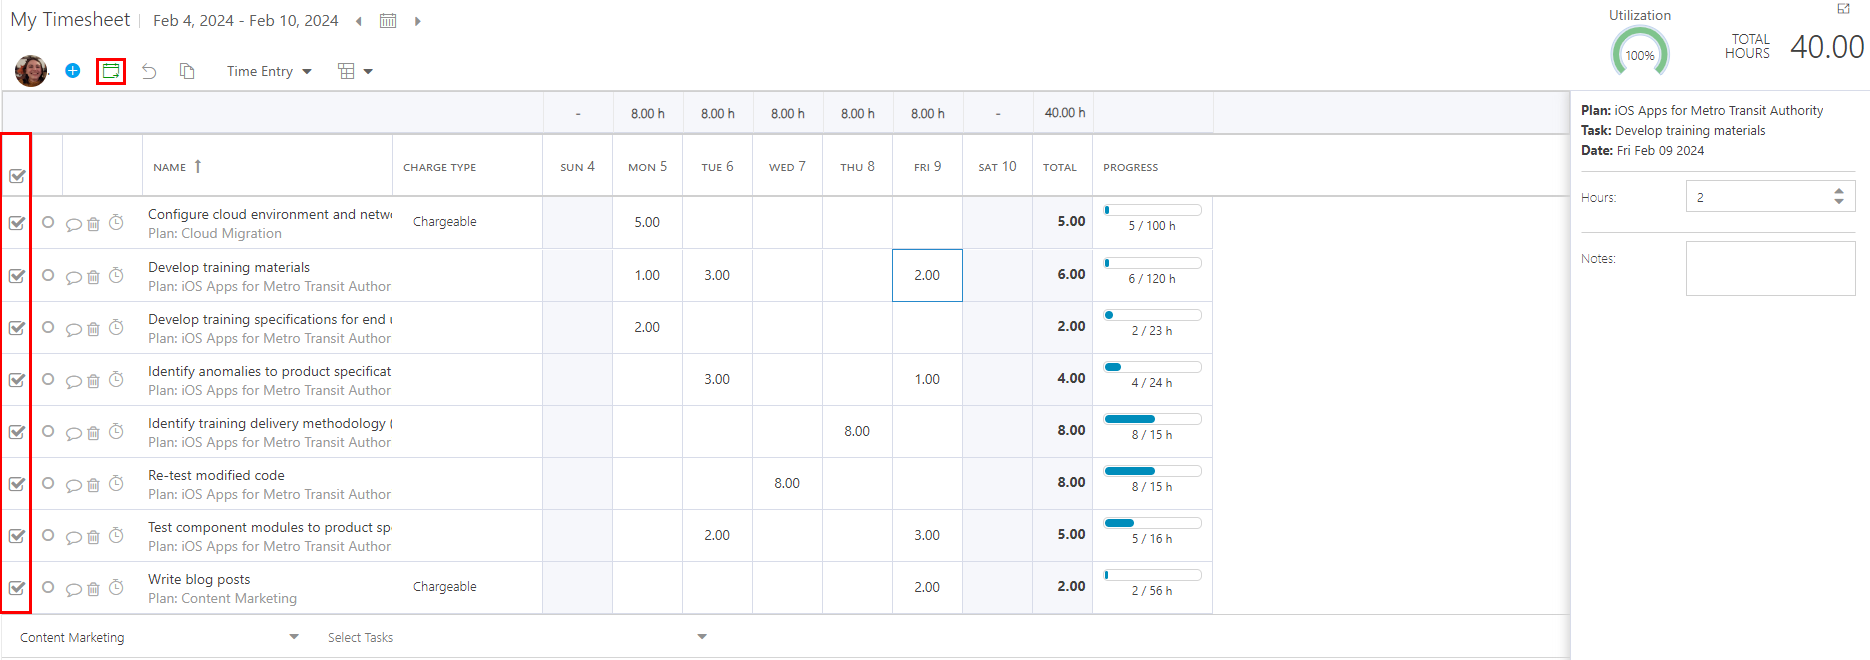
Submit Your Timesheet
Once your timesheet is complete, you need to submit it for review.
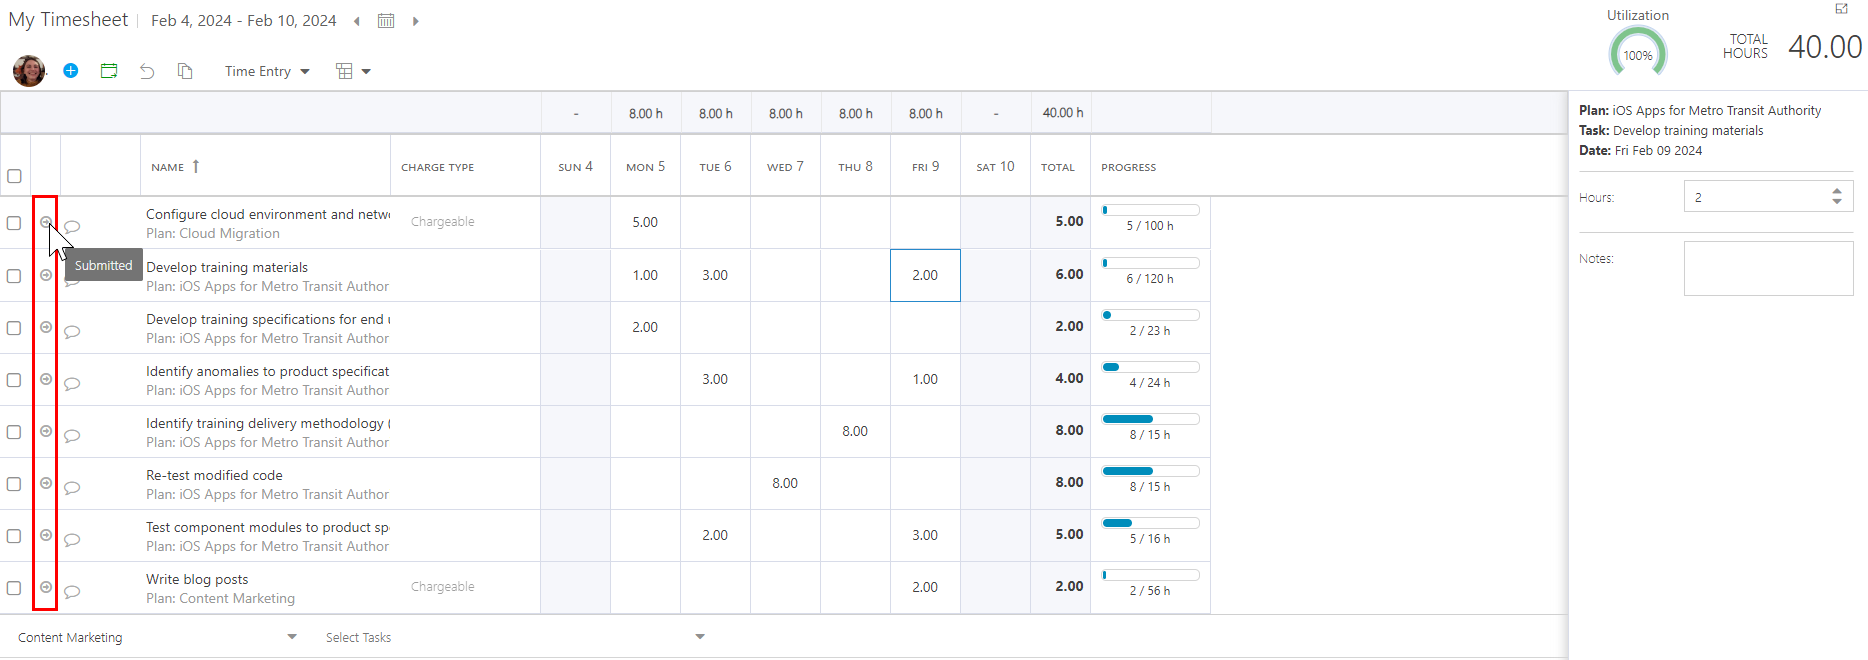
Check the check box next to the timesheet rows you would like to submit for review.
Click the Submit icon
 in the timesheet header. The selected timesheet rows will be sent off to your timesheet manager for review and approval.
Note
Once a row is submitted, it is no longer editable. If needed, you may select the row and click Recall  to edit.
Recall Your Timesheet
If you have submitted your timesheet for review, but need to make changes, you can recall timesheet rows to edit your entires;
Note
You cannot recall approved timesheet rows.
Check the check box next to the timesheet rows you would like to submit for review.
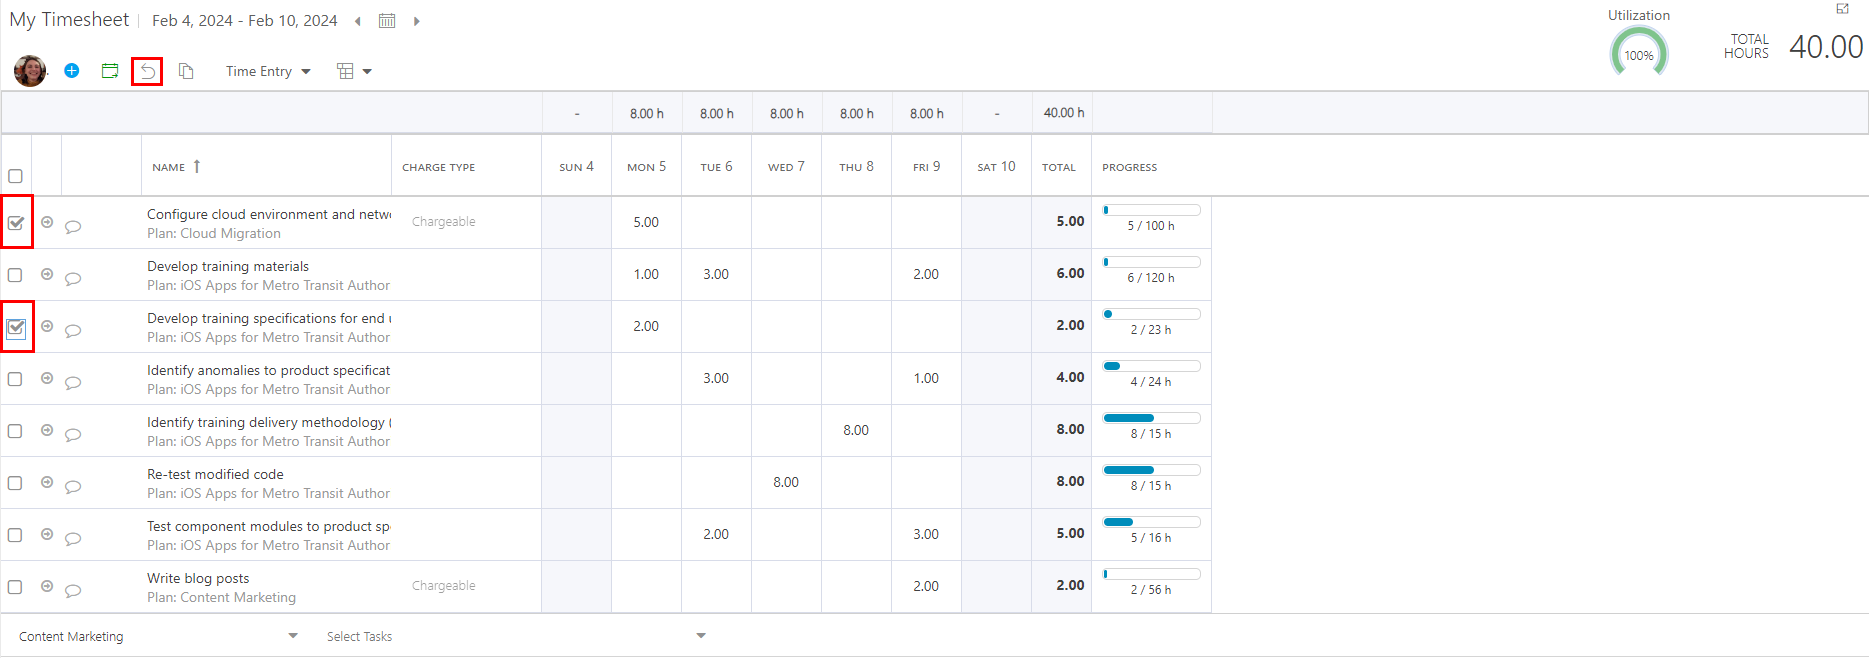
Click the Recall icon
. Confirm that you want to recall the selected timesheet items. Once confirmed, the selected timesheet row(s) will be recalled and become editable.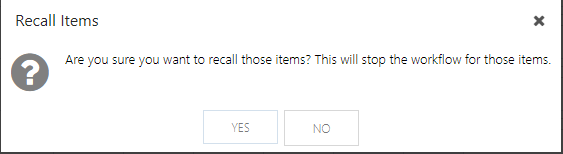
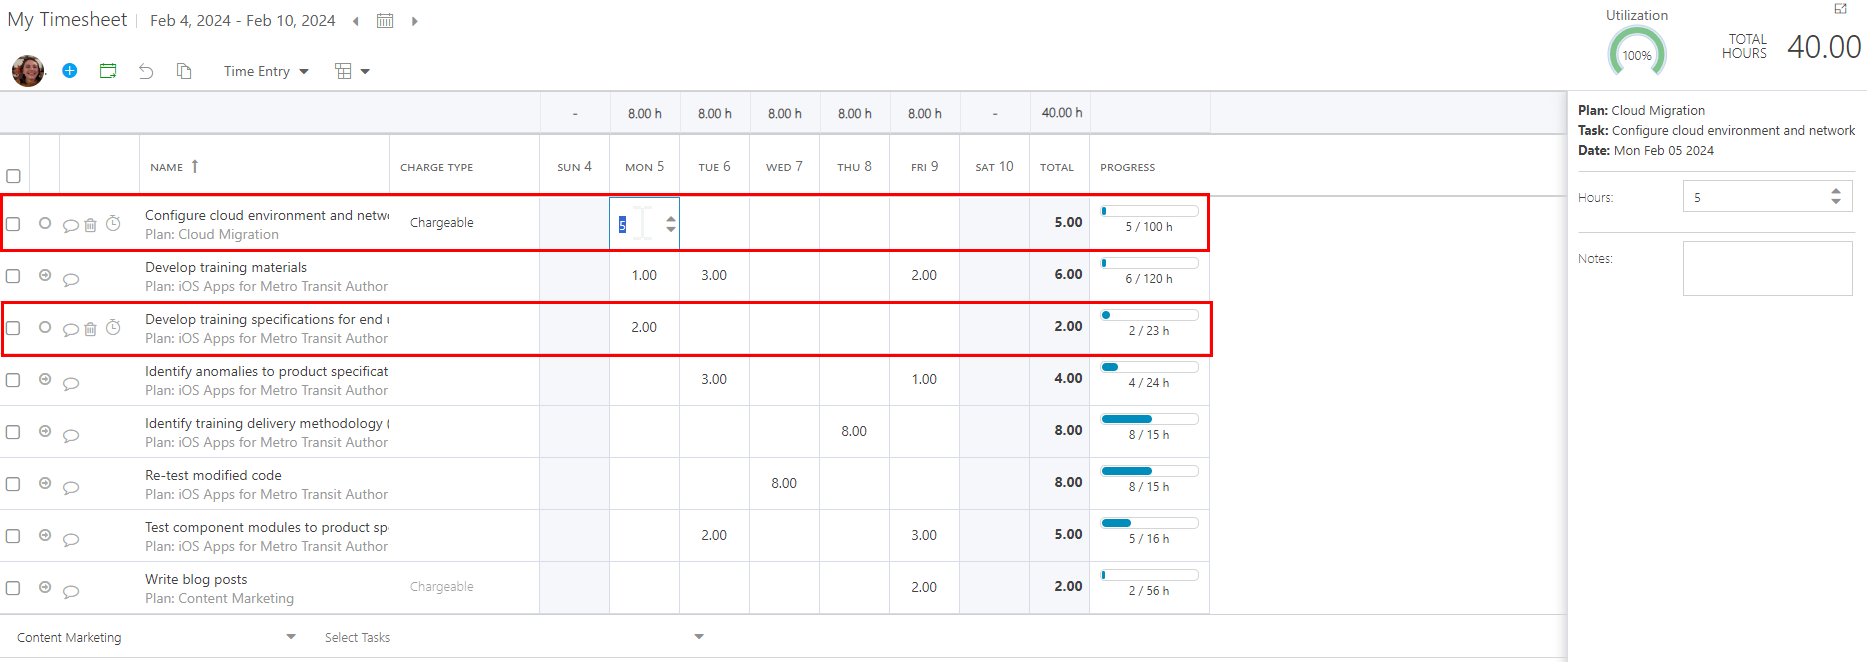
Once your edits are complete, resubmit the edited timesheet rows.
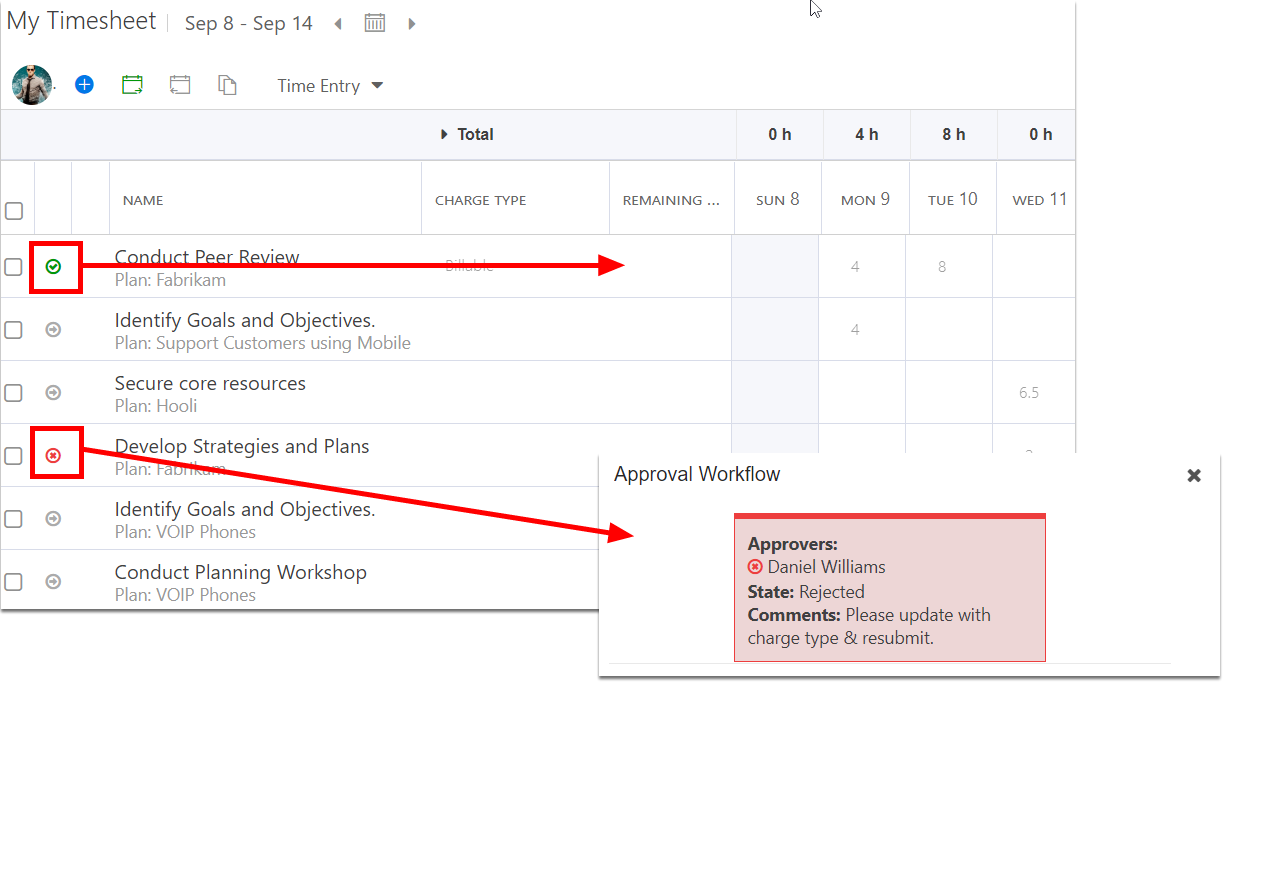
View the Timesheet Workflow Status
Note
Based on your organization, timesheets may be set to auto-approve.
When your timesheet manager has approved or rejected your timesheet entries, you will see the updated status icon in your timesheet. Click on the icon to see the workflow status and any approval/rejection notes. Then, if required, recall any rejected timesheet items and update the timesheet accordingly.