Create Local Plan Fields in the Work Plan
This article explains how to create and manage local plan fields in the Work Planner.
Plan Managers can create local plan fields to capture additional information for work items. These fields are exclusive to your plan and serve for internal reference only. Local plan fields will not be included in the OData feed or in any reports.
Important
You can create up to 10 local fields per plan.
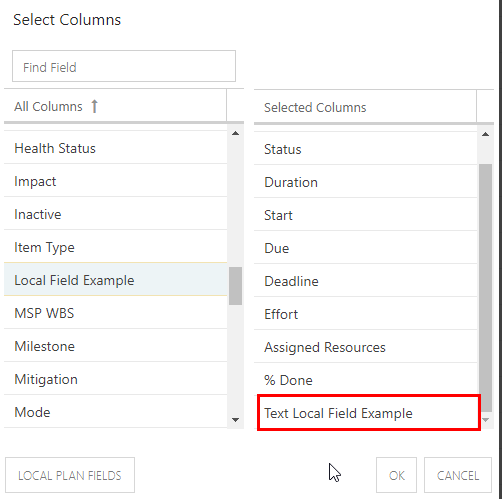
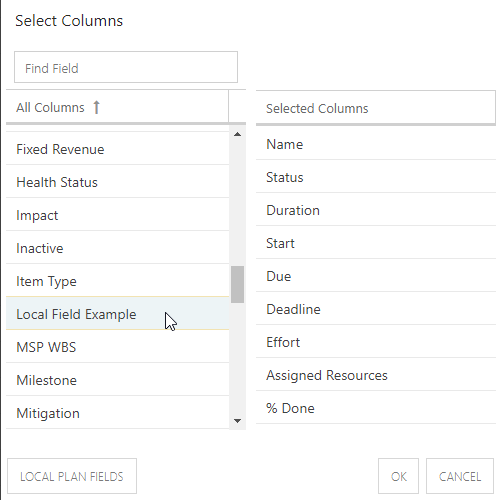
Click the Columns icon. The Select Columns form will open.

Click Local Plan Fields. The Edit Fields form will open.
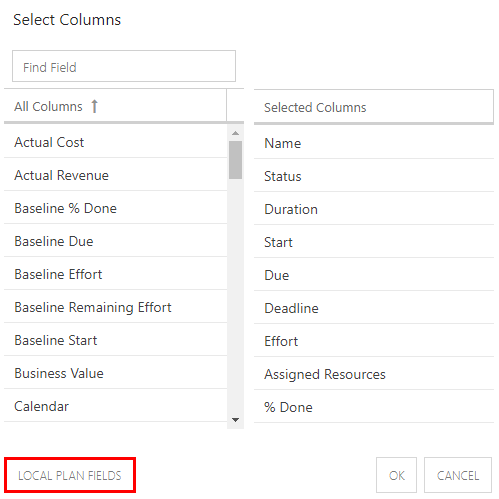
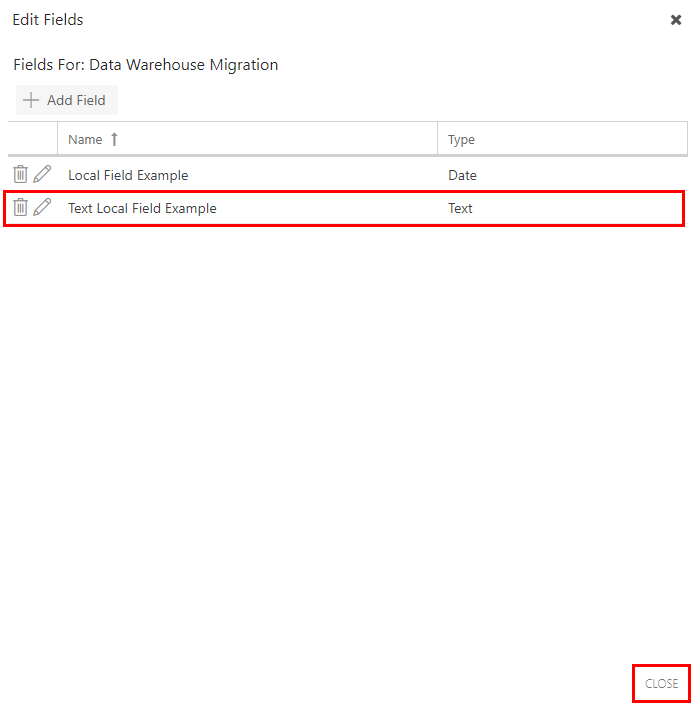
Here you will see a list of all existing local plan fields (if available). You can also edit and delete existing local fields from here. To create a new local plan field, click Add Field. The New Task Field form will open.

Complete the New Task Field form.
Give your new local plan field a Name.
(Optional) enter a description for your field. This description will appear as a tooltip when you hover your mouse over the field in the Work Plan.
Select the field type. Options include:
Text
Date
Number
Currency
YesNo
Choice
User
Multichoice
The field configuration form will change dynamically based on your selection. See Create and Edit Plan Fields for more information on the different field types and their configuration.
Check the Required check box if the field is required.
Check the Read Only check box if the field is read-only.
Select the Work Types this local plan fields will be available for.
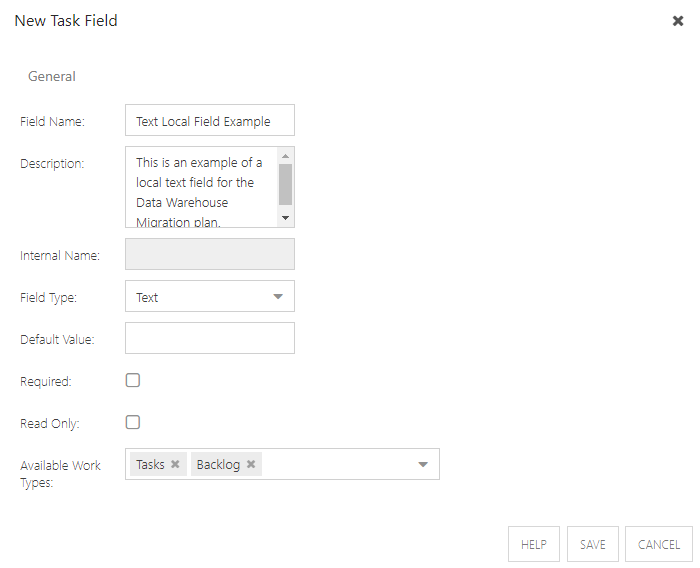
Click Save. You will return to the Edit Fields form. Your new local plan field will now be available in the list of all local fields for the current plan.
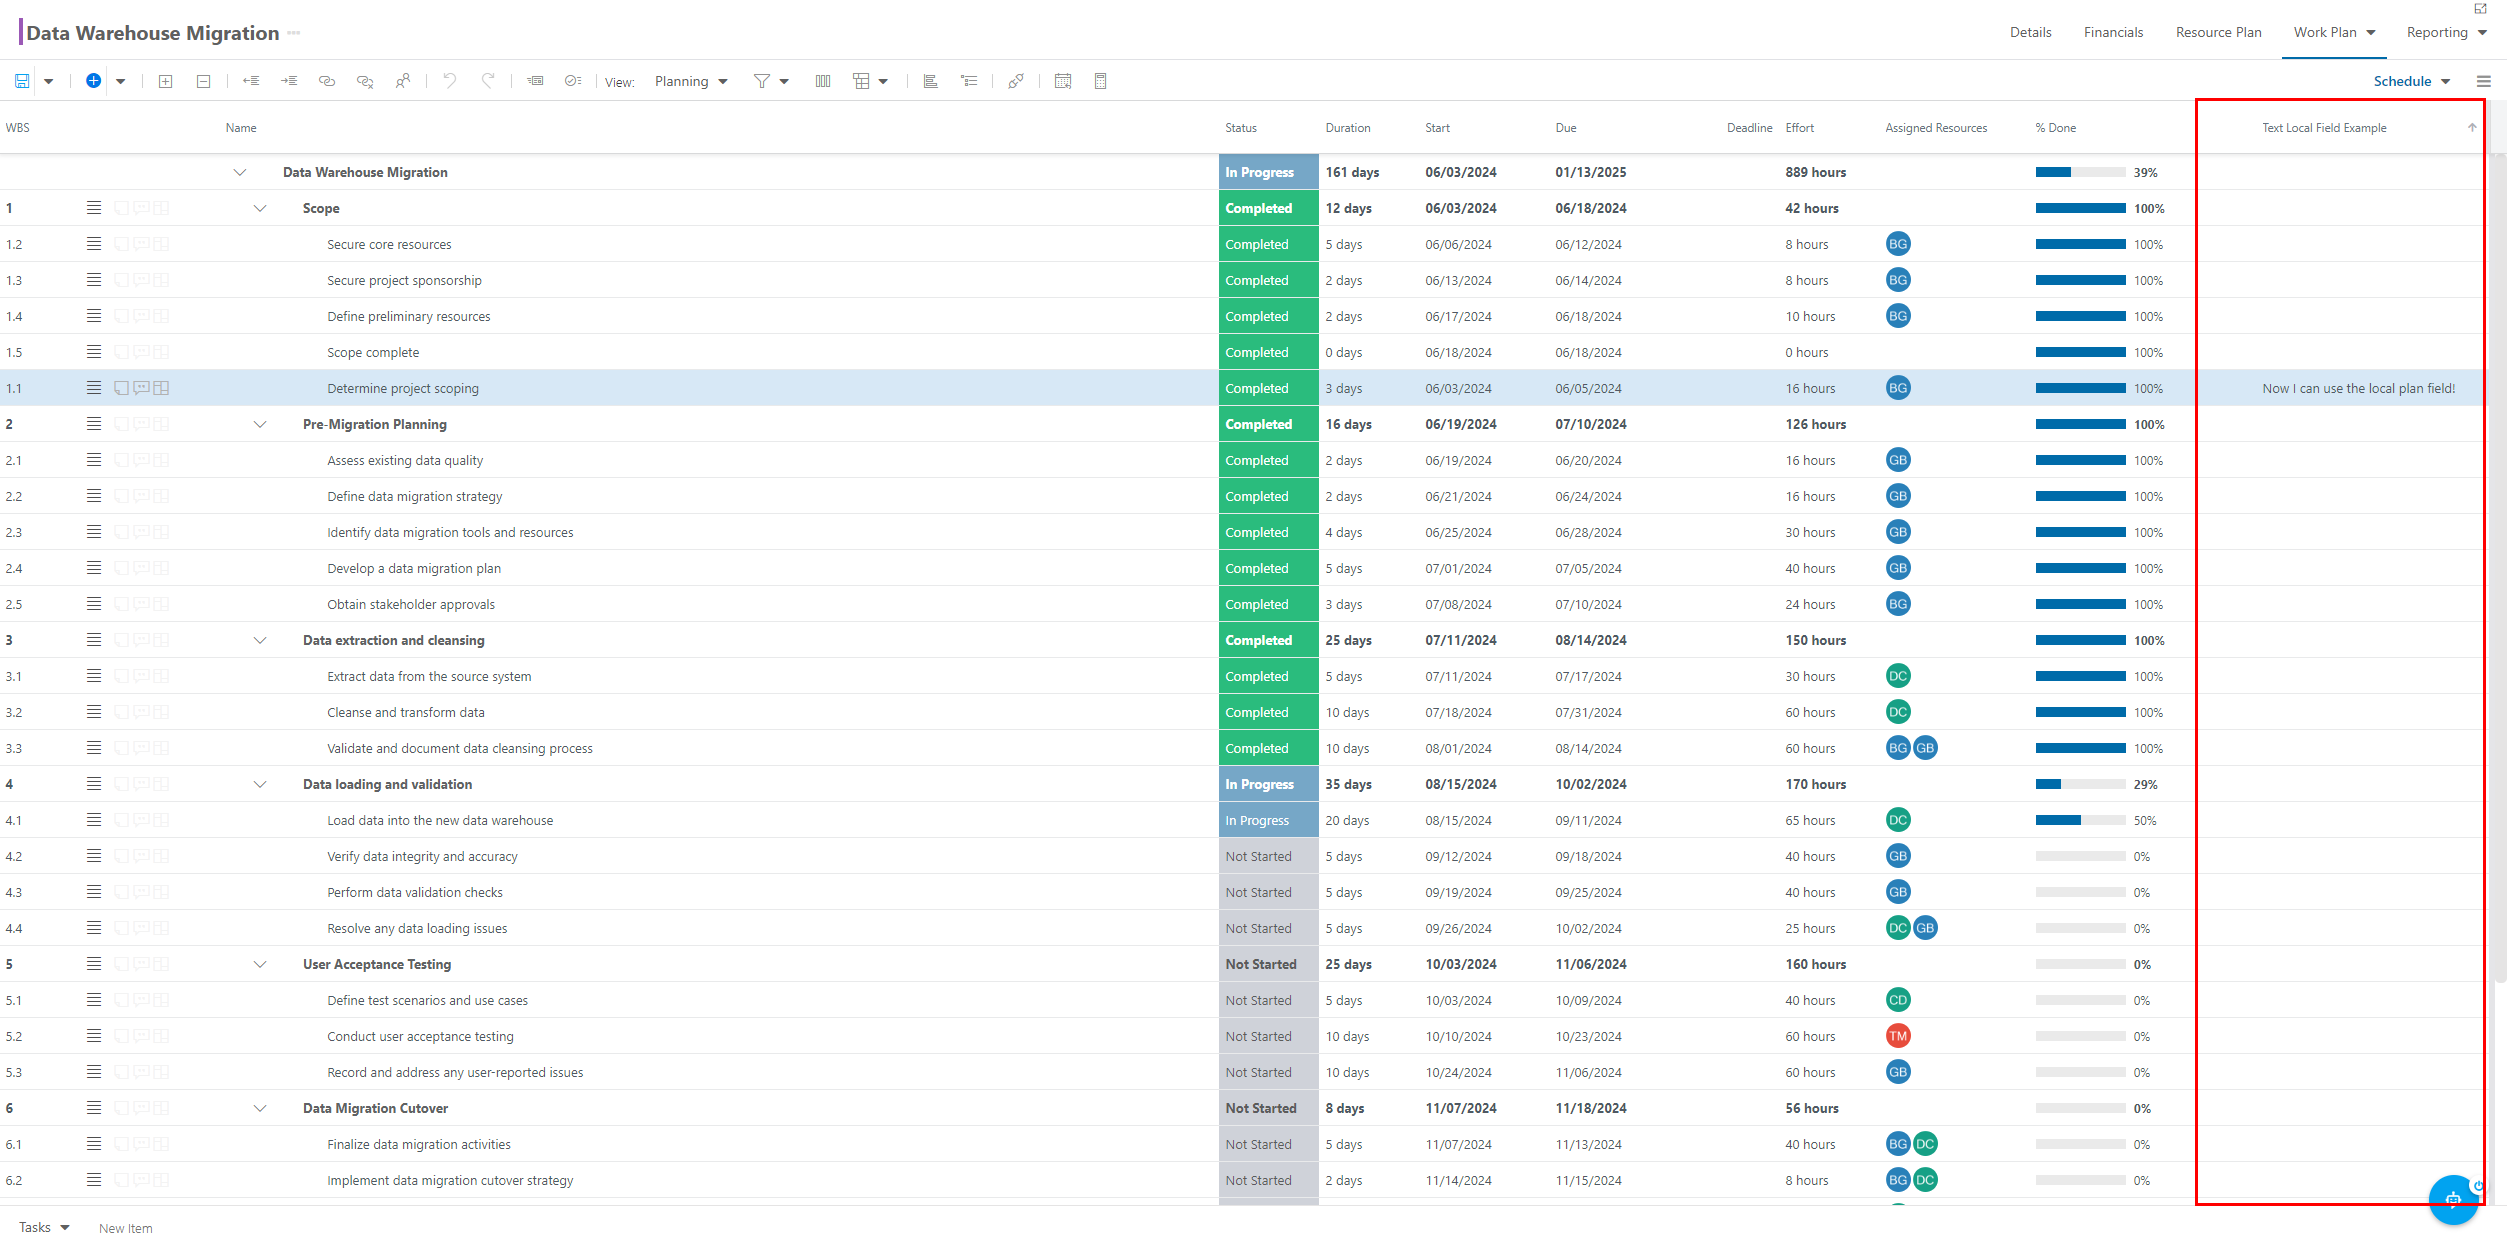
Click Close. You will return to the Select Columns form. The new local plan field will automatically be added to your Work Plan view. You can drag and drop the fields in the Select Columns window to rearrange your view.
Note
If you do not save a Work Plan view with your local plan fields, they will then become available in the All Columns section of the Select Columns form, so you can add them back into your Work Plan at any time.
Click Ok. Now you can enter data into the local plan field right from your Work Plan.
Important
We strongly recommend saving a view with your local plan fields. See Modify and Save Views in the Work Plan Grid for instructions.