How do I manage Cost Fields?
This article explains how to create and manage custom cost category fields in OnePlan. This requires the app 'Financial Plan' is installed.
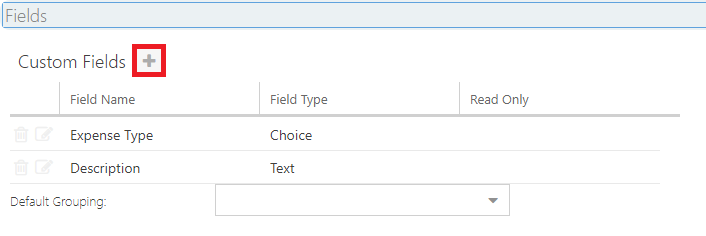
Go to the Admin pages, select Financial Plan in the navigation. Then, expand the Fields heading.
Add Custom Cost Field
To create a custom cost field:
Click Add Cost Field (+).
Complete the Cost Field form.
Field Name: Enter a name for your new field.
Field Type: Select the type of field. Choice fields will show on the Cost Categories page, for you to select the choice values. User fields allow users to add names/accounts of users already in the OnePlan Resource Center. If you want users to add names of people who aren't in OnePlan as resources, select Text as the field type.
Read Only: Select the check box if the value for the cost field will be set by the admin on the Cost Categories page. Users will be able to see the value, but not edit it.
Choices (if applicable): Add the available choices. You can edit and delete choices as well.
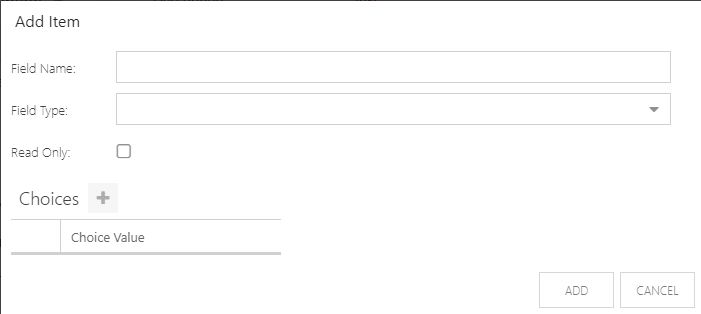
Default Grouping
If desired, select the default grouping for the cost categories. If left blank, the default will be ungrouped. Users will still be able to change the grouping whether or not the admin selects a default grouping. Only custom fields that are field type 'choice' can be selected for grouping.

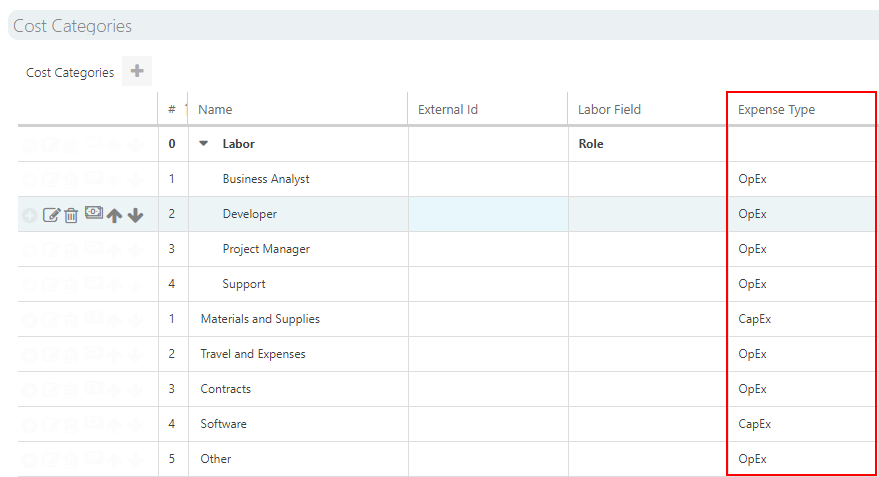
Populate Fields
Navigate to the Cost Categories heading in the Financial Plan settings. For any fields that are choice, you can pre-select the choices for the cost categories. Be sure to pre-select the choice values for the cost categories if you made the field read only. If it's not read only, you can pre-select the choices, and then the users can still make their selections as needed for each financial plan.