Configure Work Type Form Layouts
This article explains how to manage the layout of the Plan Details page in OnePlan.
This requires the Work Plan App be installed.
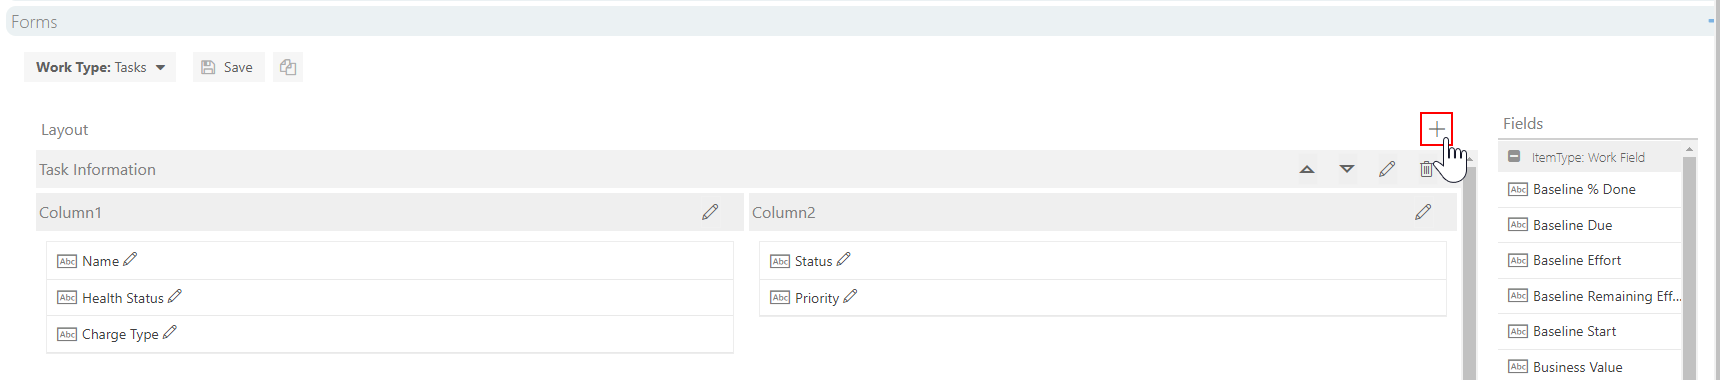
Go to the Admin pages, select Work Plan in the navigation. Then expand the Forms heading.
Add, edit, or delete form sections
Sections make up the main layout of the work type form.
To add a new section:
Select the Add Section icon (+). The Add Section form will open.
Complete the Add Section form.
Name: Enter the name of the new section.
Show Header: Check the check box to show the section header.
Layout: Select the section layout.
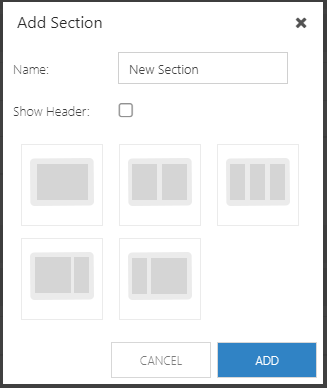
Select Add.
To edit sections:
Click the Edit icon next to the desired section header. The Edit Section form will open.

Complete the Edit Section form.
Name: Enter the name of the section.
Show Header: Check the check box to show the section header in the plan details form.
Color: Use the color picker to select the text color for the column header.
Background Color: Use the color picker to select the background color for the column header.
Additional CSS: Enter any additional CSS that you would like to add to the section.
Default Collapsed: Check the check box if you would like the section content to be collapsed at default.
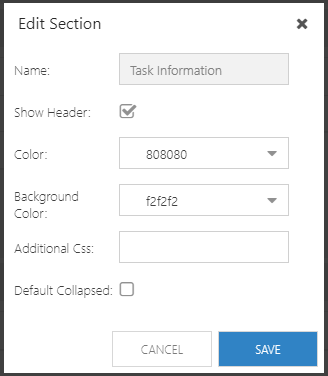
Click Save.
To rearrange sections, select the up or down arrows next to the desired section header.
To delete a section, click the Delete icon next to the desired section header.

Edit Form Columns
Columns make up the form sections. You selected the column layout when you created the section. See Add, edit, or delete form sections.
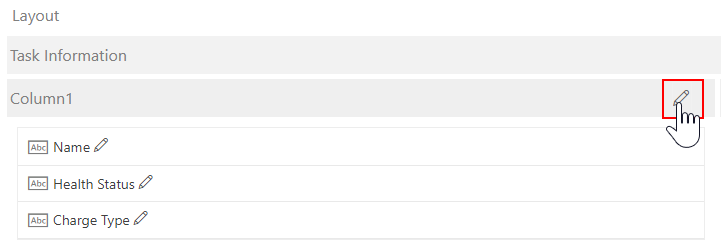
To edit form columns:
Select the Edit icon next to the header of the desired column. The Edit Column form will open.
Complete the Edit Column form.
Name: Enter the name of the column.
Show Header: Check the check box to show the column header.
Color: Use the color picker to select the text color for the column header.
Background Color: Use the color picker to select the background color for the column header.
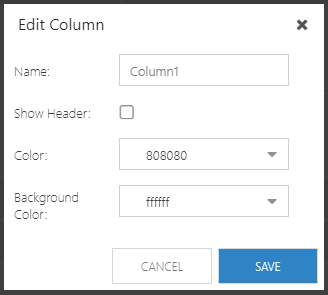
Click Save.
Add, Edit, or Remove Form Fields
Within the form sections, you can place form fields. These fields pull data from work fields across OnePlan.
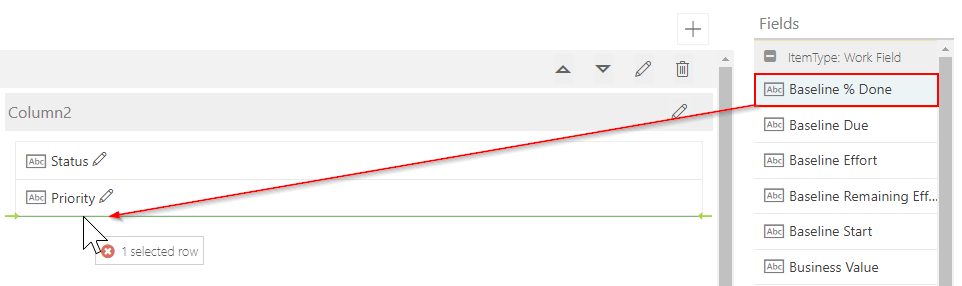
To add a new field to a section:
Select the desired field from the Fields panel.
Drag and drop the field into the desired location within a section.
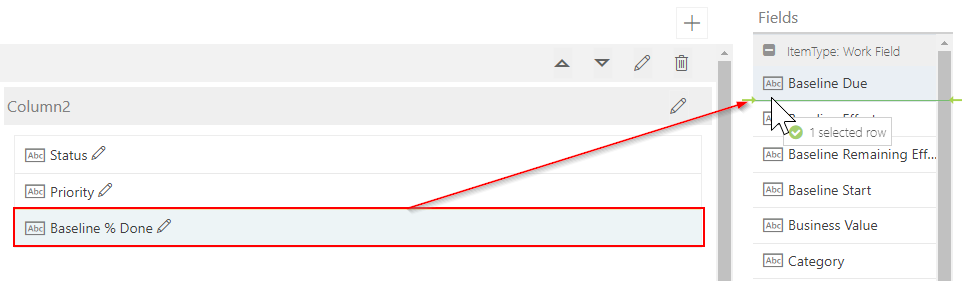
To remove a field:
Select the desired field within a section.
Drag and drop the field into the Fields panel. Ensure that plan fields are placed with plan fields, and summary fields are placed with summary fields.
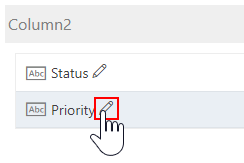
To edit a field:
Select the Edit icon next to the desired field. The Edit Field form will open.
Complete the Edit Field form.
Hide Field Label: Check the check box to hide the field label in the Plan Details form.
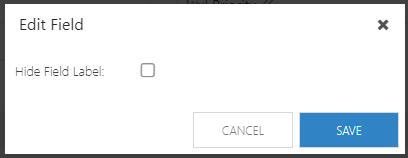
Select Save.
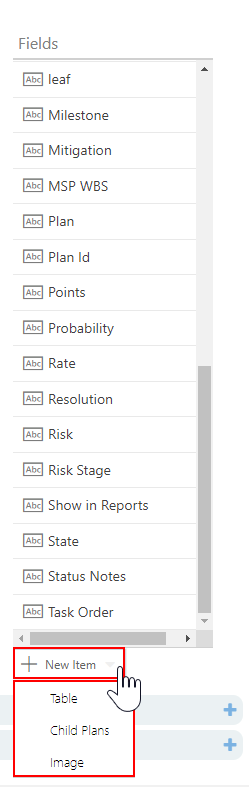
Create, add, edit, or remove field-level items
Items include tables, child plans, and images. These add additional information to your form to improve the user experience.
Items can be added at the field-level of your form. Once items are created, they function like fields.
To create a new item:
Click New Item. Select the item type from the drop down. Options include table, child plans, and image.
Complete the Add [item type] form. In this example, we have added a table field.
Note
The forms will vary based on the item type chosen.
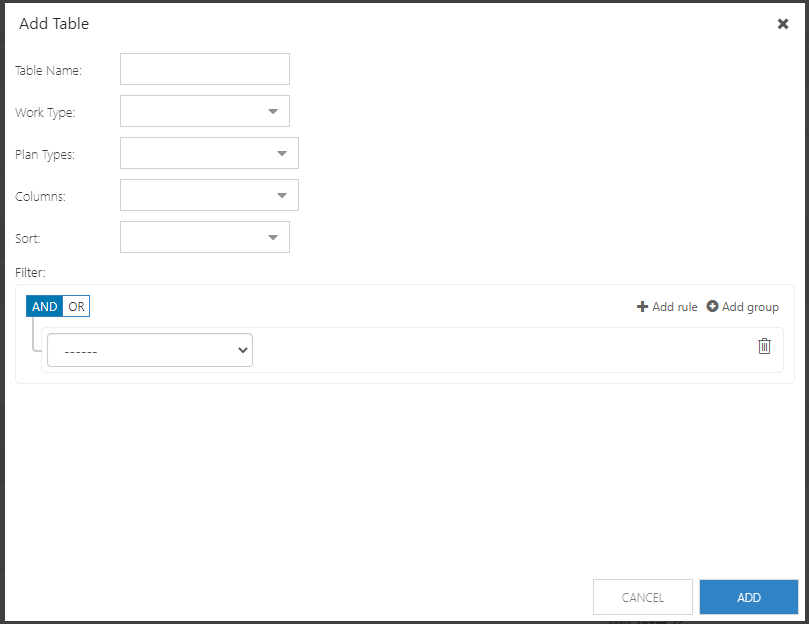
Click Add. The new item will appear as an option at the bottom of the Fields menu.
To add, edit, or remove an item in the form, follow the procedures in Add, Edit, or Remove Form Fields.