Grid options - Rate Table
This article explains how to create, edit, delete, and apply plan-level rate tables.
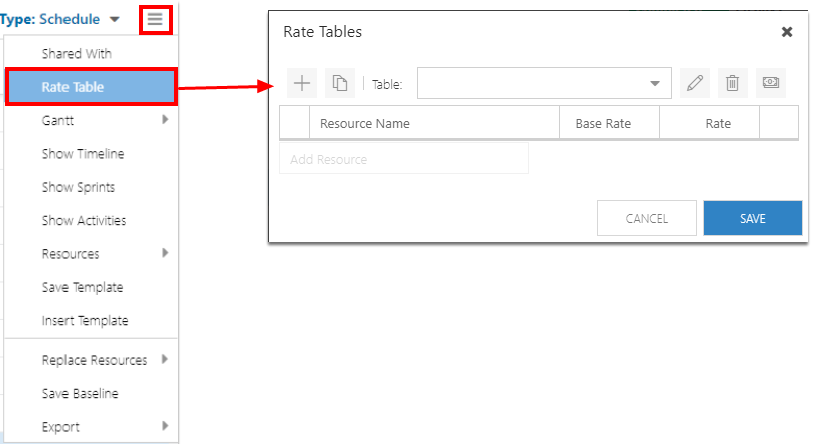
Open the Grid Options menu. Select Rate Table. The Rate Tables form will open.
Create a rate table
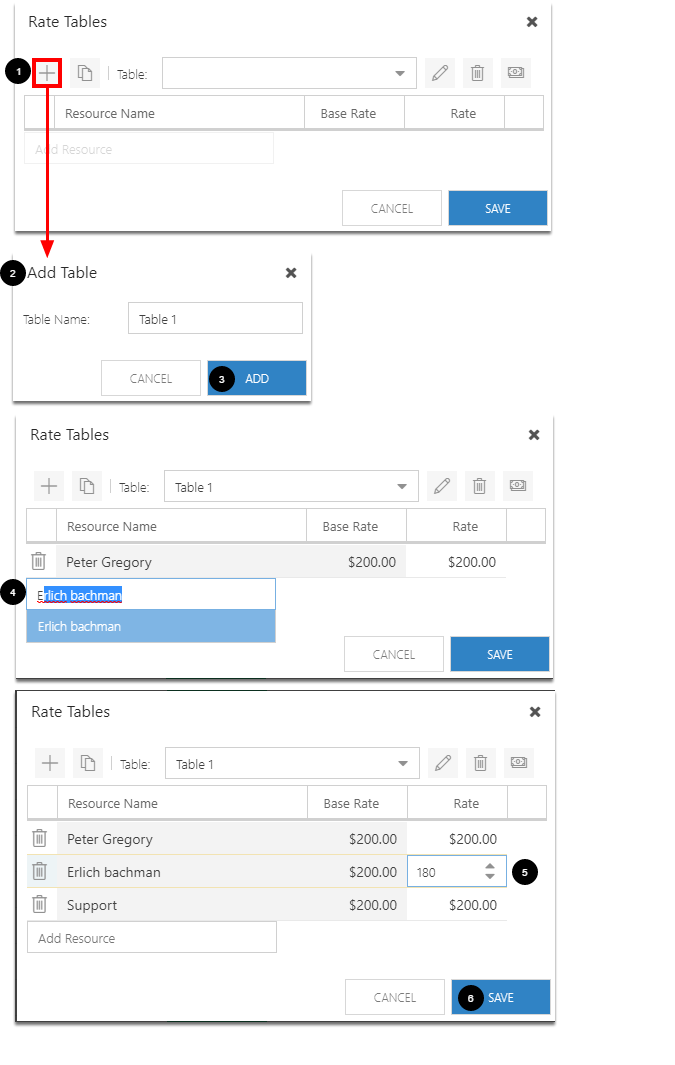
Click the Add (+) icon. The Add Table form will open.
Complete the Add Table form.
Table Name: Enter the name of the new rate table.
Click ADD.
Add resources to the rate table.
Search for a resource by entering the role or name into the Add Resource field. Search results will appear under the field. Select the desired resource.
Edit the Rate for each resource as necessary.
Click the Rate field for the desired resource and enter the new rate.
Click SAVE.
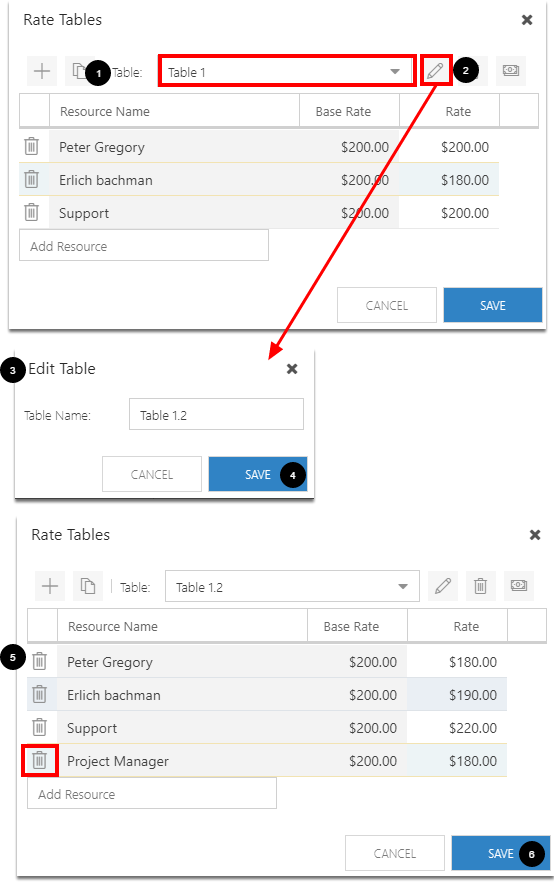
Edit a rate table
Select a rate table from the Table drop down.
Click the Edit icon. The Edit Table form will open.
Complete the Edit Table form.
Table Name: Edit the name of the rate table.
Click SAVE.
Update the resources and resource Rates as necessary.
NOTE: To remove a resource, click the Delete icon next to the desired resource.
Click SAVE.
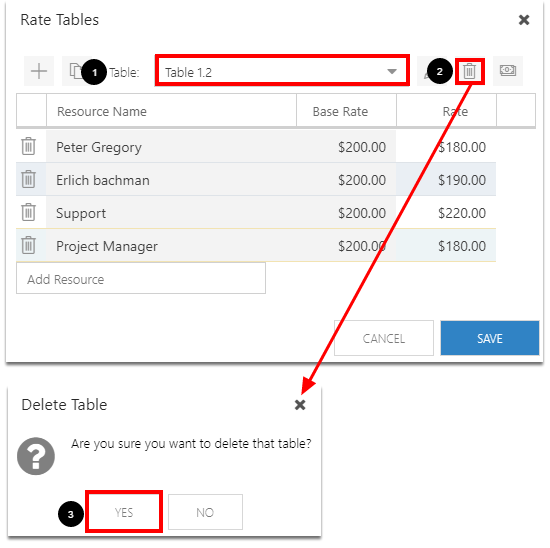
Delete a rate table
Select a rate table from the Table drop down.
Click the Delete icon.
Confirm the deletion.
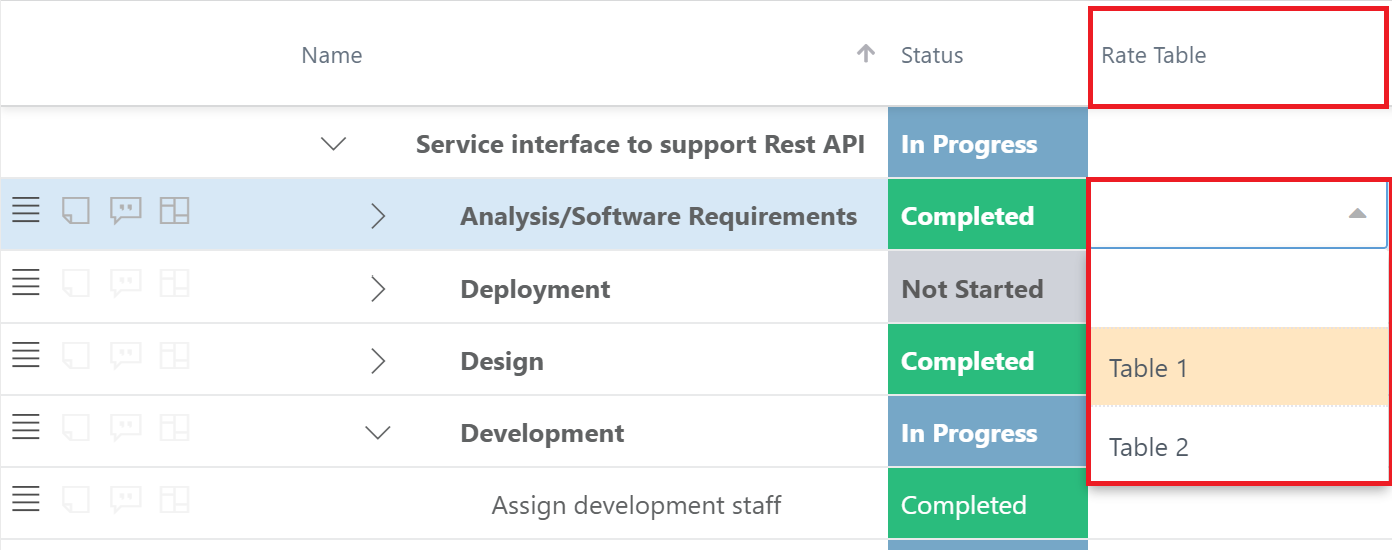
Apply a rate table
Once you have created rate tables, you can apply those new rates to various tasks within a project.
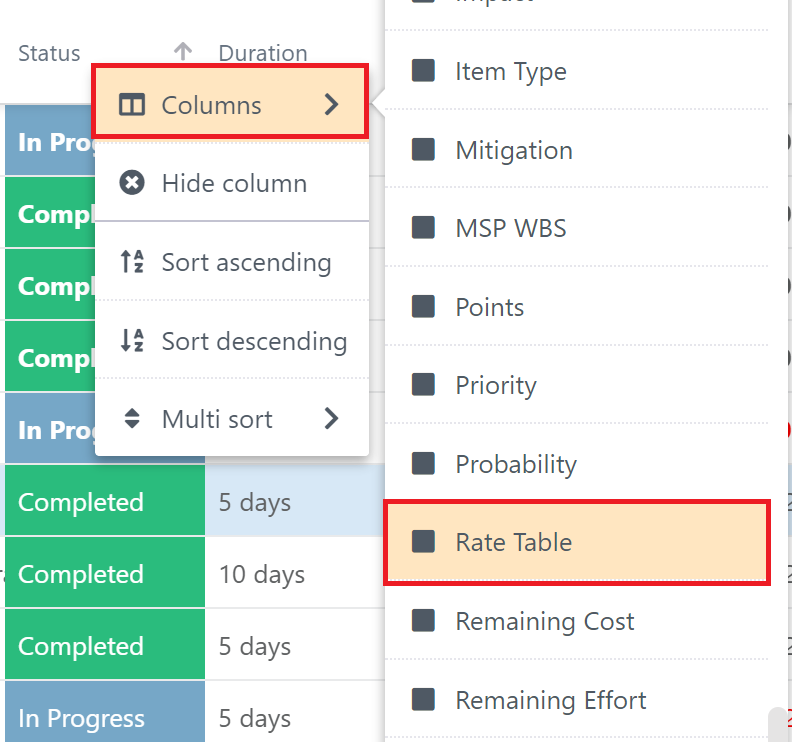
Right click on any column header in the grid.
Go to Columns and select Rate Table. The Rate Table column will be added to the far right of the grid.
(Optional) Drag and drop the Rate Table column to the desired location.
Within the Rate Table column, select the rate table you would like to apply to the tasks.