Configure and Manage Enterprise Security Groups
This article explains how to configure and manage enterprise security groups in your OnePlan environment.
The enterprise security groups feature will allow for more control over what OnePlan users can do within OnePlan. This feature will allow administrators to adjust existing group permissions, or create new groups with specific permission levels. For example, the enterprise security groups feature allows administrators to do the following:
Choose which apps and areas each security group can see/use. For example, you might limit the modeler to only be seen and used by managers and owners.
Limit which plan-level apps can be used by each security group. For example, you could allow contributors to view and edit the plan details and the work plan, but not the financial plan.
Choose which type of license each security group will consume. If you choose a lower-level license, the users in the group will only have access to functionality available to that license type.
Choose which global permissions each group has (like view all plans or edit all plans).
Note
Enterprise security groups only apply for named resources. You cannot assign an enterprise security group to generic resources.
Create New Security Groups
The enterprise security group feature allows administrators to create custom security groups for their users.
To create a new security group:
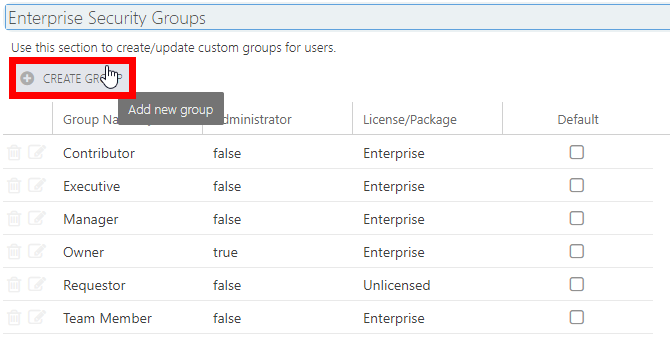
Go to the configuration area
 > Users > Enterprise Security Groups.
Click Create Group. The Add New Group form will open.
Complete the Add New Group form.
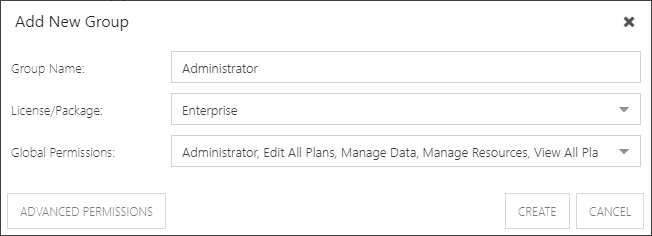
Group Name: Enter a name for your security group.
License/Package: Select the kind of license resources in the security group will consume.
Group Permissions: Select the global permissions that resources in the security group will be granted. Options here include
Administrator: This permission gives users in the group access to the configuration area.
Note
The Administrator permission does not give users full access to OnePlan content. You also need to apply other permissions in this list for the users to access all plans, resources, and data in the group.
Edit All Plans: This permission gives users in the security group edit permissions for all plans in the group.
View All Plans This permission gives users in the security group read-only permissions to all plans in the group.
Manage Data: This permission allows users in the security group to create global views, templates, task notifications, etc. for the group.
Manage Resources: This permission allows users in the security group to create and update resources in the Resource Center and view and manage resource data for all resources in the group.
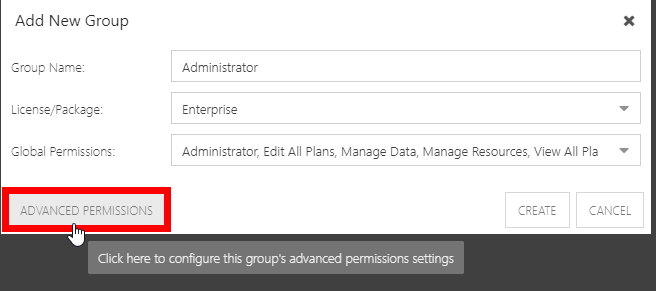
Click Advanced Permissions to access more detailed permissions settings for the security group.
Note
Advanced Permissions are only available for security groups using Enterprise licenses.
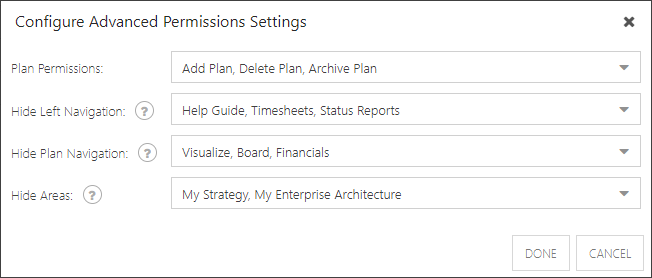
Plan Permissions:Select the plan-level permissions for the users in the security group. Options include:
Add Plan: This permission allows users in the security group to create new plans.
Delete Plan: This permission allows users in the security group to delete plans.
Archive Plan: This permission allows users in the security group to archive plans.
Hide Left Navigation: This setting allows you to hide global modules (icons in the left navigation bar, available through adding apps) from users in the security group. Choices that are selected will be hidden from users in the security group. Unselected choices will be available to users in the security group.
Hide Plan Navigation: This setting allows you to hide plan-level modules (the views and icons in the header of a plan) from users in the security group. Choices that are selected will be hidden from users in the security group. Unselected choices will be available to users in the security group.
Hide Areas: This setting allows you to hide custom areas (also icons in the left navigation bar, configured by an administrator) from users in the security group. Choices that are selected will be hidden from users in the security group. Unselected choices will be available to users in the security group.
If you are in the Advanced Settings section of the configuration form, click Done to return to the main page of the configuration form.
Click Create. Your new security group will become available to assign to your resources.
Update Existing Security Group Permissions
The enterprise security group feature allows you to easily update existing group permissions.
To update security group permissions:
Go to the configuration area
> Users > Enterprise Security Groups.Click the Edit icon
 next to the group you would like to update. The Edit Group form will open.
Update the group permissions as desired. Settings you can update include:
Group Name: Enter a name for your security group.
License/Package: Select the kind of license resources in the security group will consume.
Group Permissions: Select the global permissions that resources in the security group will be granted. Options here include
Administrator: This permission gives users in the group access to the configuration area.
Note
The Administrator permission does not give users full access to OnePlan content. You also need to apply other permissions in this list for the users to access all plans, resources, and data in the group.
Edit All Plans: This permission gives users in the security group edit permissions for all plans in the group.
View All Plans This permission gives users in the security group read-only permissions to all plans in the group.
Manage Data: This permission allows users in the security group to create global views, templates, task notifications, etc. for the group.
Manage Resources: This permission allows users in the security group to create and update resources in the Resource Center and view and manage resource data for all resources in the group.
Click Advanced Permissions to access more detailed permissions settings for the security group.
Note
Advanced Permissions are only available for security groups using Enterprise licenses.
Plan Permissions:Select the plan-level permissions for the users in the security group. Options include:
Add Plan: This permission allows users in the security group to create new plans.
Delete Plan: This permission allows users in the security group to delete plans.
Archive Plan: This permission allows users in the security group to archive plans.
Hide Left Navigation: This setting allows you to hide global modules (icons in the left navigation bar, available through adding apps) from users in the security group. Choices that are selected will be hidden from users in the security group. Unselected choices will be available to users in the security group.
Hide Plan Navigation: This setting allows you to hide plan-level modules (the views and icons in the header of a plan) from users in the security group. Choices that are selected will be hidden from users in the security group. Unselected choices will be available to users in the security group.
Hide Areas: This setting allows you to hide custom areas (also icons in the left navigation bar, configured by an administrator) from users in the security group. Choices that are selected will be hidden from users in the security group. Unselected choices will be available to users in the security group.
If you are in the Advanced Settings section of the configuration form, click Done to return to the main page of the configuration form.
Click Save to save your group updates.
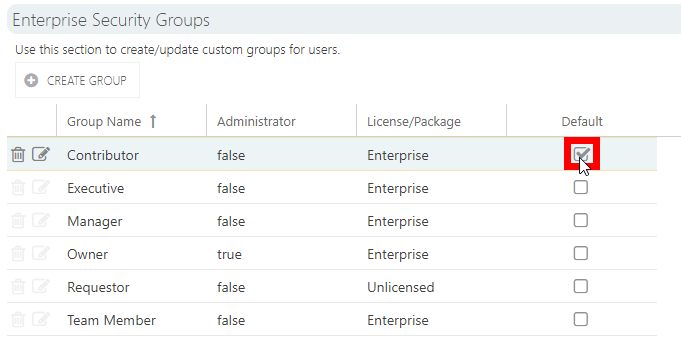
Set a Default Security Group for New Resources
You can select one of your configured security groups to be the default security group assigned automatically to new resources created in the system.
To define a default security group:
Go to the configuration area
> Users > Enterprise Security Groups.Identify the desired security group to use as the default group.
Check the Default check box next to the desired security group. This will now be the default security group assigned to new named resources created in your OnePlan environment.
Of course, you can always change the security group for these resources by following the instructions in Assign Resources to Security Groups.
Assign Resources to Security Groups
Once your security groups are configured, you will need to assign new or existing resources to a particular security group. To assign resources to security groups:
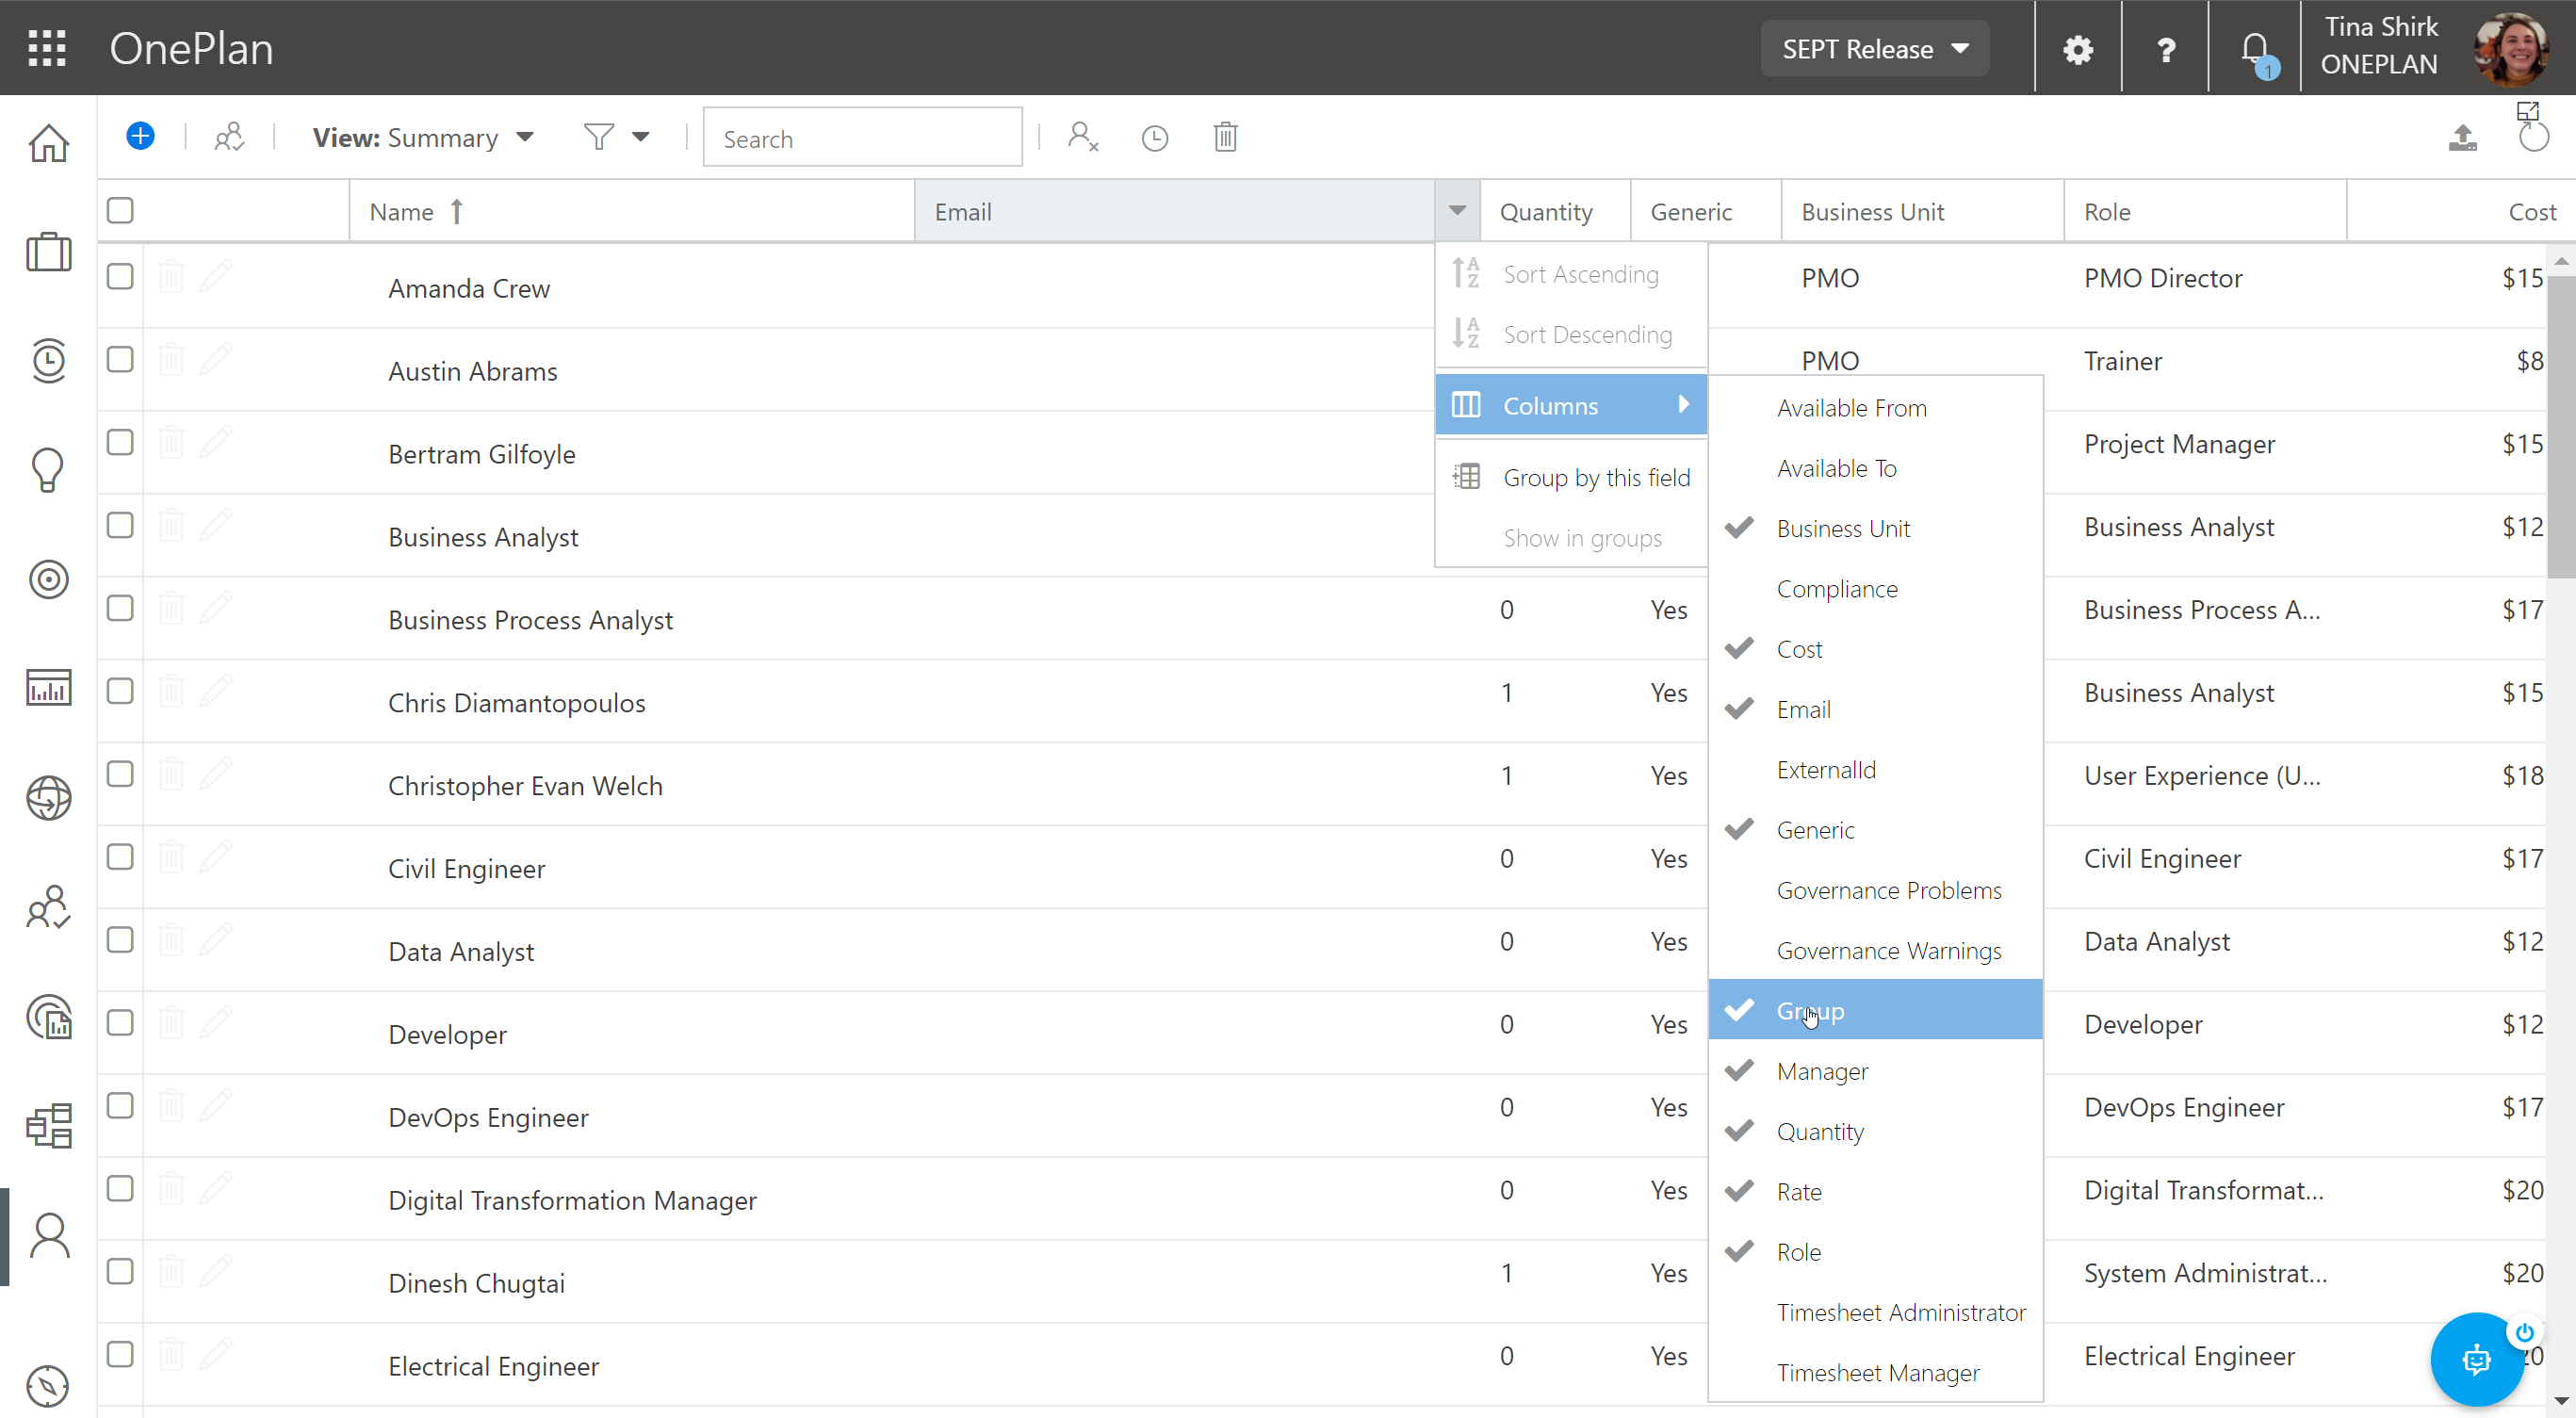
Go to the Resource Center in the OnePlan front end.
Important
Make sure that the Group field is available in your Resource Center view. If it is not, click on the arrow in a column header, and select Columns from the drop-down menu to add the Group field.
For a selected resource, click into the Group field, and select the desired security group from the drop-down. The permissions set in the security group settings will now apply to that resource.
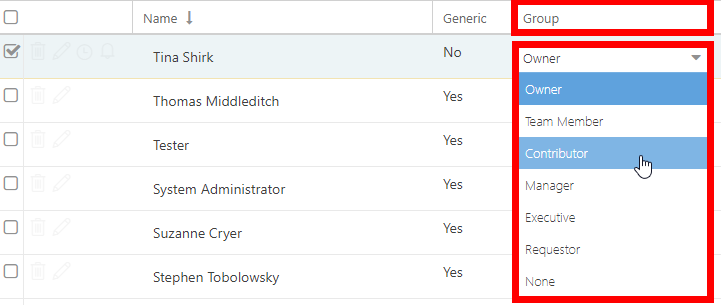
Repeat this process for all desired resources.