Add Users to OnePlan
This article explains how to add users/resources to your OnePlan environment.
Create Named Resources
If you are adding a new user who is part of your Entra/Office 365 tenant, and your organization has Office365 Authentication enabled, follow these instructions.
Go to the Resource Center.
Click Add Resource. The Add Resource form will open.
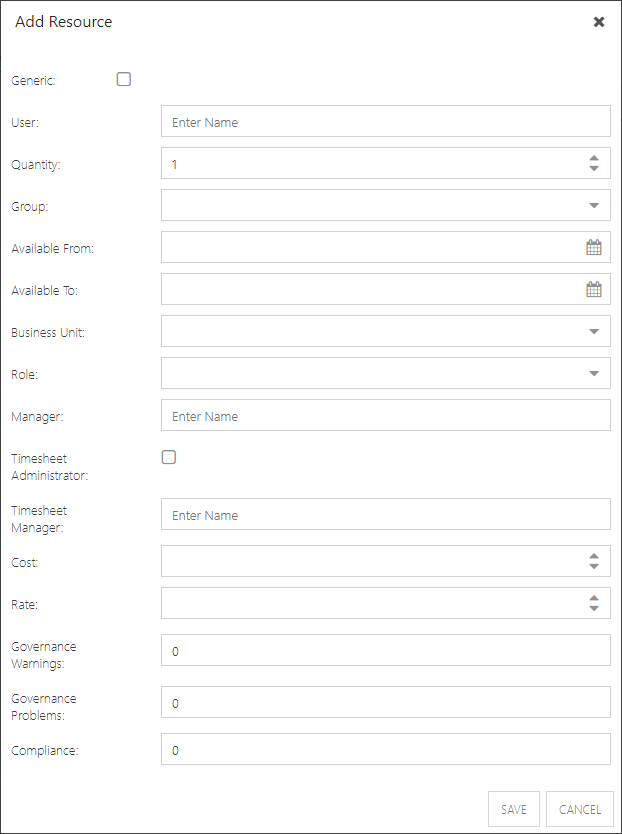
Complete the Add Resource form.
Generic: Leave the check box unchecked if the resource is a named user.
User: Begin typing the name of the user. The available names will authenticate based on user accounts in your Azure/Office365 tenant. Select the user name.
Quantity: 1 signifies 1 FTE, or one full-time resource. Full-time is all working hours based on the Calendar settings. 0.5 would signify a part-time resource who is available 1/2 time. This affects the resource's capacity.
Group: Select the appropriate Enterprise Security Group for this new user. Out of the box, OnePlan comes with the following Enterprise Security Groups, with the following permissions:
None: Does not have access to OnePlan
Team Member: Can view and edit plans or tasks assigned to them
Contributor: Can create, view, and edit their own plans
Executive: Can view all plans (and content for those plans)
Manager: Can view and edit all plans (and content for those plans)
Owner: Can view and edit all plans (and content for those plans); can modify OnePlan configuration (Admin)
Business Unit: Select the business unit. Available business unit choices are configured on the Fields page, in the section for resource-level fields.
Role: Select primary role. Available role choices are configured on the Fields page, in the section for resource-level fields.
Manager: Begin typing the name of the manager for this user. Select the desired name.
Timesheet Administrator: (This field only shows when the Timesheet App has been added). Select this check box if this user is a timesheet administrator.
Timesheet Manager: (This field only shows when the Timesheet App has been added). Begin typing the name of the timesheet manager for this user. Select the desired name.
Cost: Enter the cost for this user. Cost is what us costs to have the resource on a project.
Rate: Enter the rate for this user, if different than the rate associated to this user's role (configured on the Cost Categories page). Rate is the amount that you bill out for the resource.
Governance Warnings, Governance Problems, Compliance: These fields are not editable. They are related to Insights, and display the number of governance warnings and problems and a calculated compliance score. Skip.
Click Save. The new user will be available throughout OnePlan. The user will also receive an invitation email from OnePlan informing them that they have been added to the OnePlan group, as well as a link to the group. The user can then use their Office 365 credentials to access OnePlan.
Note
Any additional fields that are configured as resource-level fields on the Fields page will show on the Add/Edit Resource forms.
Note
Multi-Authentication must be enabled in order to add users with this method. See Enable OnePlan Multi-Authentication for instructions.
If you are adding a new user who is part of your Entra/Office 365 tenant, and your organization has Multi-Authentication enabled, follow these instructions.
Go to the Resource Center.
Click Add Resource. The Add Resource form will open.
Complete the Add Resource form.
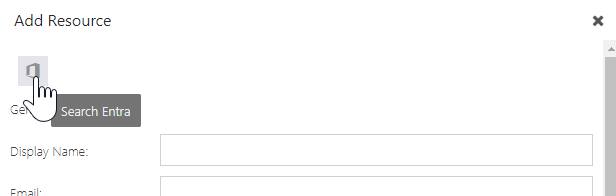
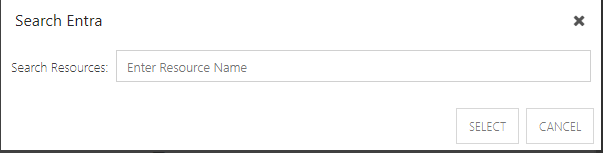
Click the Entra icon. Search for and select the user you would like to add to OnePlan.
Generic: Leave the check box unchecked if the resource is a named user.
Quantity: 1 signifies 1 FTE, or one full-time resource. Full-time is all working hours based on the Calendar settings. 0.5 would signify a part-time resource who is available 1/2 time. This affects the resource's capacity.
Group: Select the appropriate Enterprise Security Group for this new user. Out of the box, OnePlan comes with the following Enterprise Security Groups, with the following permissions:
None: Does not have access to OnePlan
Team Member: Can view and edit plans or tasks assigned to them
Contributor: Can create, view, and edit their own plans
Executive: Can view all plans (and content for those plans)
Manager: Can view and edit all plans (and content for those plans)
Owner: Can view and edit all plans (and content for those plans); can modify OnePlan configuration (Admin)
Business Unit: Select the business unit. Available business unit choices are configured on the Fields page, in the section for resource-level fields.
Role: Select primary role. Available role choices are configured on the Fields page, in the section for resource-level fields.
Manager: Begin typing the name of the manager for this user. Select the desired name.
Timesheet Administrator: (This field only shows when the Timesheet App has been added). Select this check box if this user is a timesheet administrator.
Timesheet Manager: (This field only shows when the Timesheet App has been added). Begin typing the name of the timesheet manager for this user. Select the desired name.
Cost: Enter the cost for this user. Cost is what us costs to have the resource on a project.
Rate: Enter the rate for this user, if different than the rate associated to this user's role (configured on the Cost Categories page). Rate is the amount that you bill out for the resource.
Governance Warnings, Governance Problems, Compliance: These fields are not editable. They are related to Insights, and display the number of governance warnings and problems and a calculated compliance score. Skip.
Click Save. The new user will be available throughout OnePlan. The user will also receive an invitation email from OnePlan informing them that they have been added to the OnePlan group, as well as a link to the group. The user can then use their Office 365 credentials to access OnePlan.
Note
Any additional fields that are configured as resource-level fields on the Fields page will show on the Add/Edit Resource forms.
Note
Multi-Authentication must be enabled in order to add users with this method. See Enable OnePlan Multi-Authentication for instructions.
If you are adding a new user who is NOT part of your Entra/Office 365 tenant, follow these instructions.
Go to the Resource Center.
Click Add Resource. The Add Resource form will open.
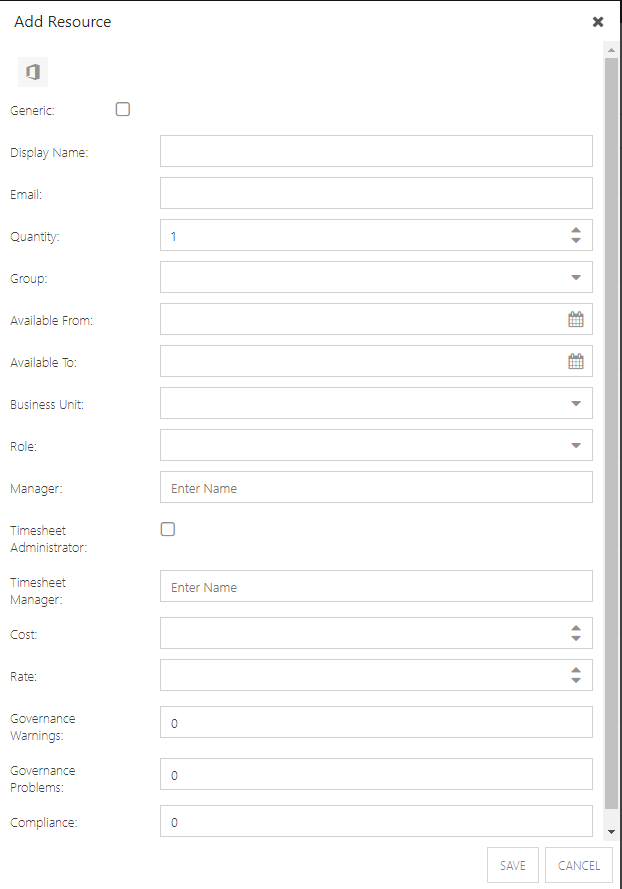
Complete the Add Resource form.
Generic: Leave the check box unchecked if the resource is a named user.
Display Name: Enter a display name for the user. This will be the name shown in the top right corner of OnePlan, as well as in Resource Plans, Work Plans, etc.
Email: Enter the email address for the new user. This will be the email address where this user will receive news and notifications from OnePlan.
Quantity: 1 signifies 1 FTE, or one full-time resource. Full-time is all working hours based on the Calendar settings. 0.5 would signify a part-time resource who is available 1/2 time. This affects the resource's capacity.
Group: Select the appropriate Enterprise Security Group for this new user. Out of the box, OnePlan comes with the following Enterprise Security Groups, with the following permissions:
None: Does not have access to OnePlan
Team Member: Can view and edit plans or tasks assigned to them
Contributor: Can create, view, and edit their own plans
Executive: Can view all plans (and content for those plans)
Manager: Can view and edit all plans (and content for those plans)
Owner: Can view and edit all plans (and content for those plans); can modify OnePlan configuration (Admin)
Business Unit: Select the business unit. Available business unit choices are configured on the Fields page, in the section for resource-level fields.
Role: Select primary role. Available role choices are configured on the Fields page, in the section for resource-level fields.
Manager: Begin typing the name of the manager for this user. Select the desired name.
Timesheet Administrator: (This field only shows when the Timesheet App has been added). Select this check box if this user is a timesheet administrator.
Timesheet Manager: (This field only shows when the Timesheet App has been added). Begin typing the name of the timesheet manager for this user. Select the desired name.
Cost: Enter the cost for this user. Cost is what us costs to have the resource on a project.
Rate: Enter the rate for this user, if different than the rate associated to this user's role (configured on the Cost Categories page). Rate is the amount that you bill out for the resource.
Governance Warnings, Governance Problems, Compliance: These fields are not editable. They are related to Insights, and display the number of governance warnings and problems and a calculated compliance score. Skip.
Click Save. The new user will be sent a link in their email to finish setting up their OnePlan account. See Create a OnePlan Account for instructions.
Note
Any additional fields that are configured as resource-level fields on the Fields page will show on the Add/Edit Resource forms.
Create Generic Resources
Go to the Resource Center.
Click Add Resource. The Add Resource form will open.
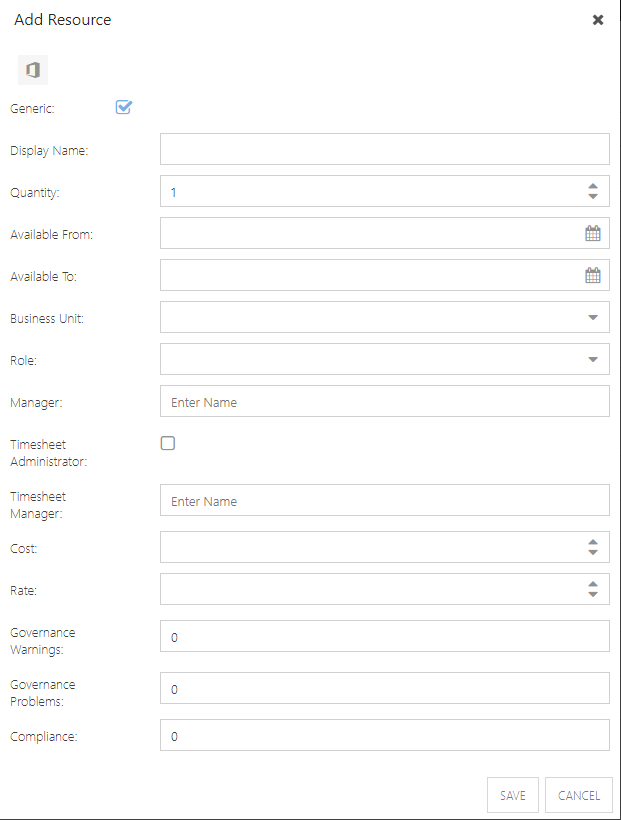
Complete the Add Resource form.
Generic: Select the check box if the resource is generic.
Display Name: Enter the generic resource name. Typically, this is something like a role name or something similar.
Quantity: 1 signifies 1 FTE, or one full time resource. Full time is all working hours based on the Calendar settings. 0.5 would signify a part time resource who is available 1/2 time. This affects the resource's capacity.
Business Unit: Select a business unit from the dropdown. Available business unit choices are configured on the Fields page, in the section for resource-level fields.
Role: Select a primary role from the dropdown. Available role choices are configured on the Fields page, in the section for resource-level fields.
Cost: Enter the cost for this user. Cost is what us costs to have the resource on a project.
Rate: Enter the rate for this generic resource, if different than the rate associated to this generic resource's role (configured on Cost Categories page, see How do I manage Cost Categories?) . Rate is the amount that you bill out for the resource.
Manager, Timesheet Administrator, Timesheet Manager, Governance Warnings, Governance Problems, Compliance: These fields are not applicable for generic resources. Skip.
Click Save. The new generic resource will be available throughout OnePlan.