Create and Manage Areas
This article explains how to create and manage Areas in OnePlan.
Go to the Admin pages, select General in the navigation.
Areas make up the main sections of OnePlan, and can be found in the main navigation bar.
Create Areas
To create an Area:
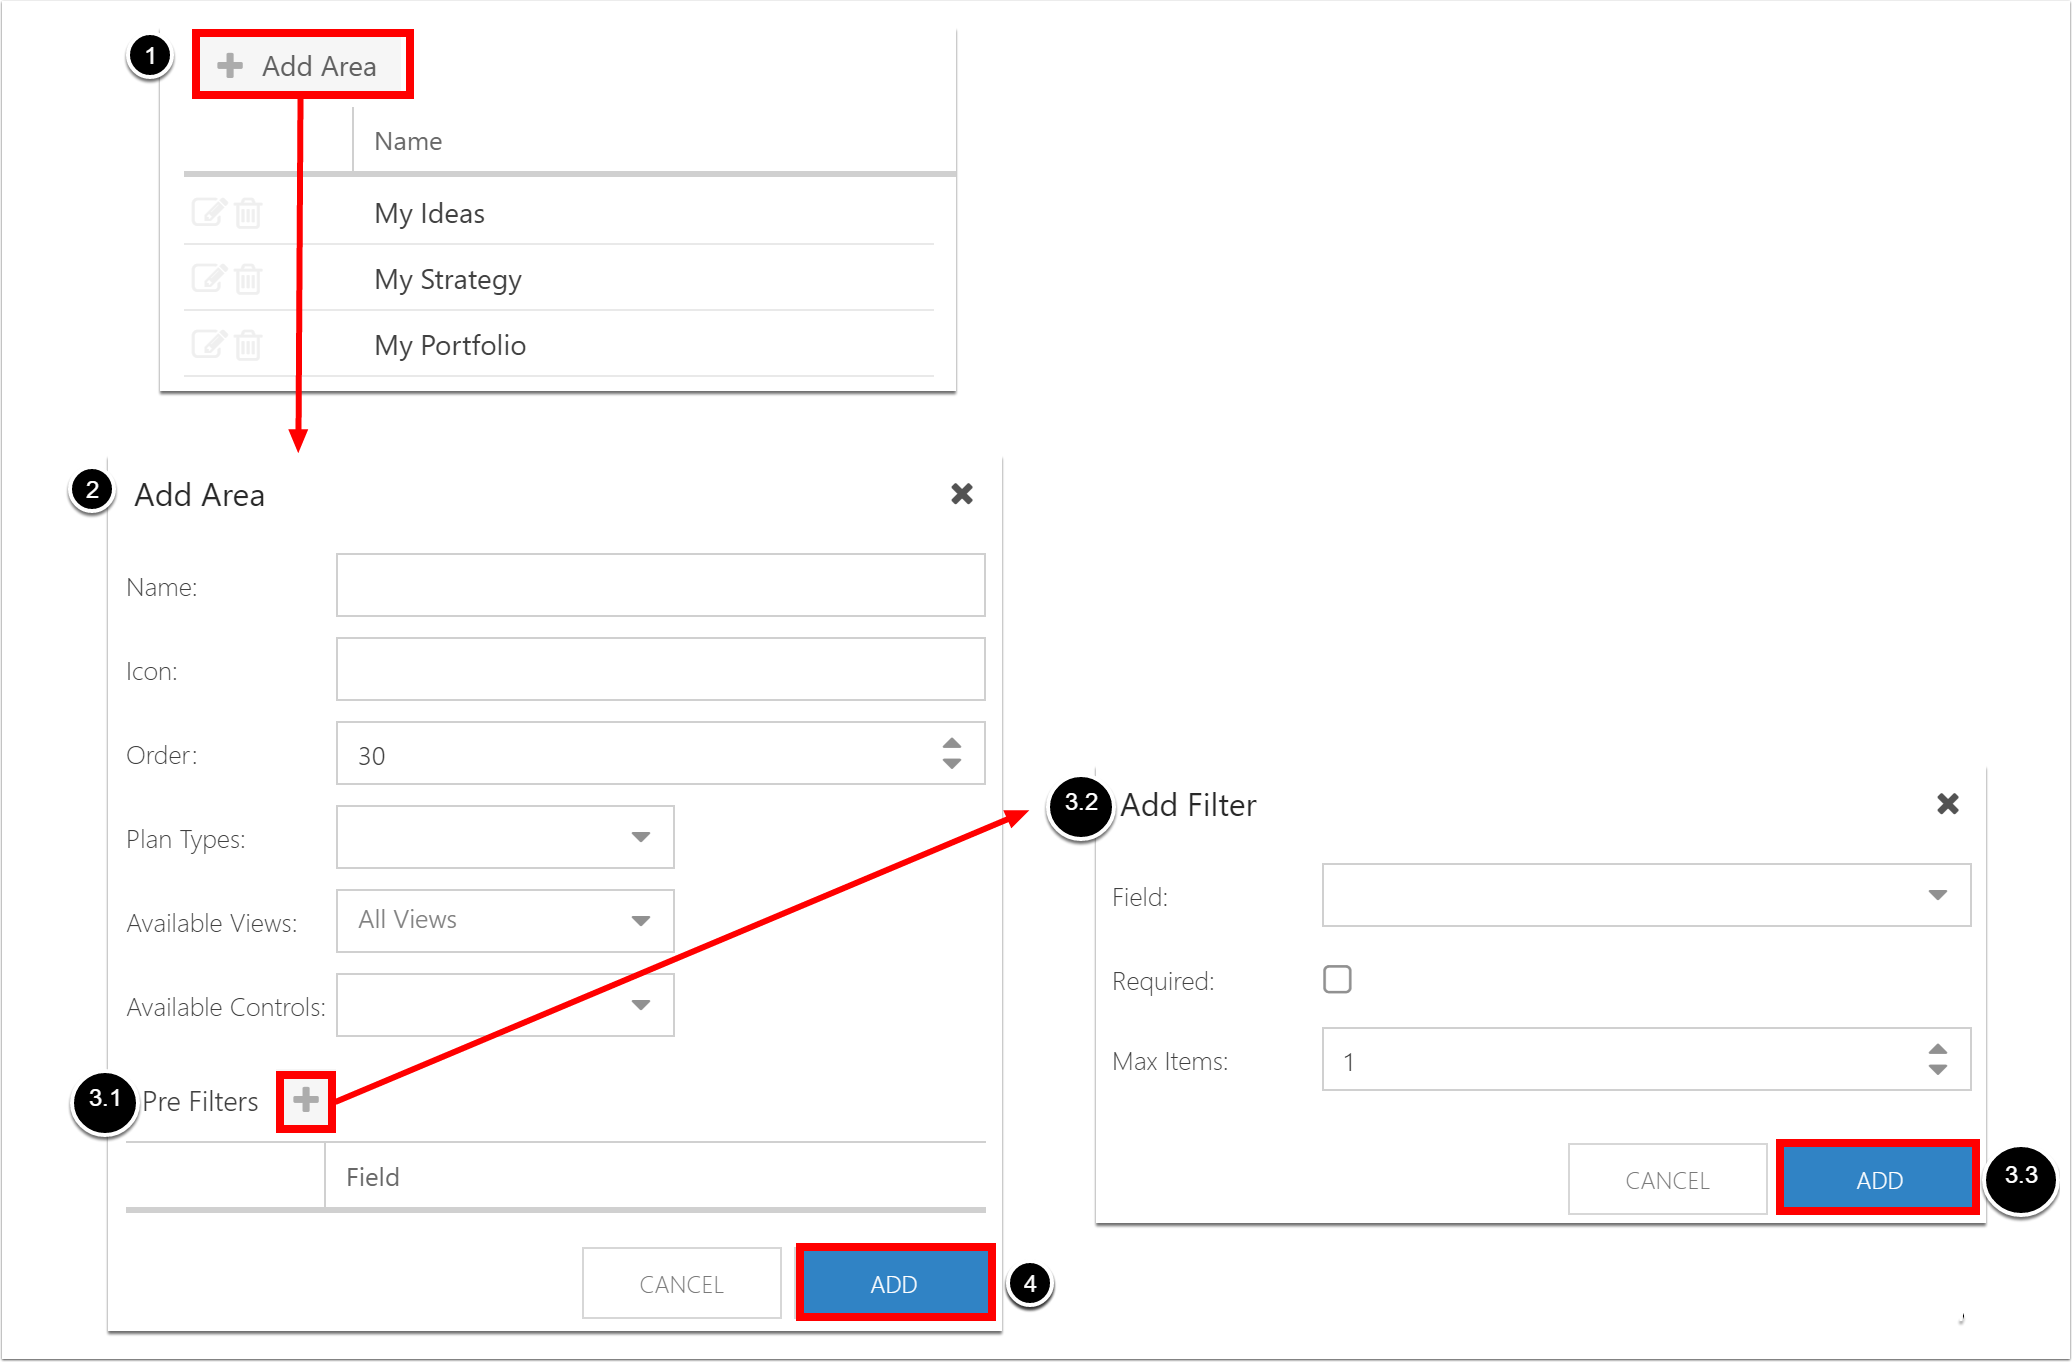
1. Click the Add Area button. The Add Area form will open.
2. Complete the Add Area form.
Name: Enter the name of the Area.
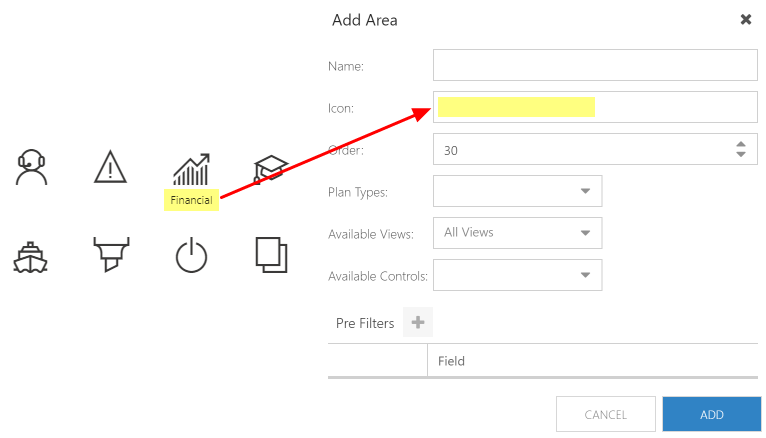
Icon: Enter the icon to display in the OnePlan main navigation bar. Enter the hover name of the desired icon from https://developer.microsoft.com/en-us/fluentui#/styles/web/icons
Order
Plan Types: Select the plan type to display in the Area. Choose top-level plans only.
Available Views: Select the desired view options for the Area. Options are List, Board, Roadmap, Dashboard. Default is All Views.
Available Controls: Select the desired control options for the Area. Options are Gantt, Pivot, Financials, Resource Plans.
3. (Optional) Add pre filters to the Area.
Click the Add Filter icon (+). The Add Filter form will open.
Complete the Add Filter form.
Field: Select the field to filter for to narrow the items returned when loading an Area.
Required: Check the check box if the pre filter is required for the Area.
NOTE: If the Required check box is checked, data will not load in the Area until the pre filter is entered.
Max Items: Enter the maximum number of items to return in the pre filter query.
NOTE: There is no limit to the maximum number of items. Fewer items returned will improve performance.
Click ADD to add a pre filter to the Area.
4. Click ADD to create the Area.
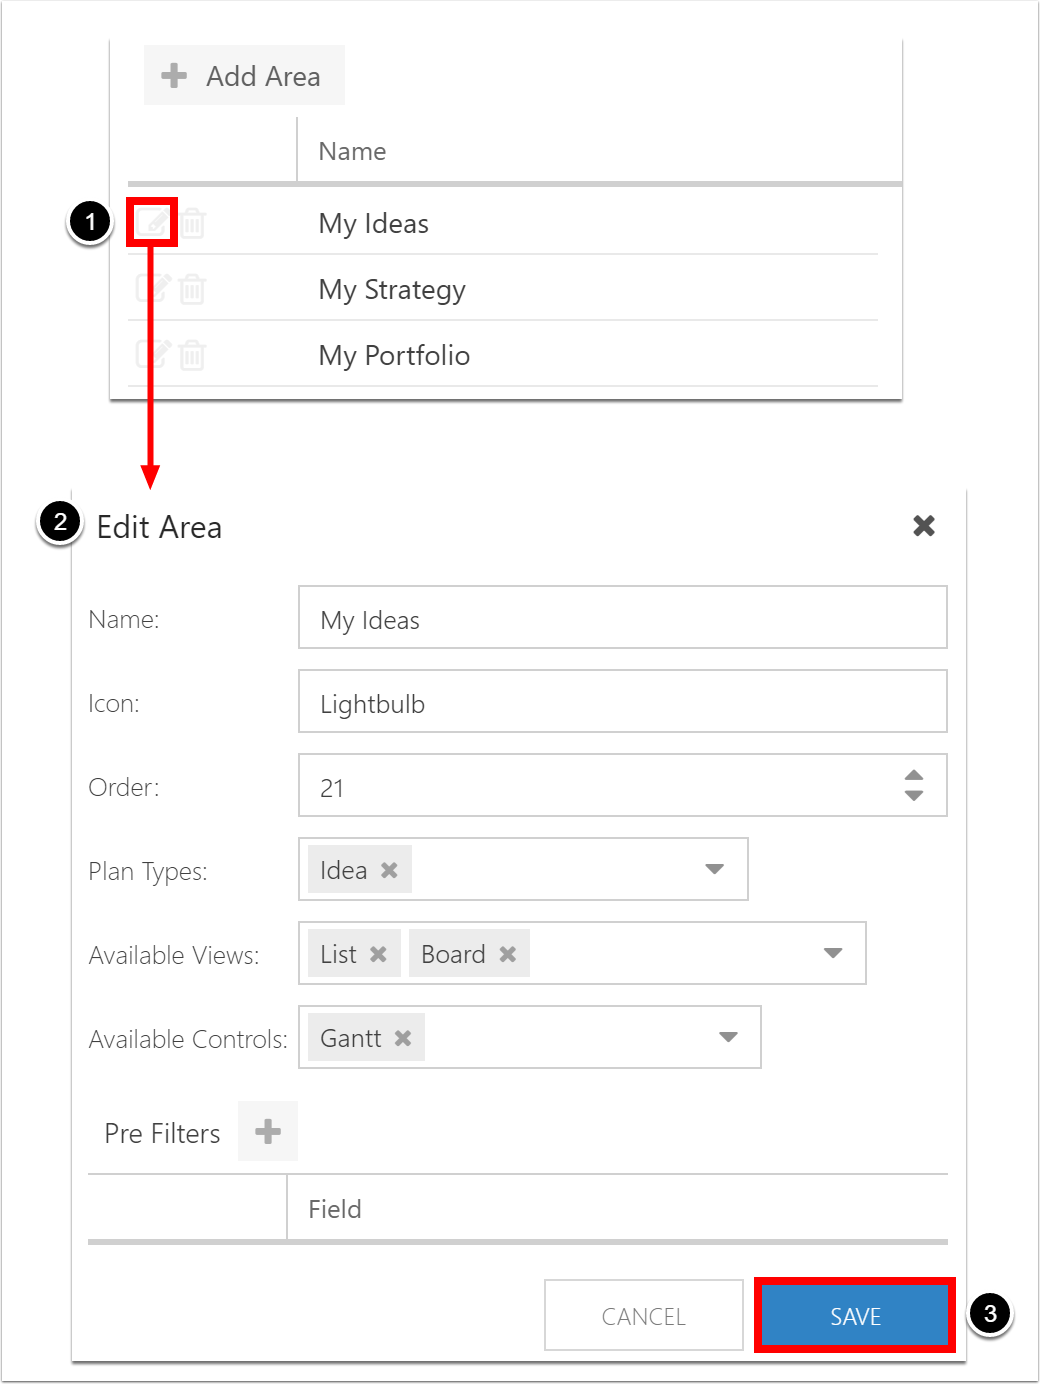
Edit Areas
To edit an Area:
Click the Edit icon. The Edit Area form will open.
Updated the Area details in the Edit Area form.
Click SAVE to save the changes.