Portfolio Analysis - Roadmap
This article explains how to use the Portfolio Roadmap.
The Portfolio Roadmap is a modern and interactive visualization tool that allows you to build out roadmap timelines of the plans in your Portfolio. From the Roadmap view, you can view the relationships between the plans in your Portfolio, create and rearrange new plans, and create key Event markers in the timeline that may impact your Portfolio planning.
Access the Roadmap Page
To access the Portfolio Roadmap, go to the My Portfolio area. Then click Roadmap in the upper right corner. This will open the Roadmap page to its default view.
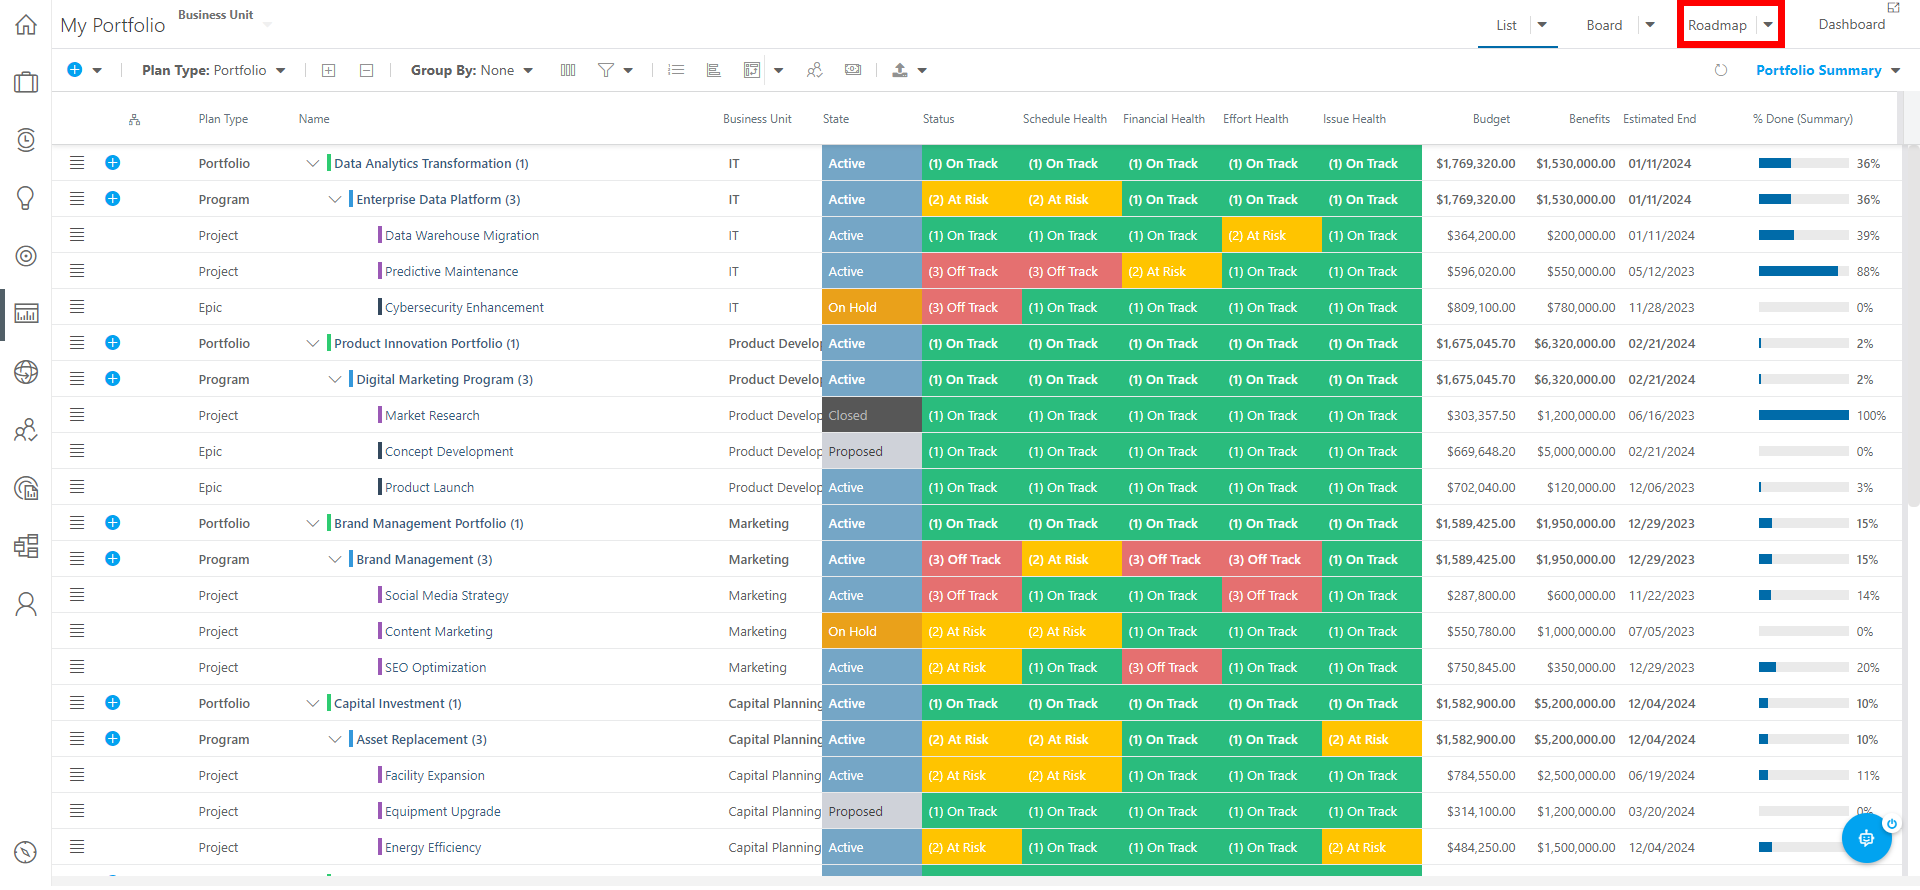
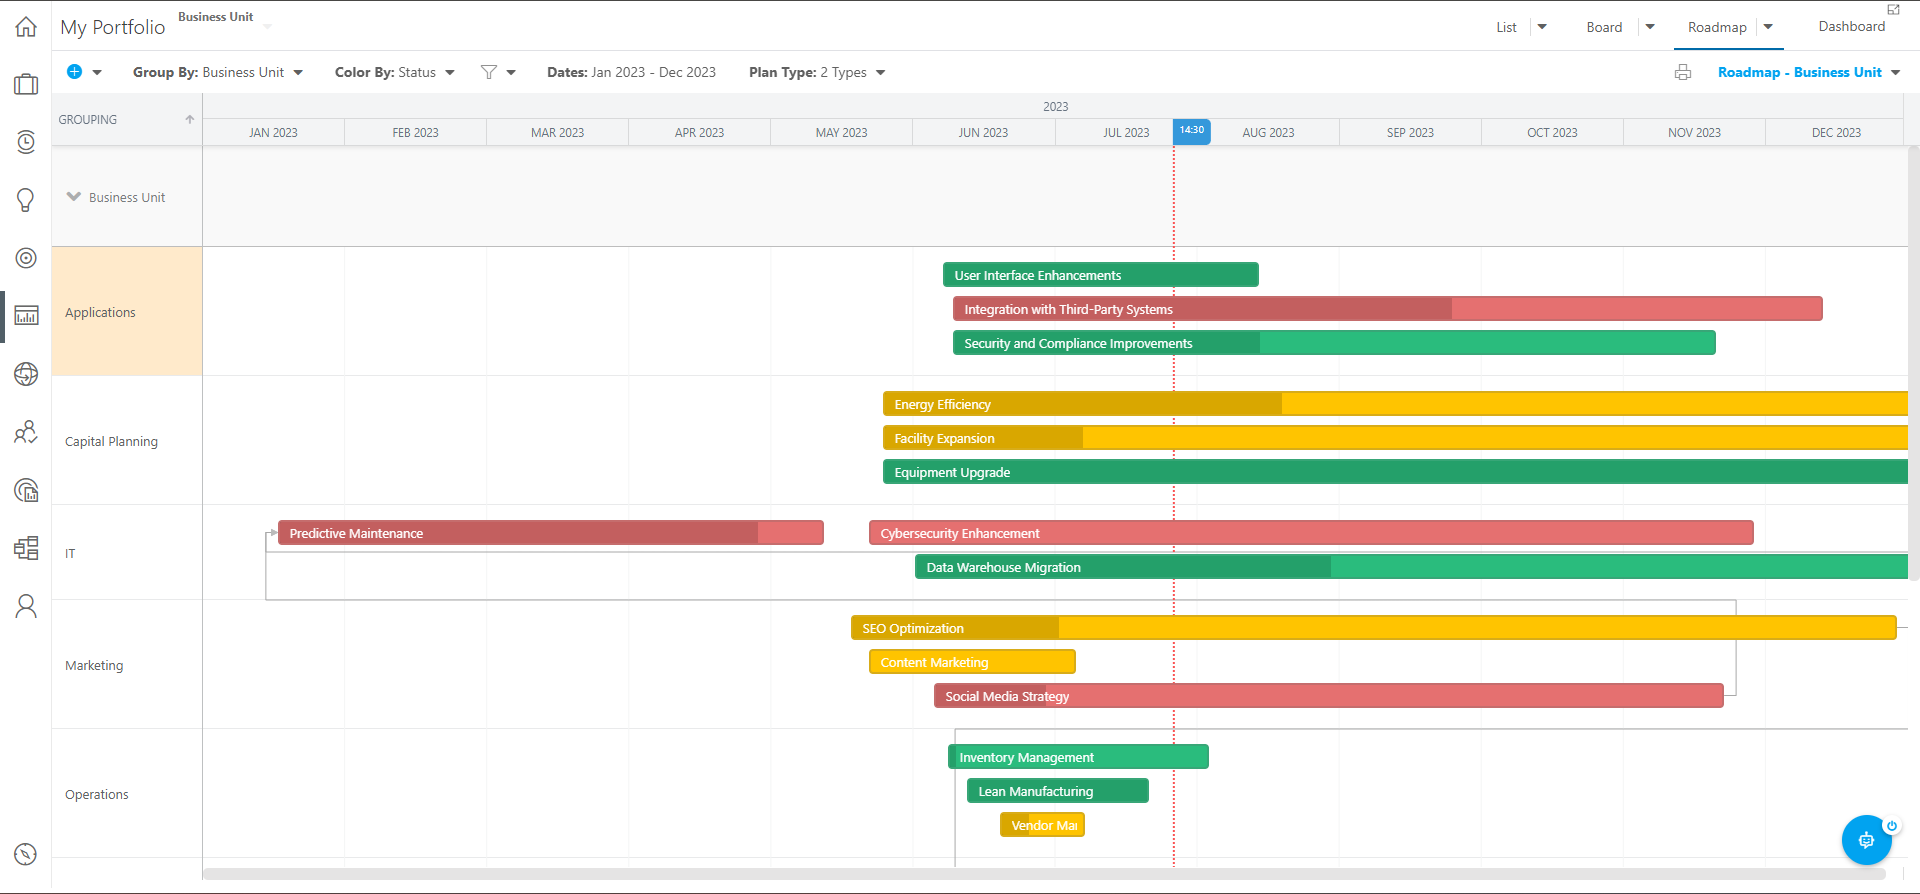
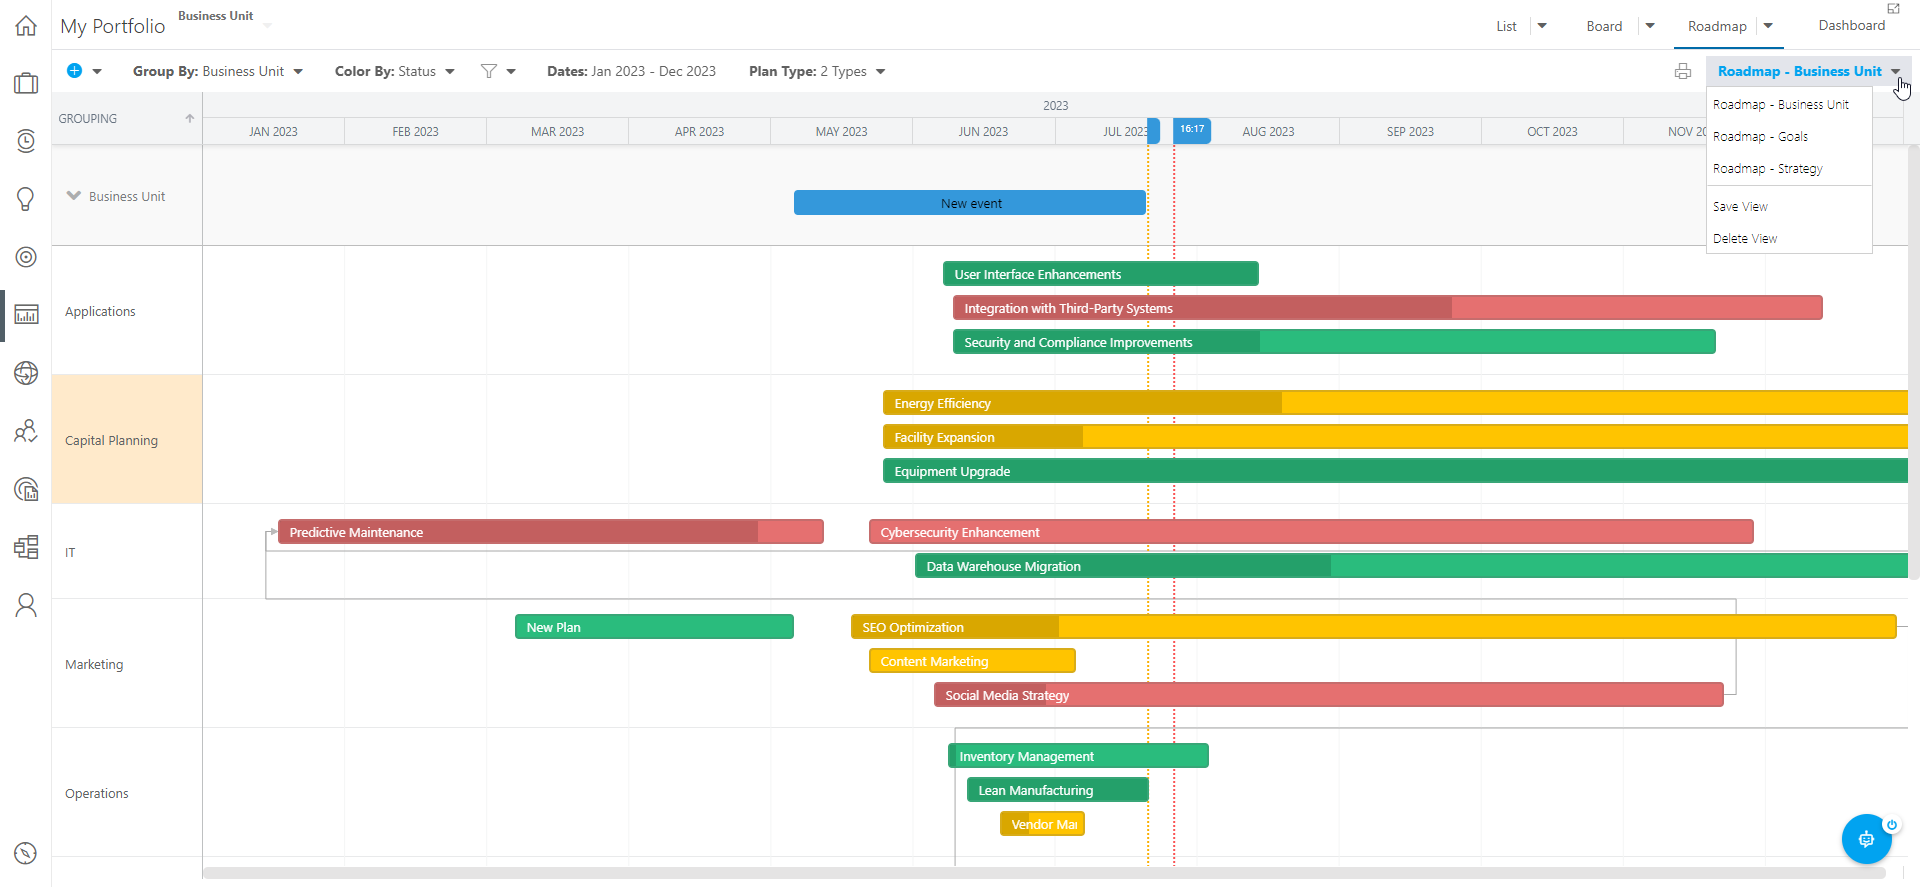
The Portfolio Roadmap page lists each plan in a roadmap timeline.
Create New Plans in the Roadmap
You can create new plans to add to your Roadmap. There are three ways to create a new plan in the Roadmap:
Click and drag directly on the Roadmap.
Click and drag your mouse to create a new bar in the date range you would like for your new plan. When you let go of your mouse click, the Add New Plan form will open.
Complete the Add New Plan form.
Select the Plan Type for your new plan.
Select the Parent Plan for your new plan, if applicable.
Give your new plan a Name.
Click Add Plan, and your new plan will appear in your Roadmap. The plan's Quick Edit form will also open on the right of the screen.
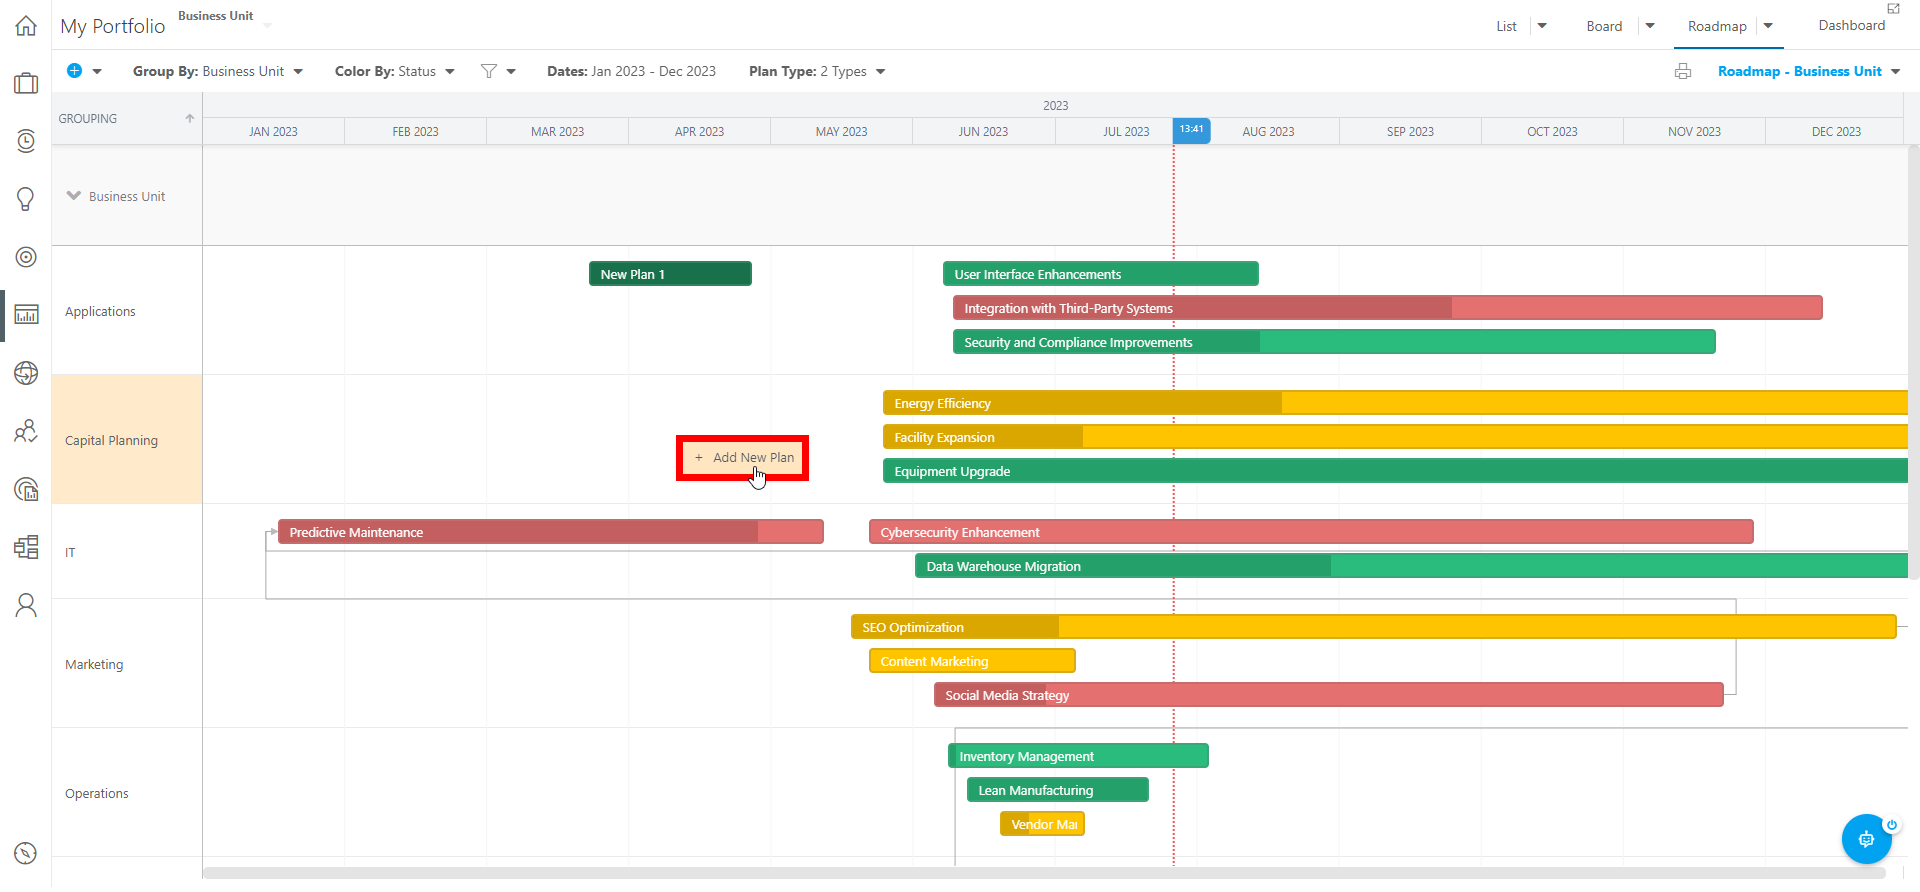
Right-click directly on the Roadmap.
Right-click on the Roadmap on the date you would like your new plan to start. Then click Add New Plan. The Add New Plan form will open.
Complete the Add New Plan form.
Select the Plan Type for your new plan.
Select the Parent Plan for your new plan, if applicable.
Give your new plan a Name.
Click Add Plan, and your new plan will appear in your Roadmap. The plan's Quick Edit form will also open on the right of the screen.
Note
Using the right-click method will create a plan with a 1-month duration by default. The plan bar will begin where you initially right-clicked on the Roadmap.
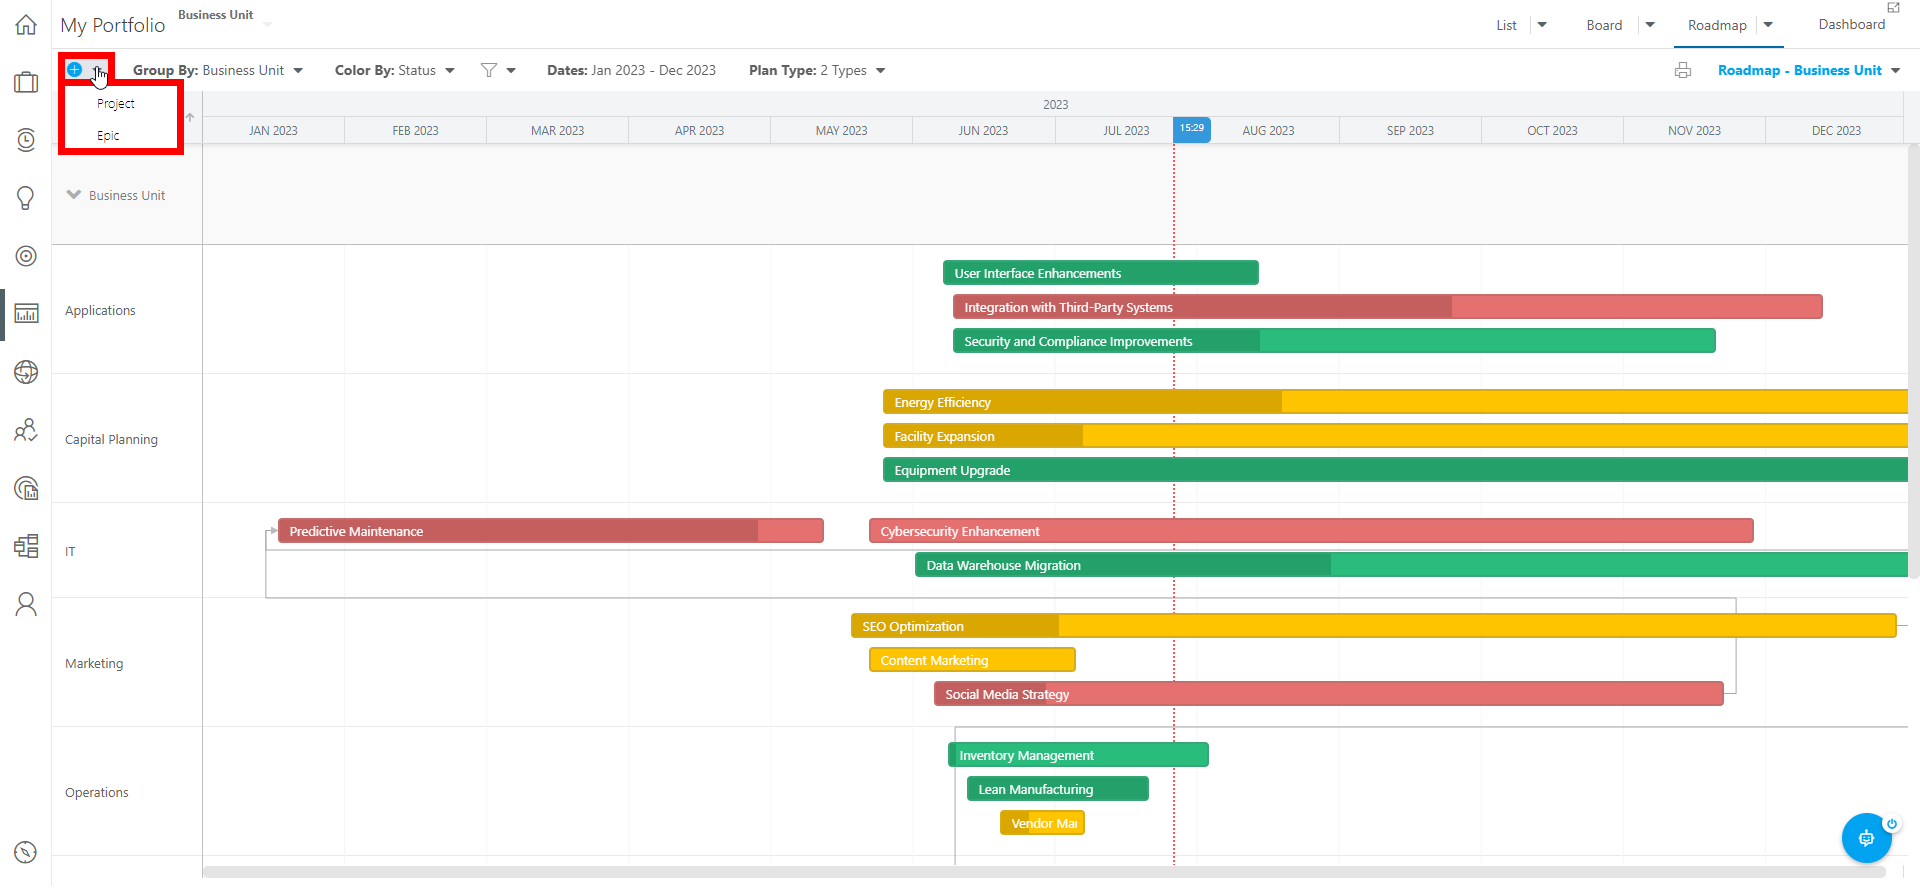
Use the New Plan button in the header.
Click the New Plan button. Select the desired Plan Type from the drop-down. The Add New [Plan Type] form will open.
Complete the Add New [Plan Type] form.
Select the Parent Plan for your new plan, if applicable.
Give your new plan a Name.
Click Add Plan. The plan's Quick Edit form will also open on the right of the screen.
Note
The plan's bar will not appear in the Roadmap until you add Estimated Start and Estimated End dates. You can add this information to the plan using the Quick Edit form. Once the dates are entered, the plan's bar will appear in the Roadmap.
Create Events in the Roadmap
Events are timeline markers that allow you to easily bring attention to special dates like milestones, release dates, program increments, etc. Saving a view will save the events to that view. There are two ways to create a Roadmap Event:
Click and drag directly on the top row of the Roadmap.
Click and drag your mouse to create a new bar in the date range you would like for your new Event. When you let go of your mouse click, the Event Information form will open.
Complete the Information form.
Give your new Event a Name.
Update the Start and Finish dates and times if necessary.
Note
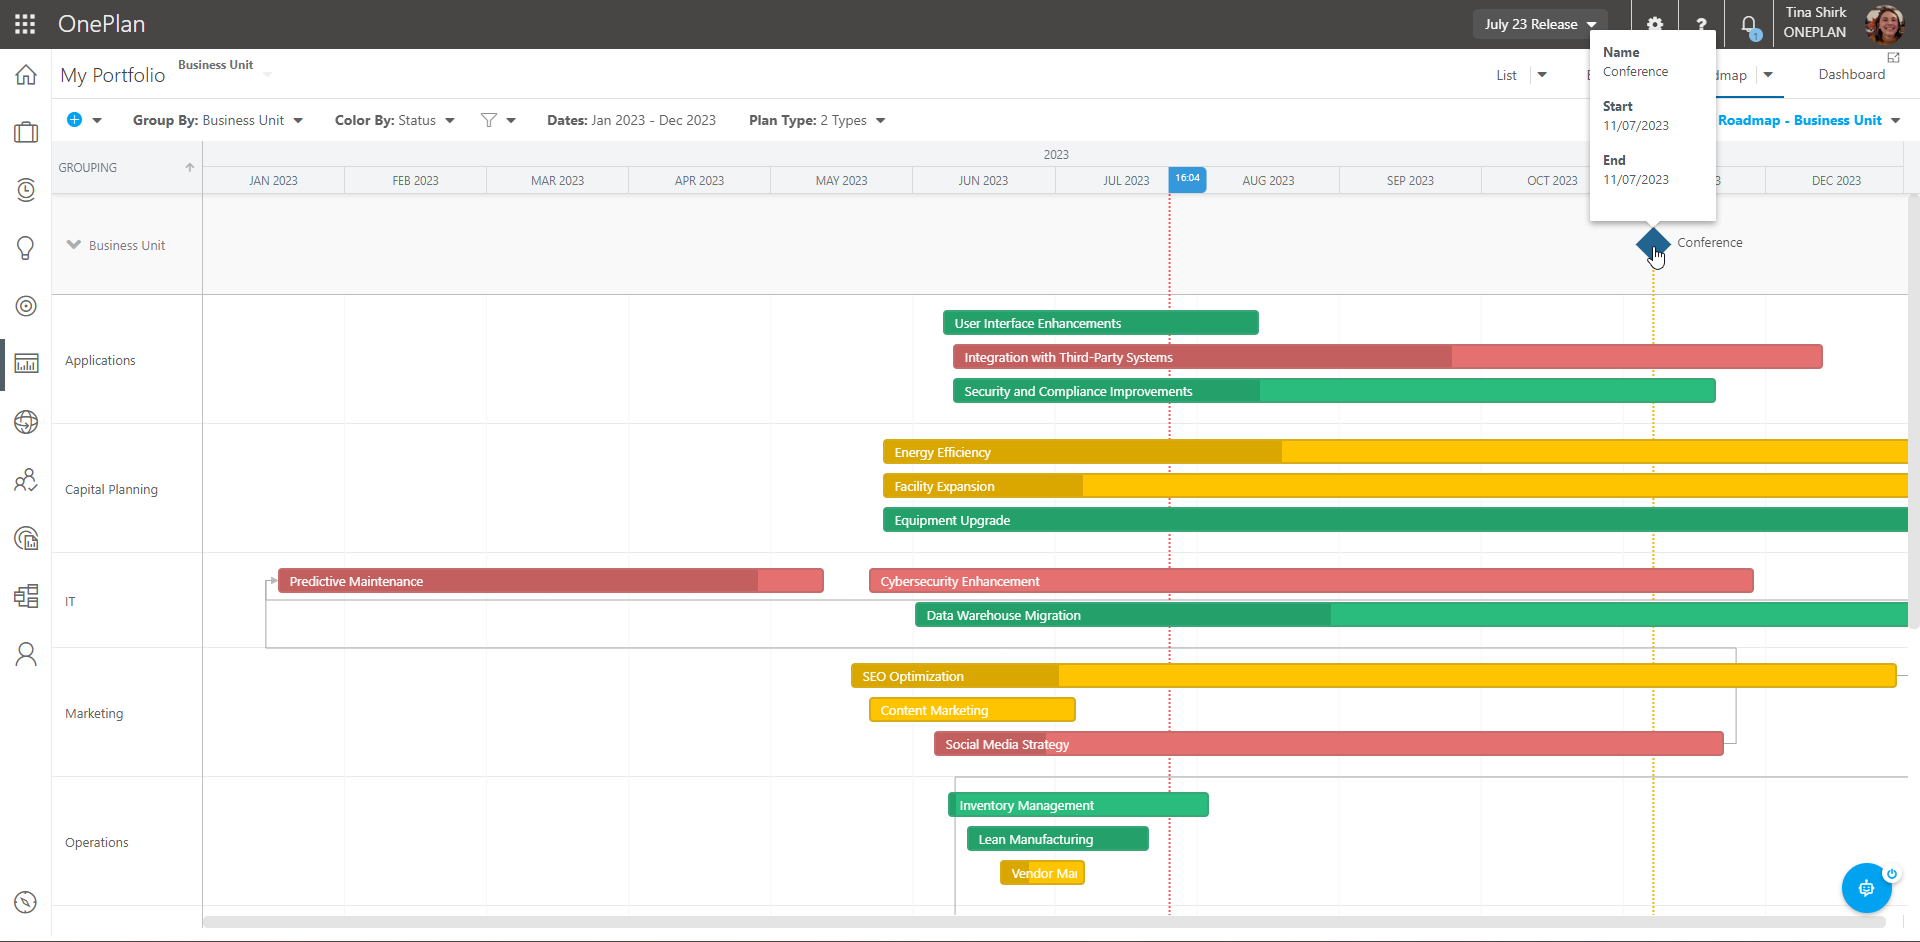
Setting an Event's duration to a single day (so the Start and Finish dates are the same) will change the Event bar into a diamond in the Roadmap.
Click Save, and your new Event will appear in your Roadmap.

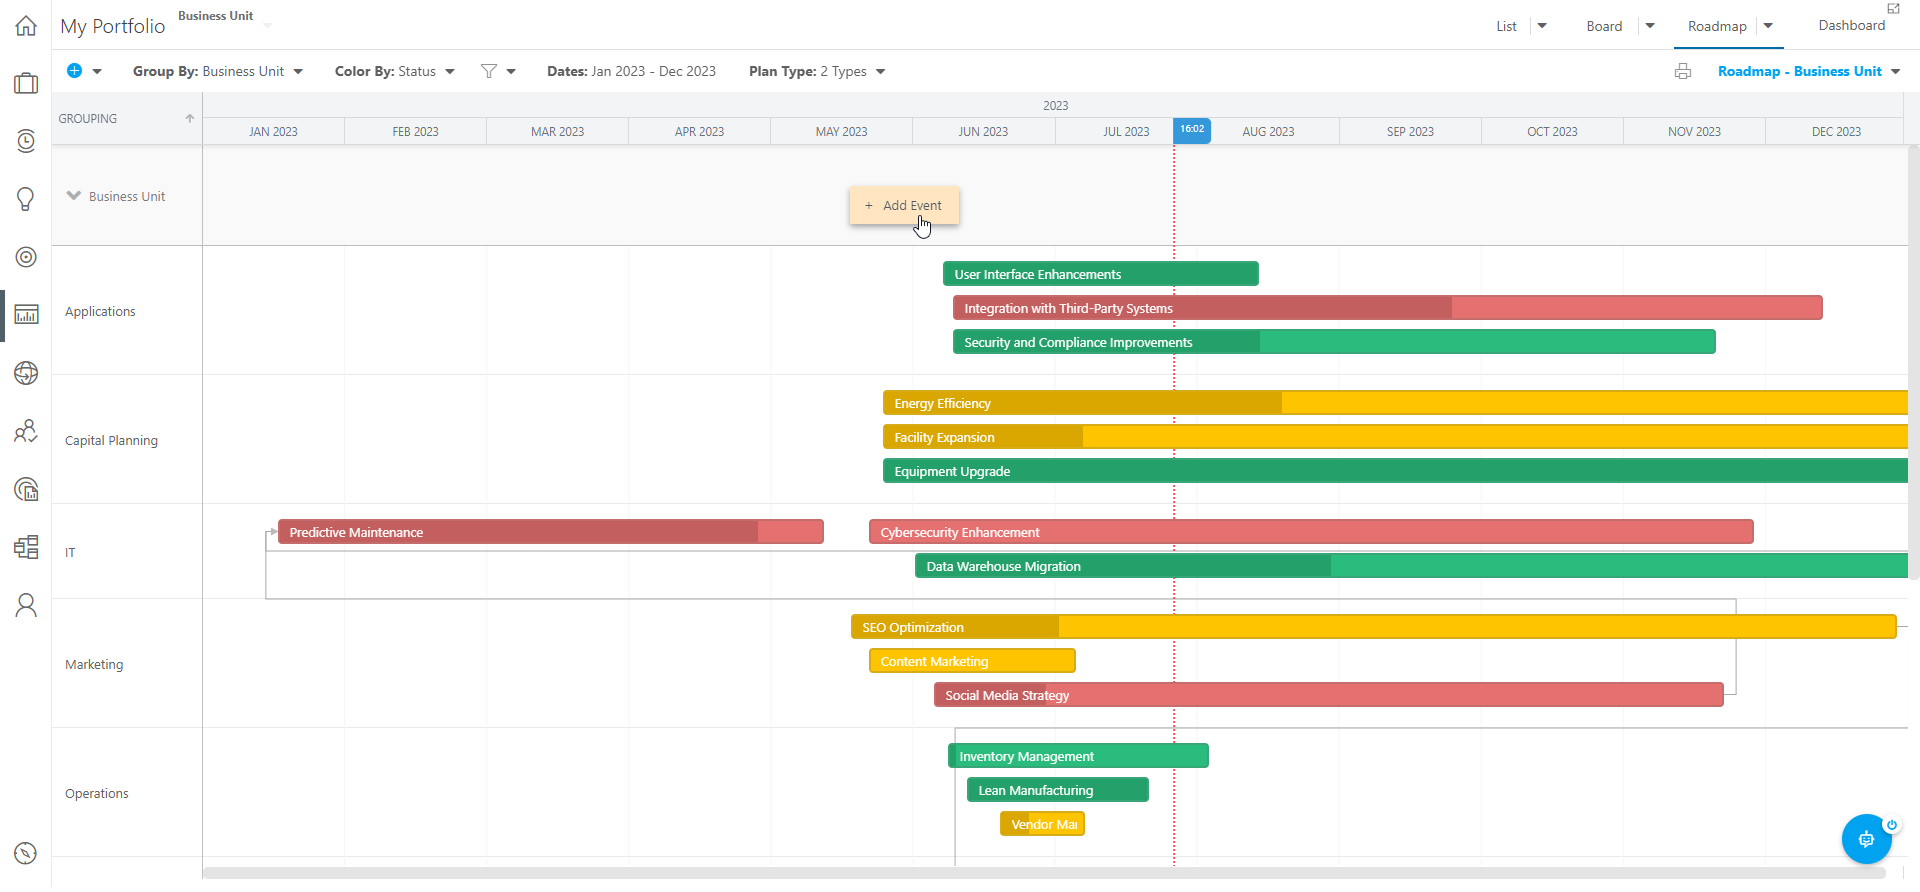
Right-click directly on the top row of the Roadmap.
Right-click on the Roadmap on the date you would like your new Event to start. Then click Add New Event. The Event Information form will open.
Complete the Information form.
Give your new Event a Name.
Update the Start and Finish dates and times if necessary.
Note
Setting an Event's duration to a single day (so the Start and Finish dates are the same) will change the Event bar into a diamond in the Roadmap.
Click Save, and your new Event will appear in your Roadmap.
Resize and Rearrange Plans in the Roadmap
Important
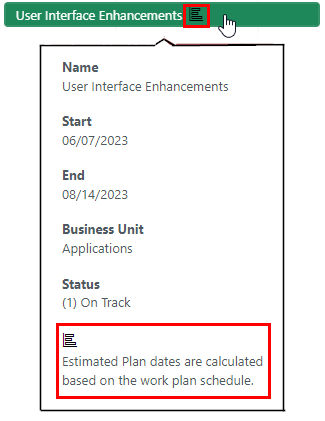
You can only resize and rearrange plans with NO tasks. Once tasks are added to a plan, it becomes locked in place in the Roadmap. A Gantt icon will show on the plan bar indicating that plan has tasks. Additionally, when hovering over the plan bar of a an immovable plan, a message will also appear in the tooltip stating"Estimated Plan dates are calcualted based on the work plan schedule."
You can change the date range of the plans and Events in your Roadmap by hovering over the ends of the bars until your cursor changes into a left/right slider. Then click and drag the end of the bar to the desired date.
You can also completely move plans and Events by clicking on a bar, then dragging and dropping the bar to the desired location in the Roadmap.
View Plan and Event Information in the Roadmap
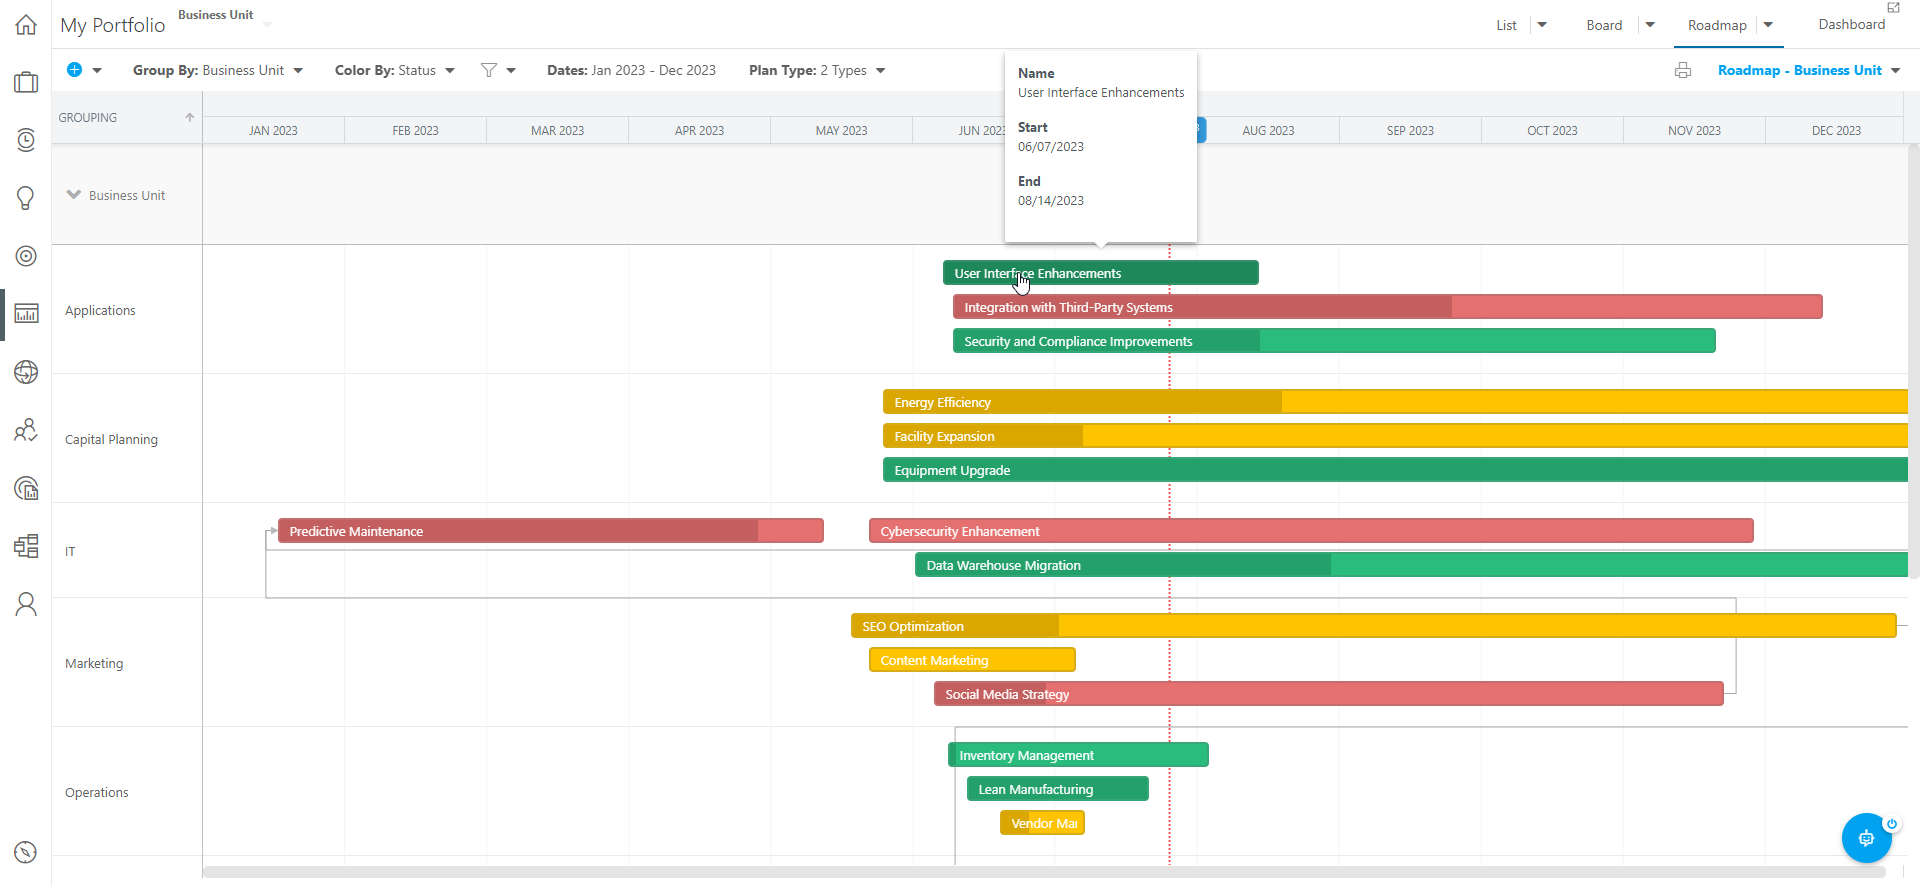
Hover over the bars in the Roadmap to preview basic Plan information, including the plan name, start date, and end date.
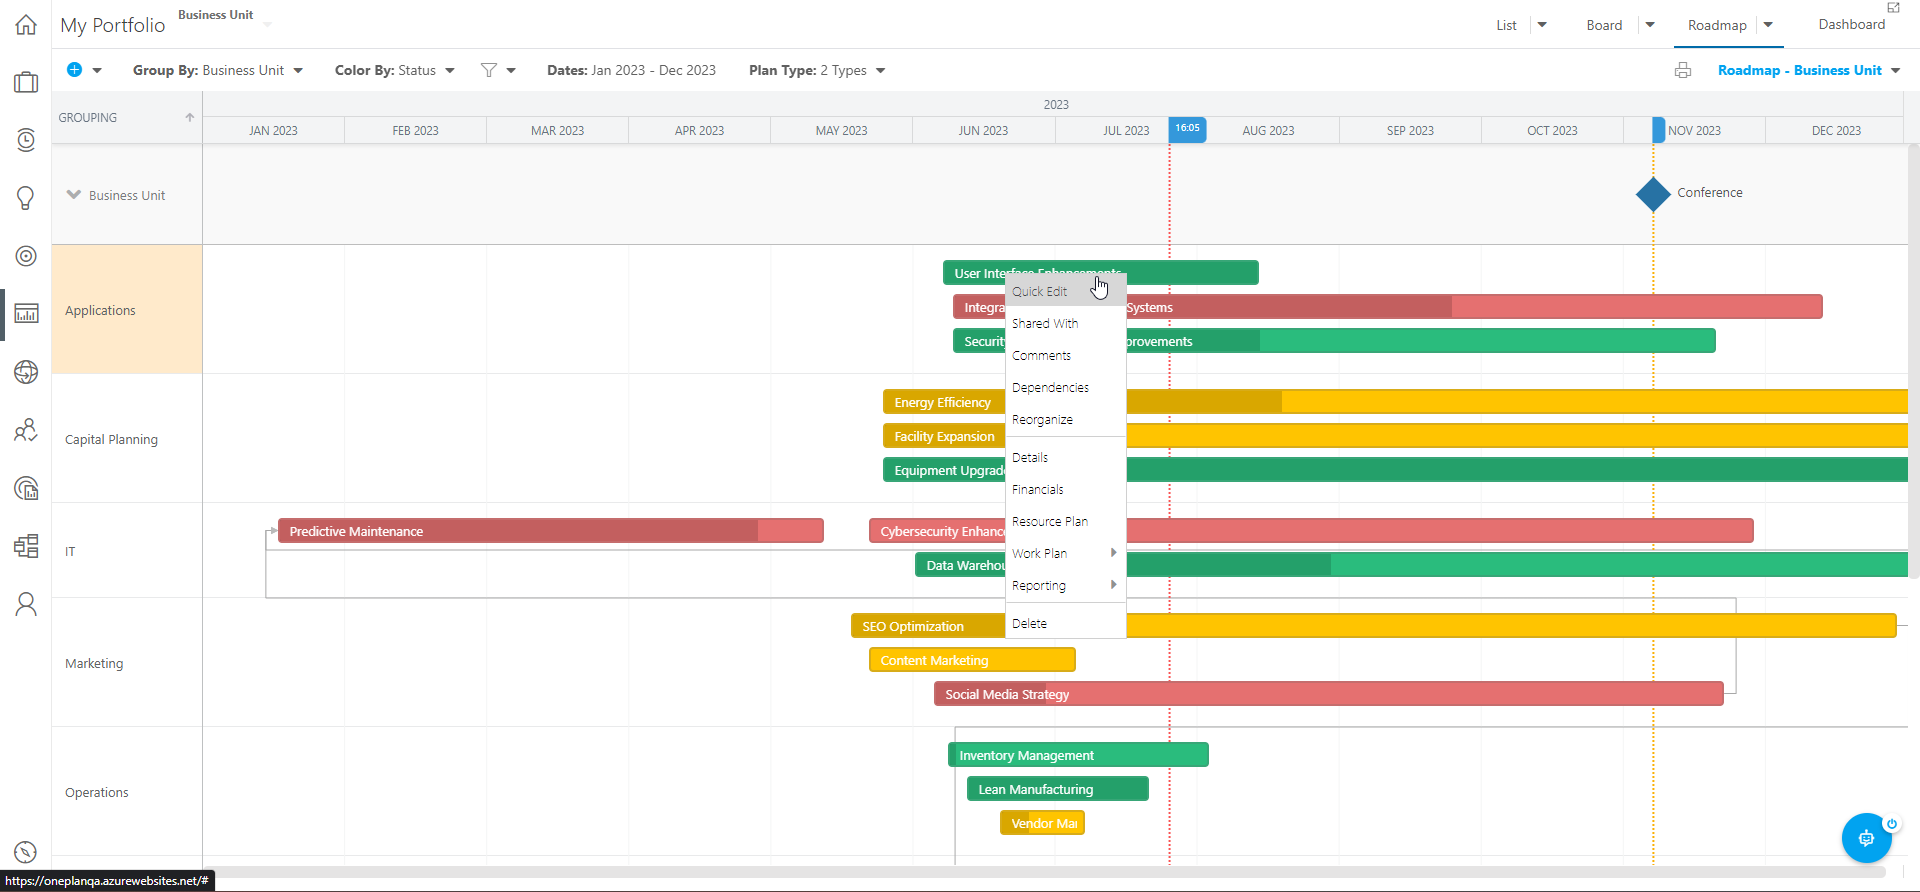
Right-click on a plan bar to access that plan's Contextual menu. Options in the Contextual menu include:
Quick Edit: Click to open the plan's Quick Edit window.
Share With: Click to access the plan's Share With form.
Comments: Click to access the plan's Comments thread. You can respond to and make new comments from this thread.
Dependencies: Click to access the Dependencies form for the plan. You can manage dependencies between plans from this form. See Portfolio Dependencies: Manage Dependencies Between Plans for more information.
Reorganize: Click to access the Plan Reorganize form. From this form, you can change the Plan Type of the plan, and change the plan's parent plan.
Details: Click to access the plan's Plan Details form.
Financials: Click to access the plan's Financial Plan.
Resource Plan: Click to access the plan's Resource Plan.
Work Plan: Click to access the plan's Work Plan list or board.
Reporting: Click to access the Reporting pages for the selected plan.
Delete: Click to delete the current plan.
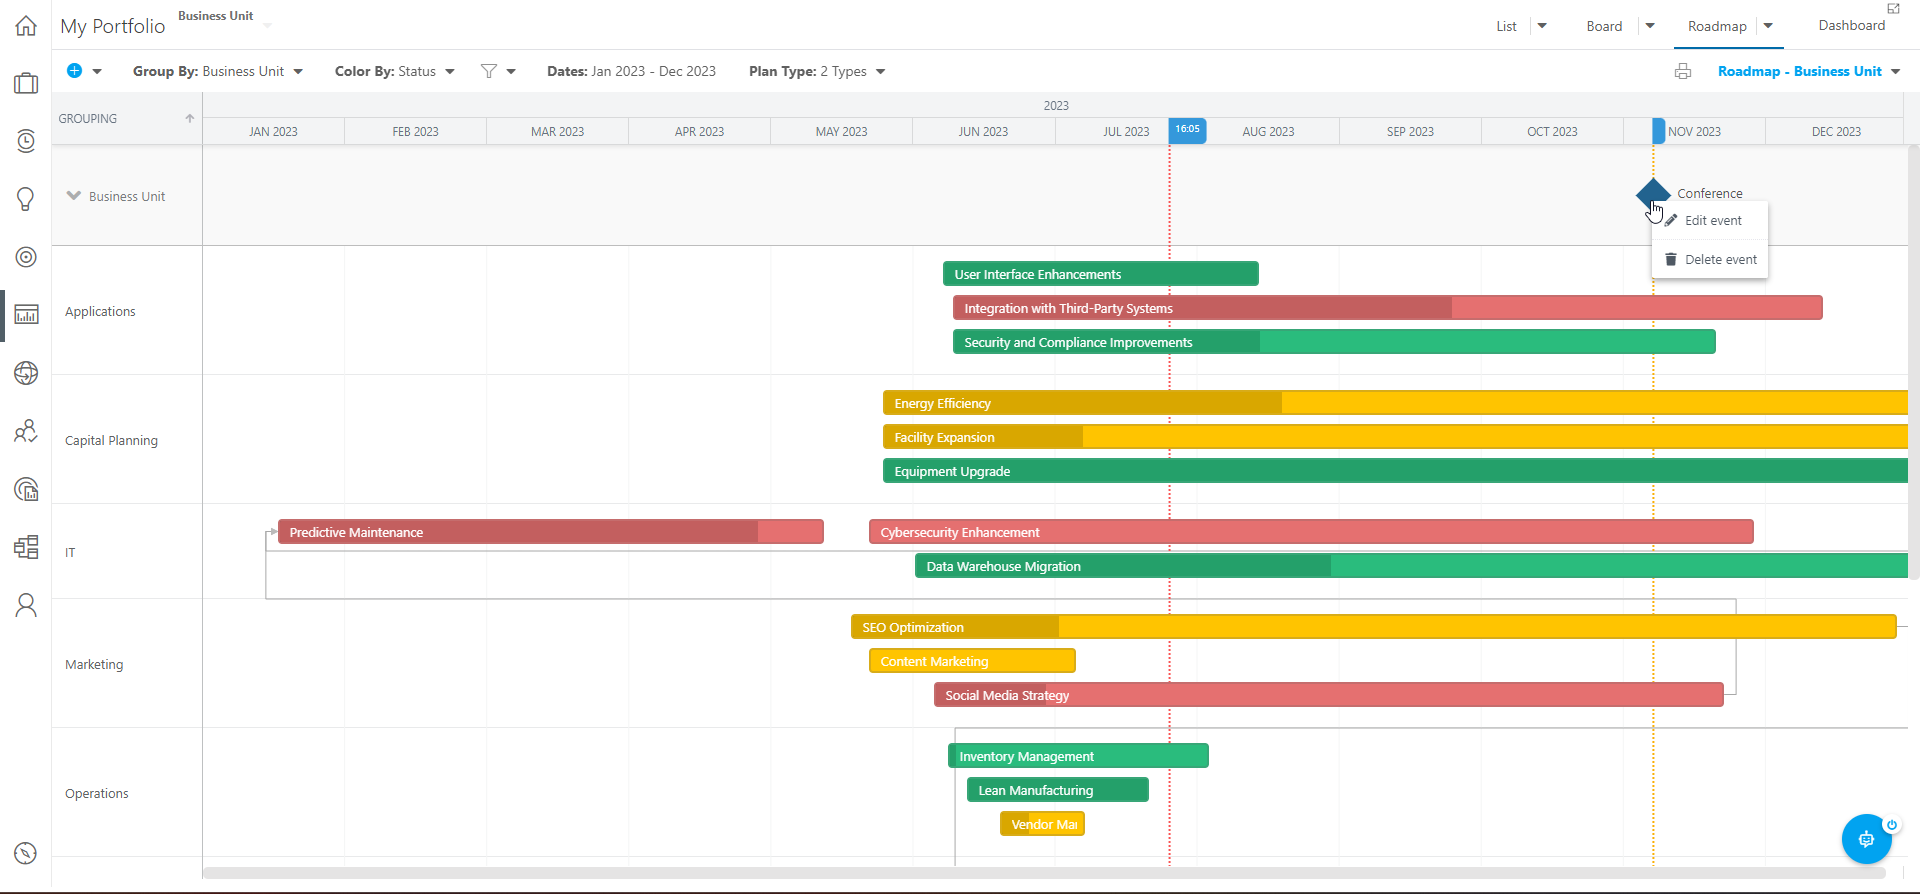
Hover over an Event bar or diamond to preview basic Event information, including the Event name, start date, and end date.
Right-click on an Event bar or diamond to access that Event's Contextual menu. From the Event Contextual menu, you can:
Edit the Event
Delete the Event
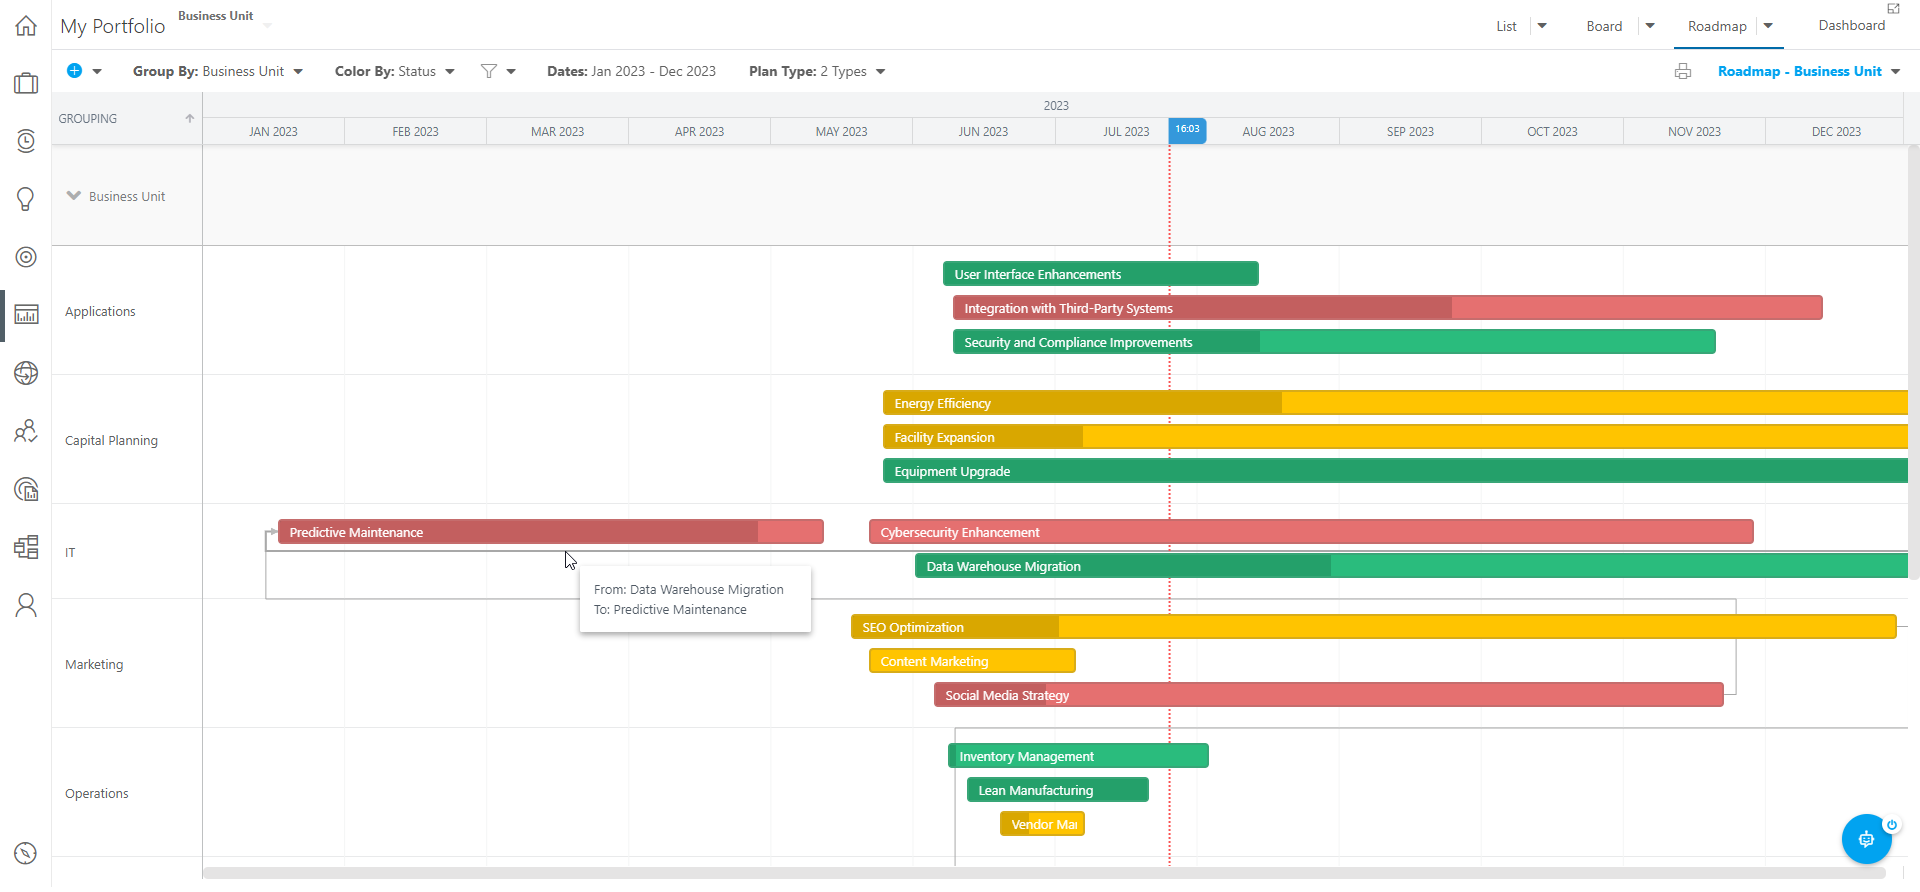
Hover over the gray dependency lines between plans to view how the plans are connected, including the To and From Plans.
Hover over any blank space in the Roadmap to view the date.
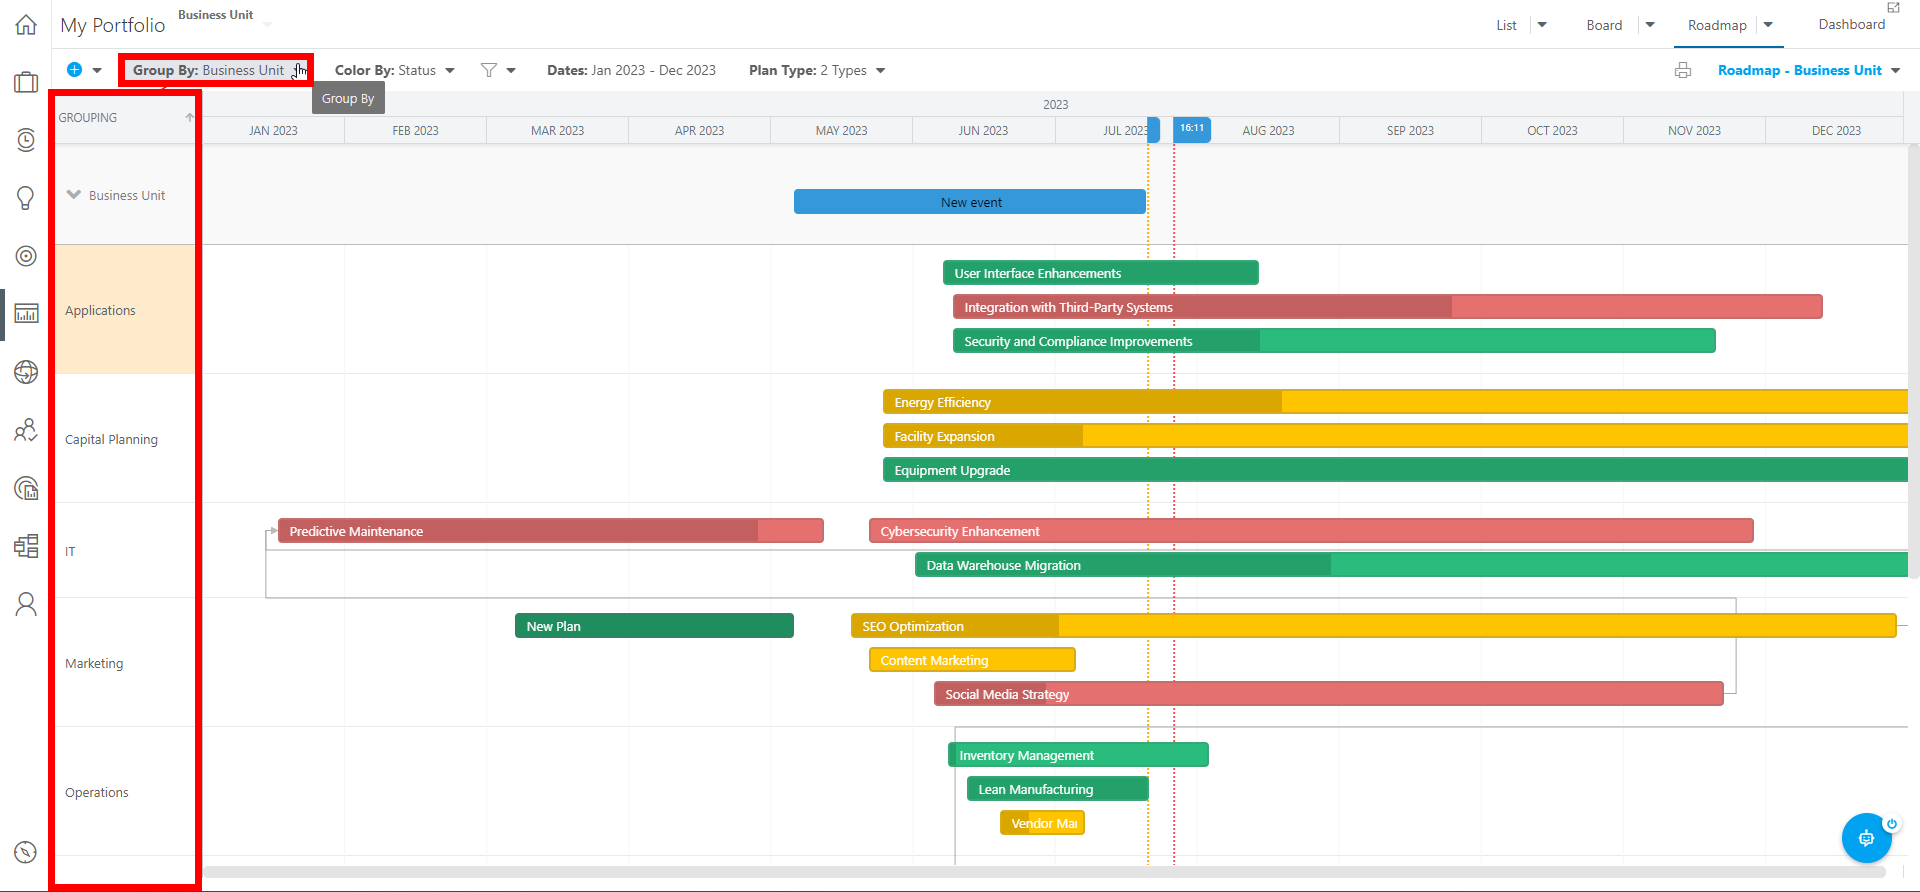
Group Plans in the Roadmap
Use the Group By menu to select a plan-level field to group the Plans in your Roadmap. For example, you could group the plans by Business Unit or Risk.
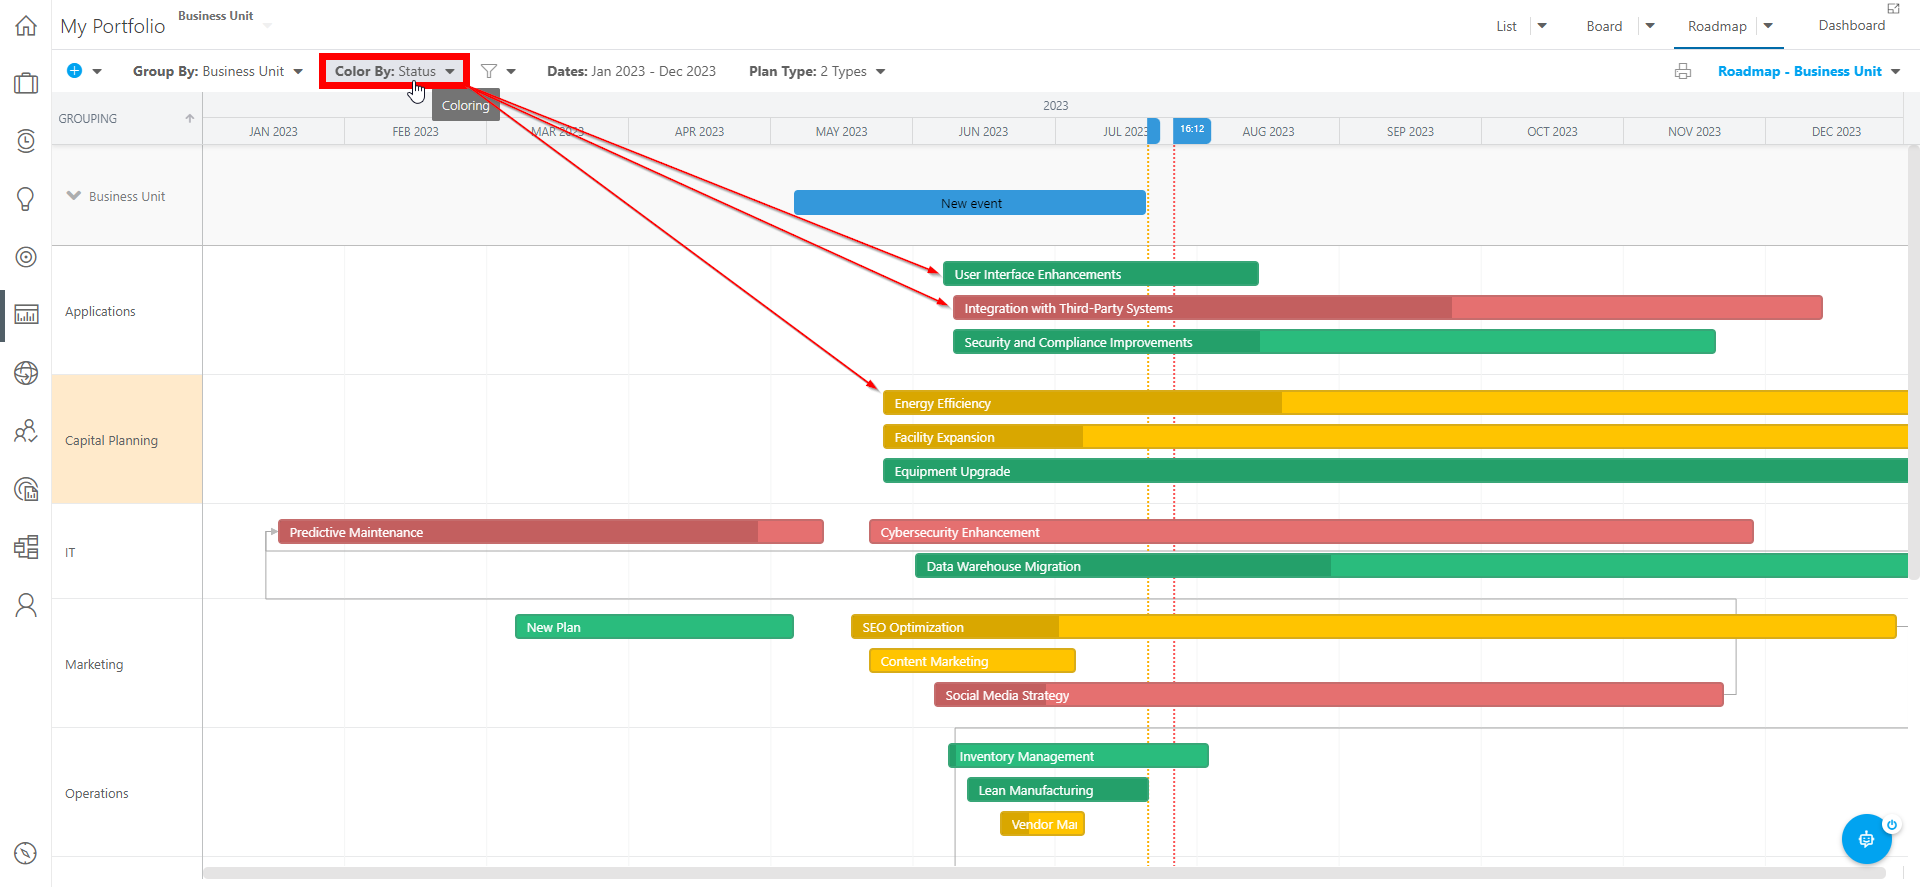
Change the Roadmap Bar Colors
Use the Color By menu to select a plan-level field to use as the color coding method of the bars in your Roadmap. For example, you could choose to have the bars colored by Status, or % Done.
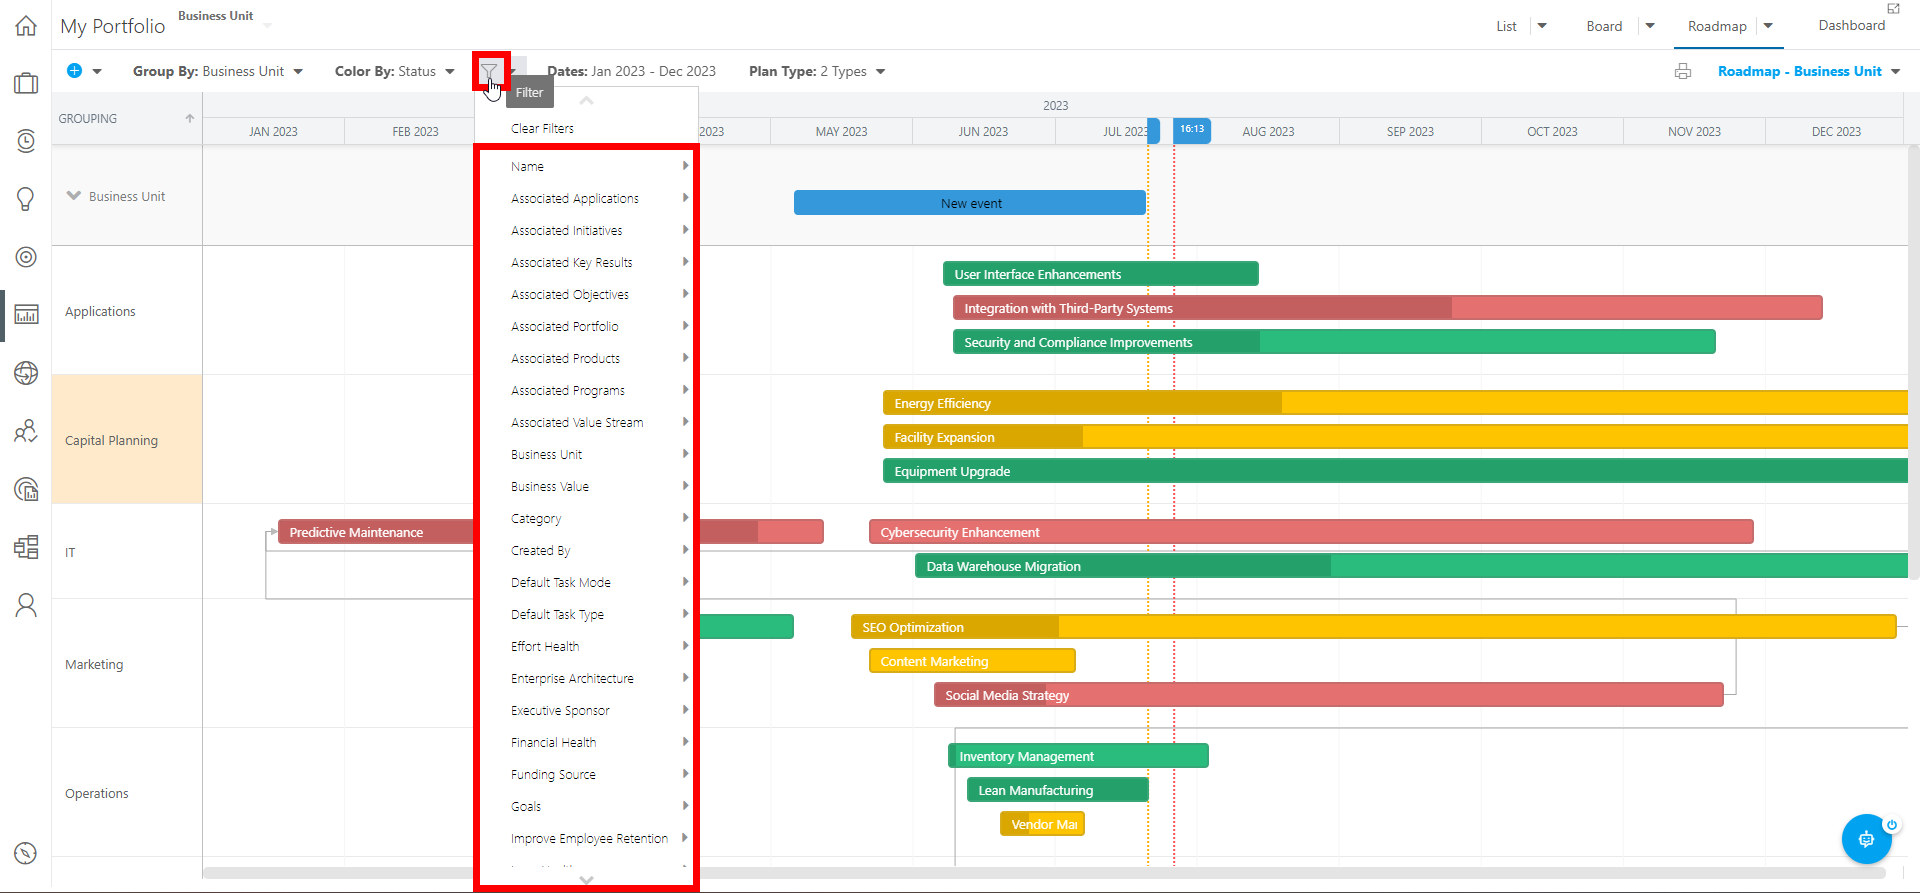
Filter the Plans in the Roadmap
Use the Filters menu to apply filters to the Roadmap to narrow down the plans that are available in the Roadmap. For example, you may want to only view plans with a certain Status.
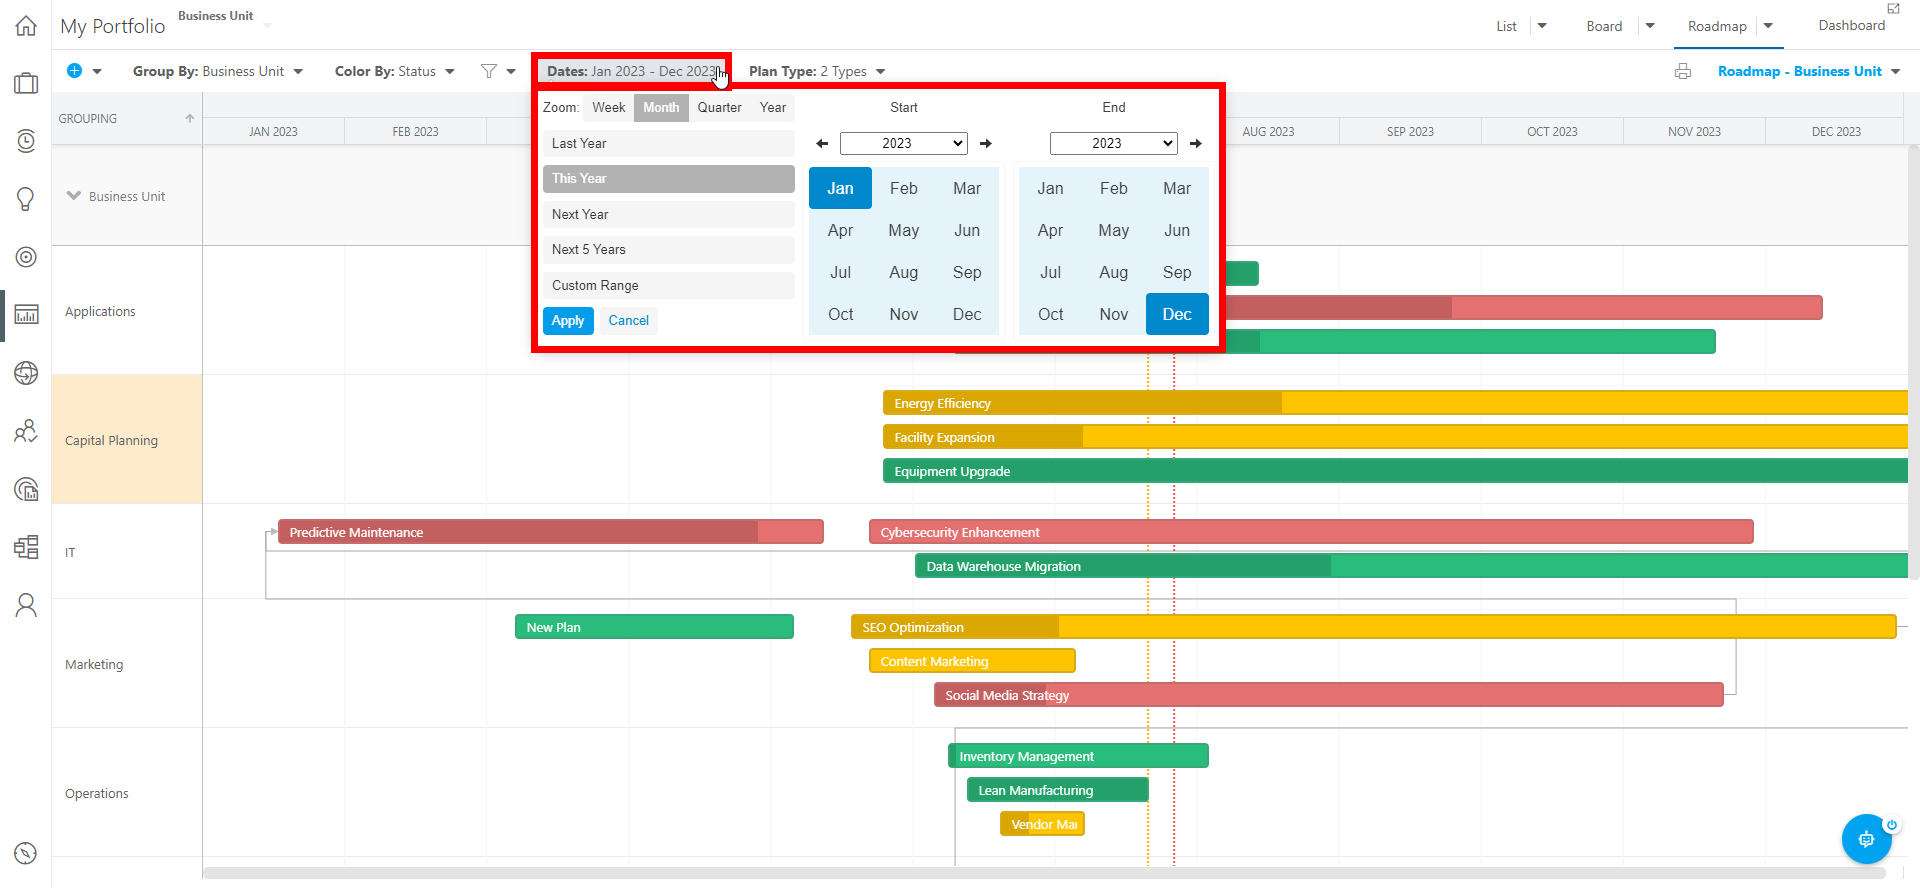
Set the Date Range in the Roadmap
Use the Dates menu to set the date range you would like to view in the Roadmap. You can select a date range preset, or set a custom range.
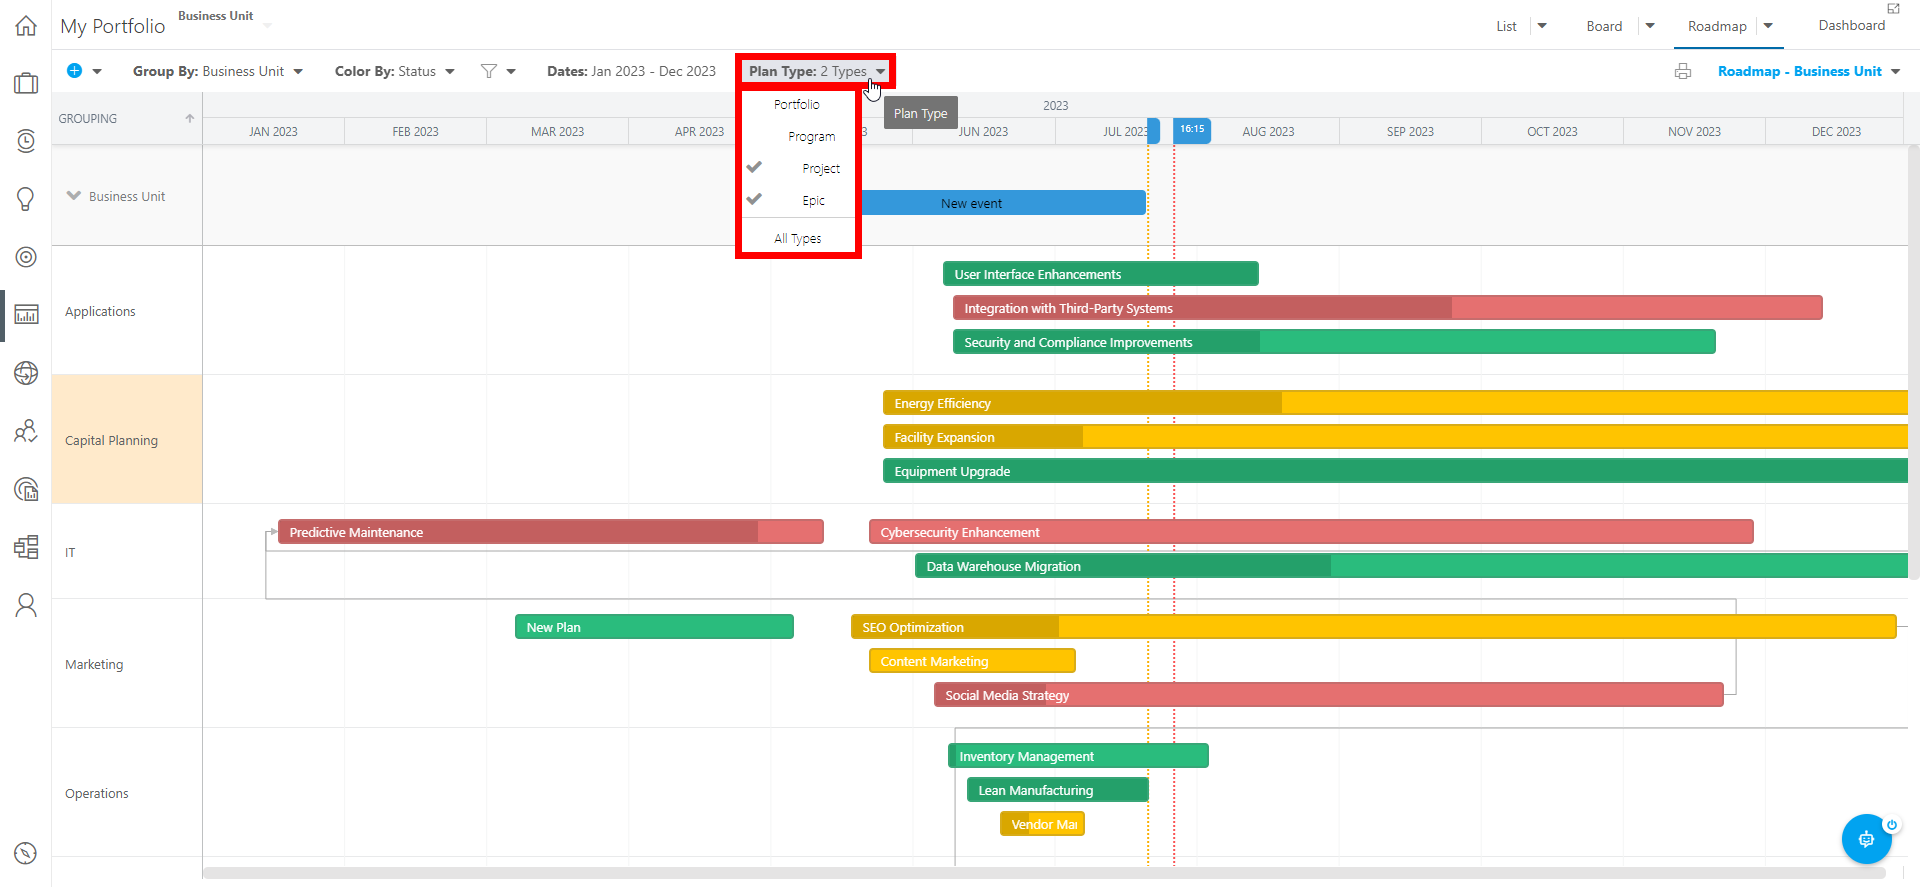
Select Which Plan Types are Available in the Roadmap
Use the Plan Types menu to select the kinds of plans you would like included in your Roadmap. For example, you may only want to look at Projects and Epics.
Save a Roadmap View
After you have made changes to the Roadmap view, including applying groupings, dates, bar colors, etc. you can save that view to use again. To save a Roadmap view:
Click on the View menu and select Save View. The Save View form will open.
Complete the Save View form.
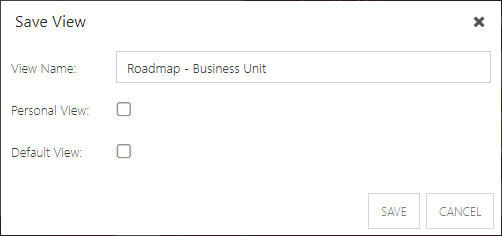
View Name: Initially, the current view name will show. Update to a new name. If updating a view rather than saving a new view, keep the name as-is.
Default View: Check the checkbox if this is a default view. A default view will open automatically when you go to the Work Plan.
Personal View: Check the checkbox if this is a personal view. It is checked by default. Administrators may save a view as a global view for the group by deselecting the checkbox.
Click Save. Your new view will now be available for use from the View menu.
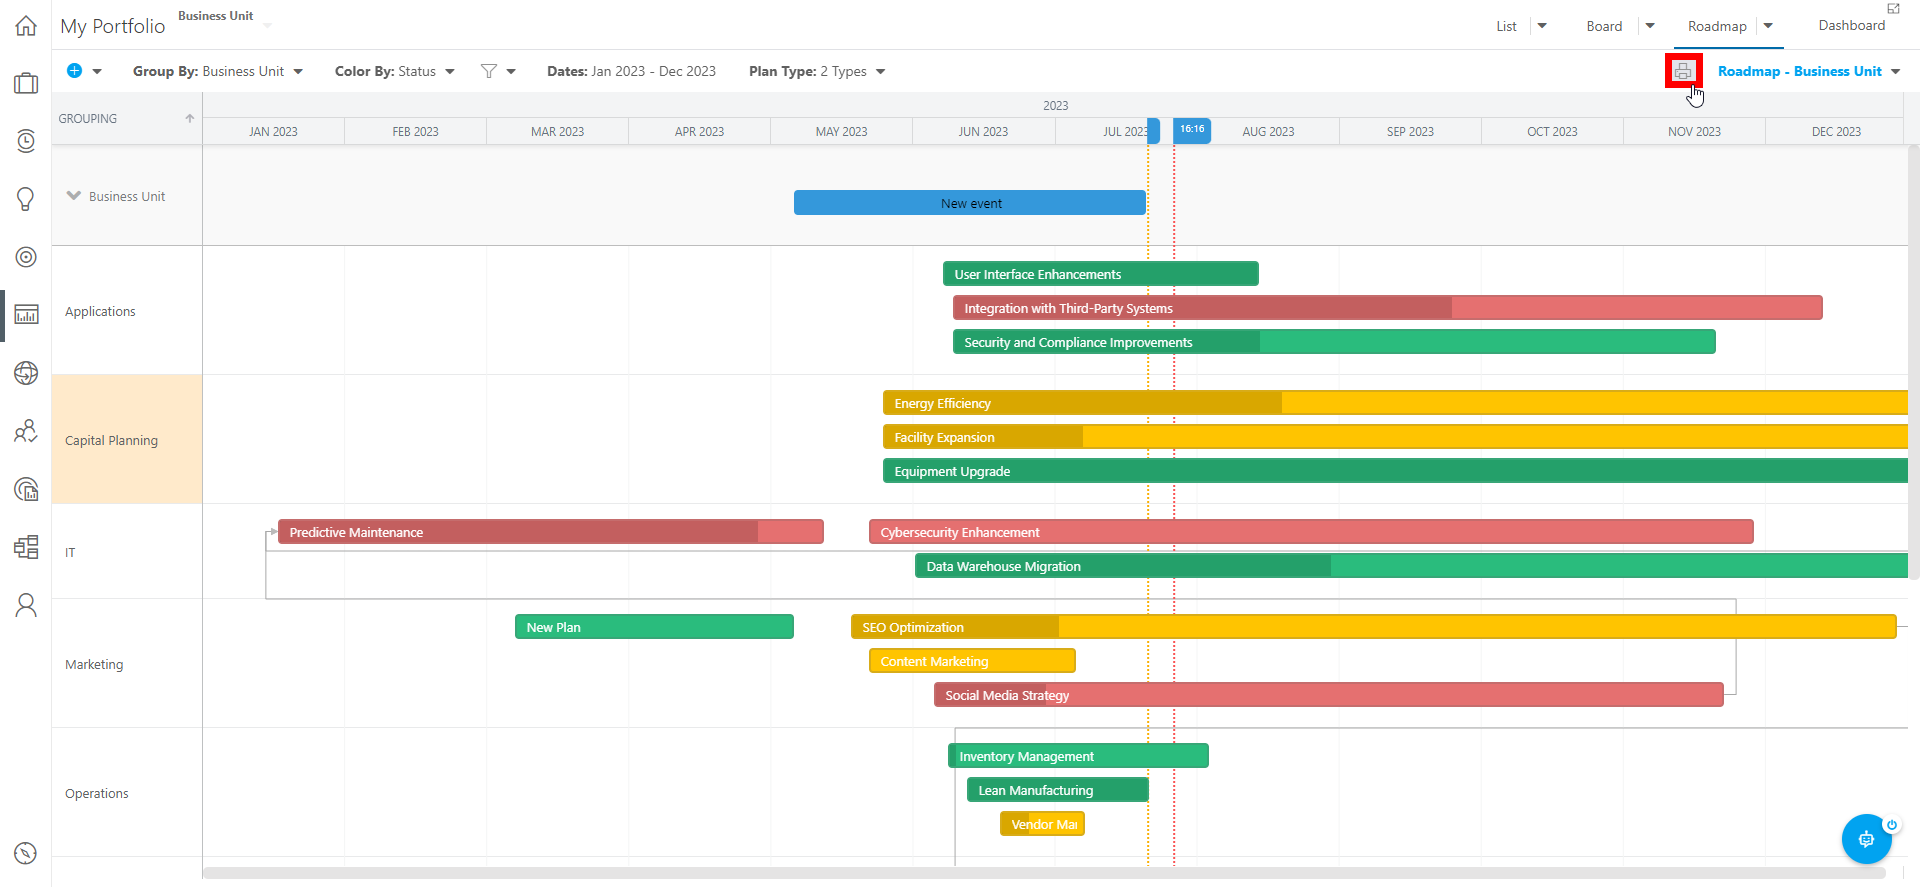
Save the Roadmap as a Printable Image
Click the Print icon to save the current Roadmap view as a printable PNG image. The PNG file will save to your Downloads folder after it is generated.