Manage Ideas with the Innovation App
Once your Innovation App area has several Ideas created and voted on, you will want to review the items and take action on them.
The plan management capabilities in the Innovation App area are identical to those in the Portfolio Area.
Note
You can apply the Innovation on any Plan Type in OnePlan. For this article, we will use an example of the Innovation App applied to the Ideas Plan Type.
Important
This article assumes that you have Plan Creation permissions beyond the Requestor permission level (such as Manager permissions).
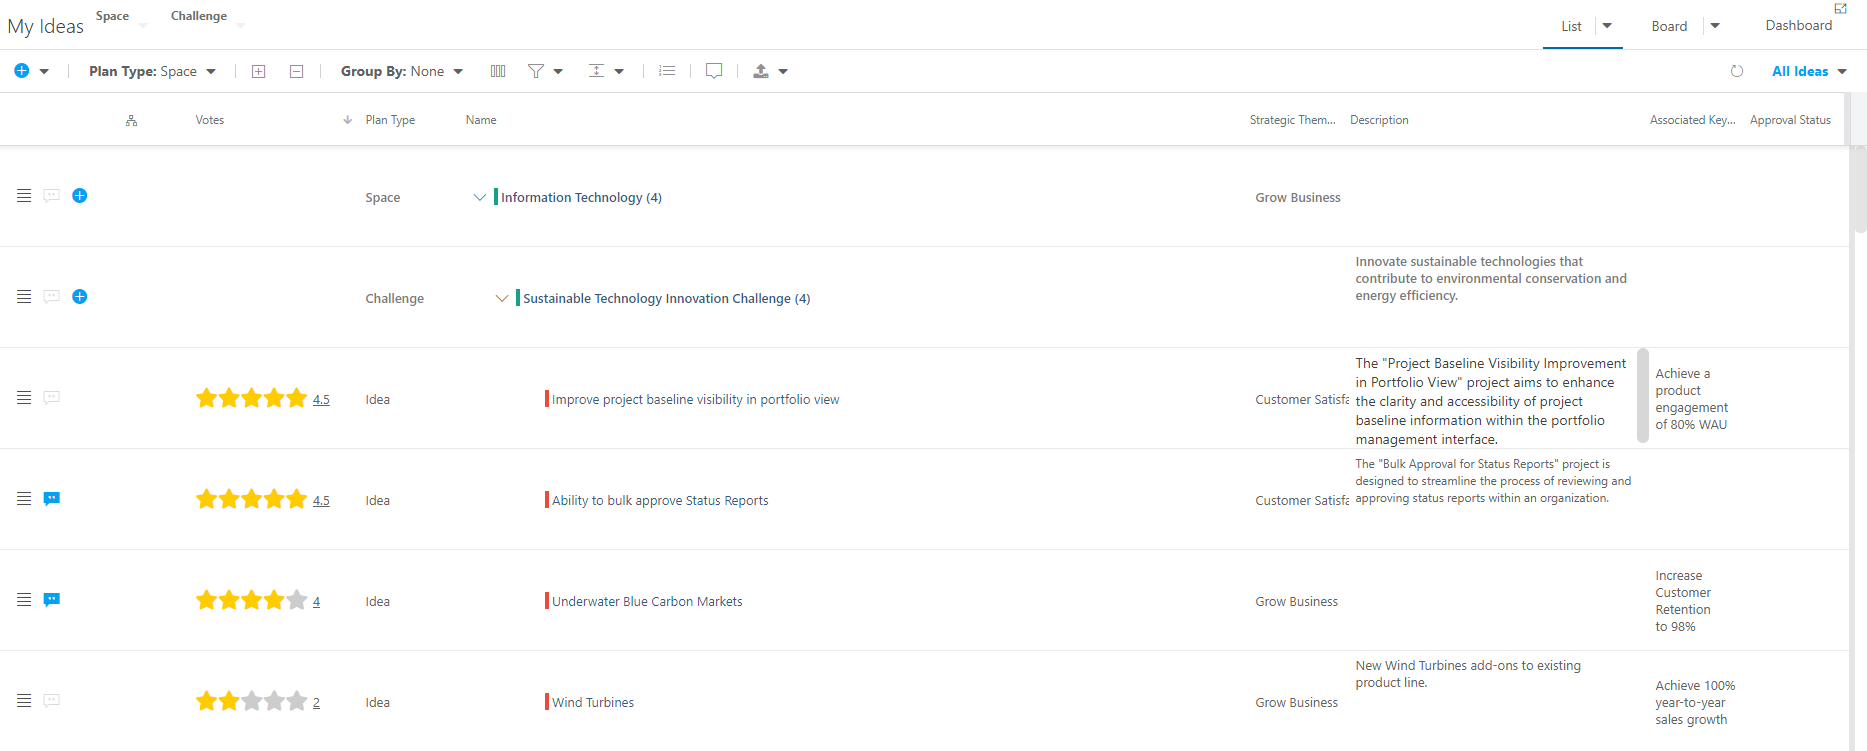
Create Hierarchies in the Innovation App
The major difference between the Innovation App and its predecessor, the Requests App, is that you can create hierarchies with the Innovation App. This means that you can organize your Innovation space in any way that makes sense for your organization. Requestors are limited to creating and voting on the Plan Type set to "Open to All Users" in the back end. This will likely be the lowest-level Plan Type. See Configure the Innovation App for more information.
In this example, all users can create and vote on Ideas, but only Managers can create Spaces and Challenges.
To create these parent plans as a user with proper plan creation permissions:
Click the New Item icon in the header to create a new top-level item in the hierarchy. The New [Item Type] form will open. Give the new top-level item a name, then click Add Plan.
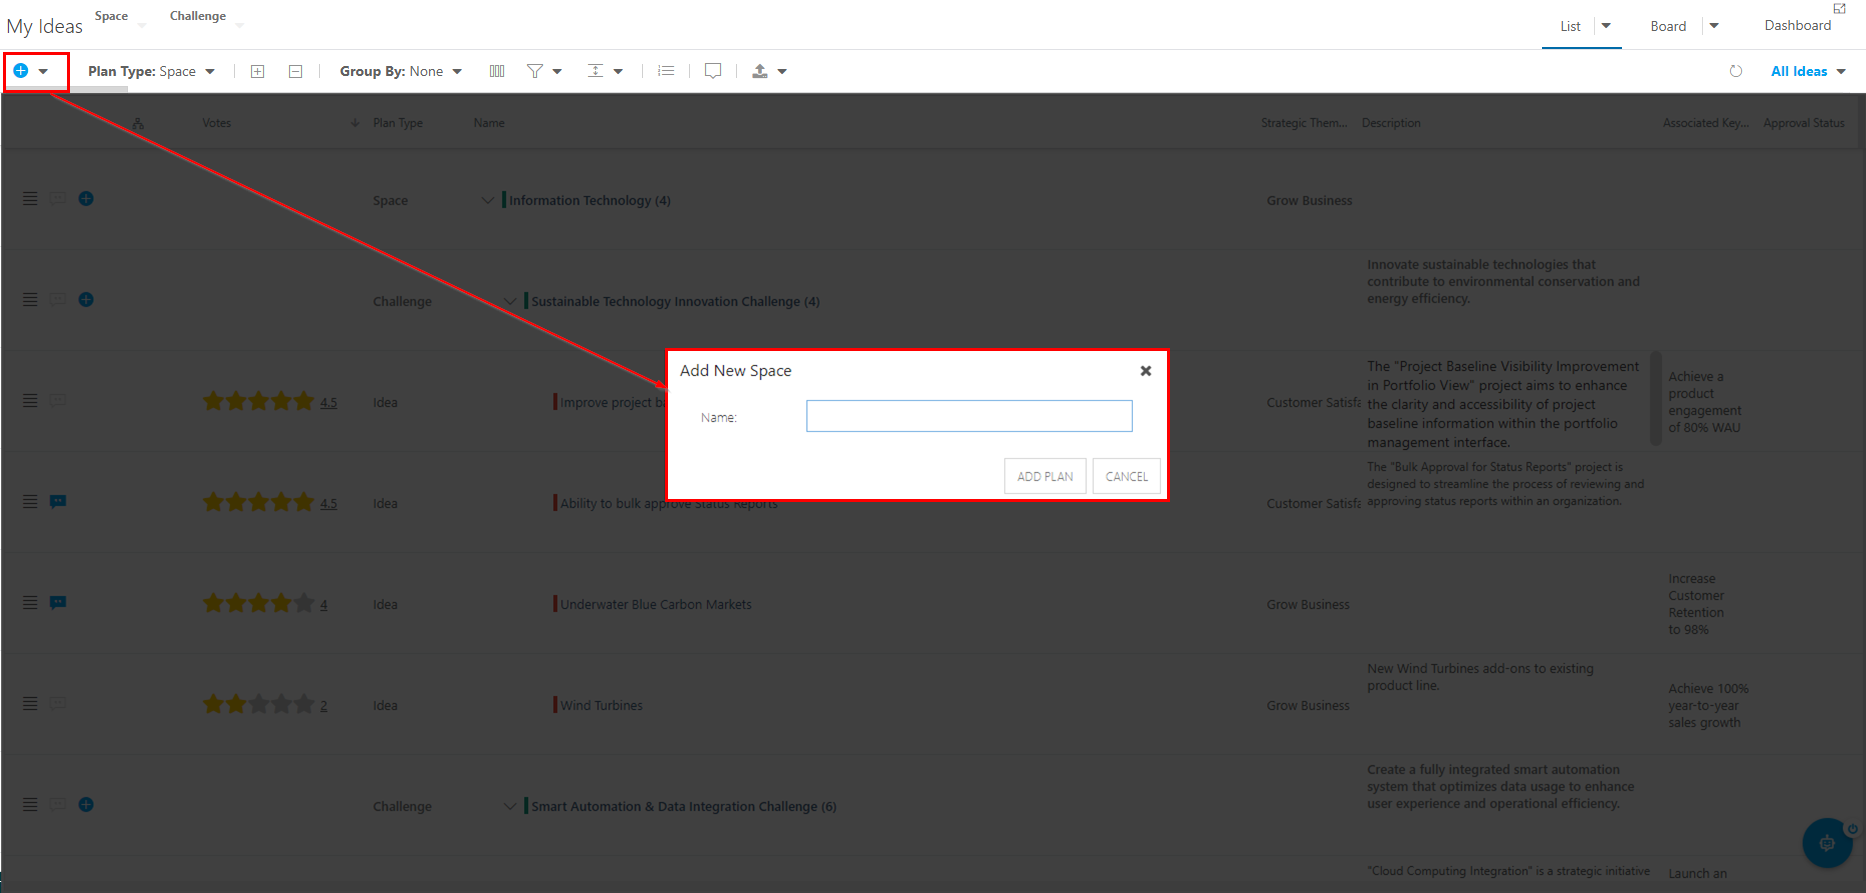
Click the New Item icon in the list view to create a child item in the hierarchy. The New [Item Type] form will open. Give the new child item a name, then click Add Plan.

Now when other users create new Ideas, they have a hierarchy to organize their Ideas into.
Configure and Save Views in the Innovation App
As a Manager, it is your responsibility to create views for other users to leverage when using the Innovation App area. To create views:
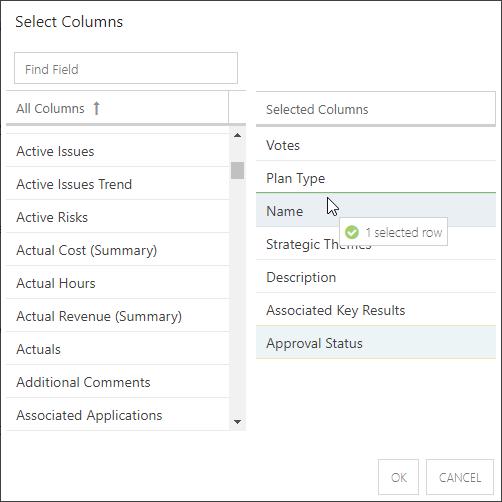
Add your desired columns into the view and arrange them in a way that makes sense to you and your organization. Click on the Select Columns icon in the header. Drag desired columns from the All Columns list into the Selected Columns list to add the column to your view.
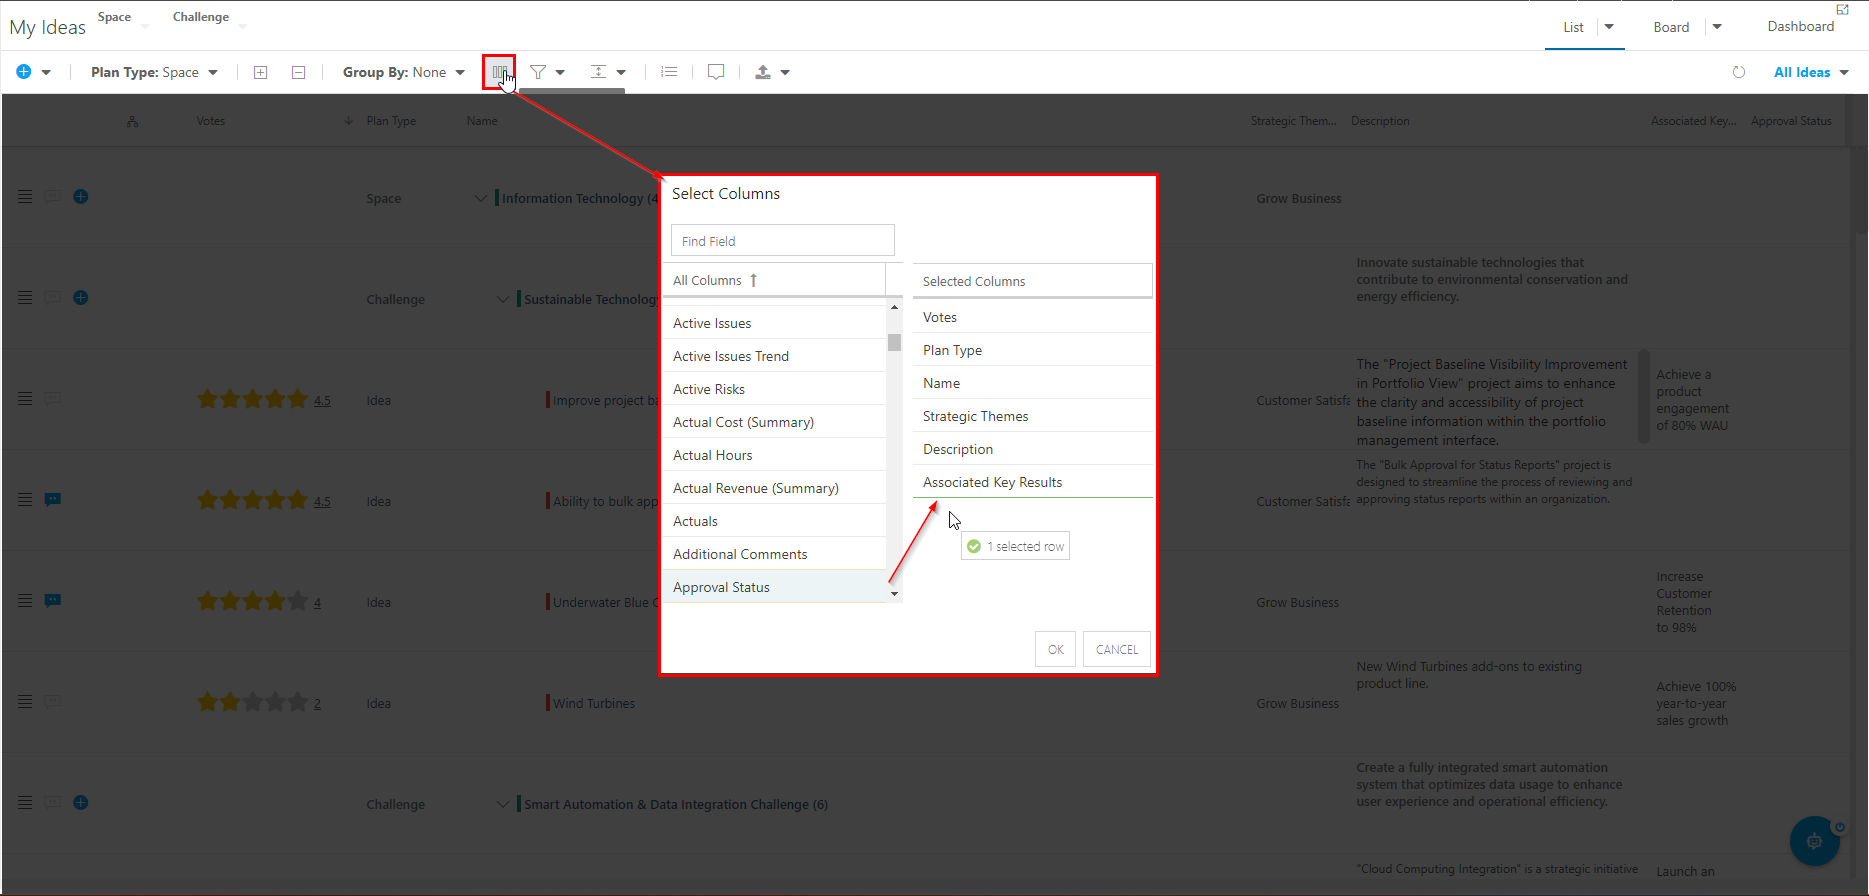
You can rearrange the columns from left (columns at the top of the list) to right (columns at the bottom of the list). When you are happy with your columns and their order, click OK.
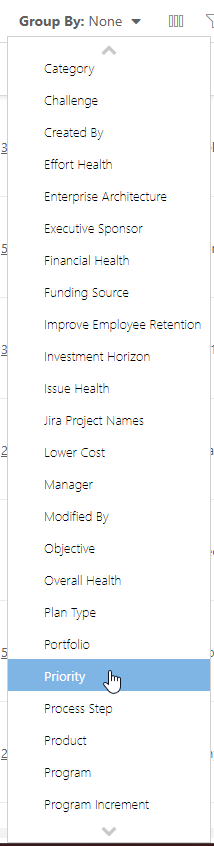
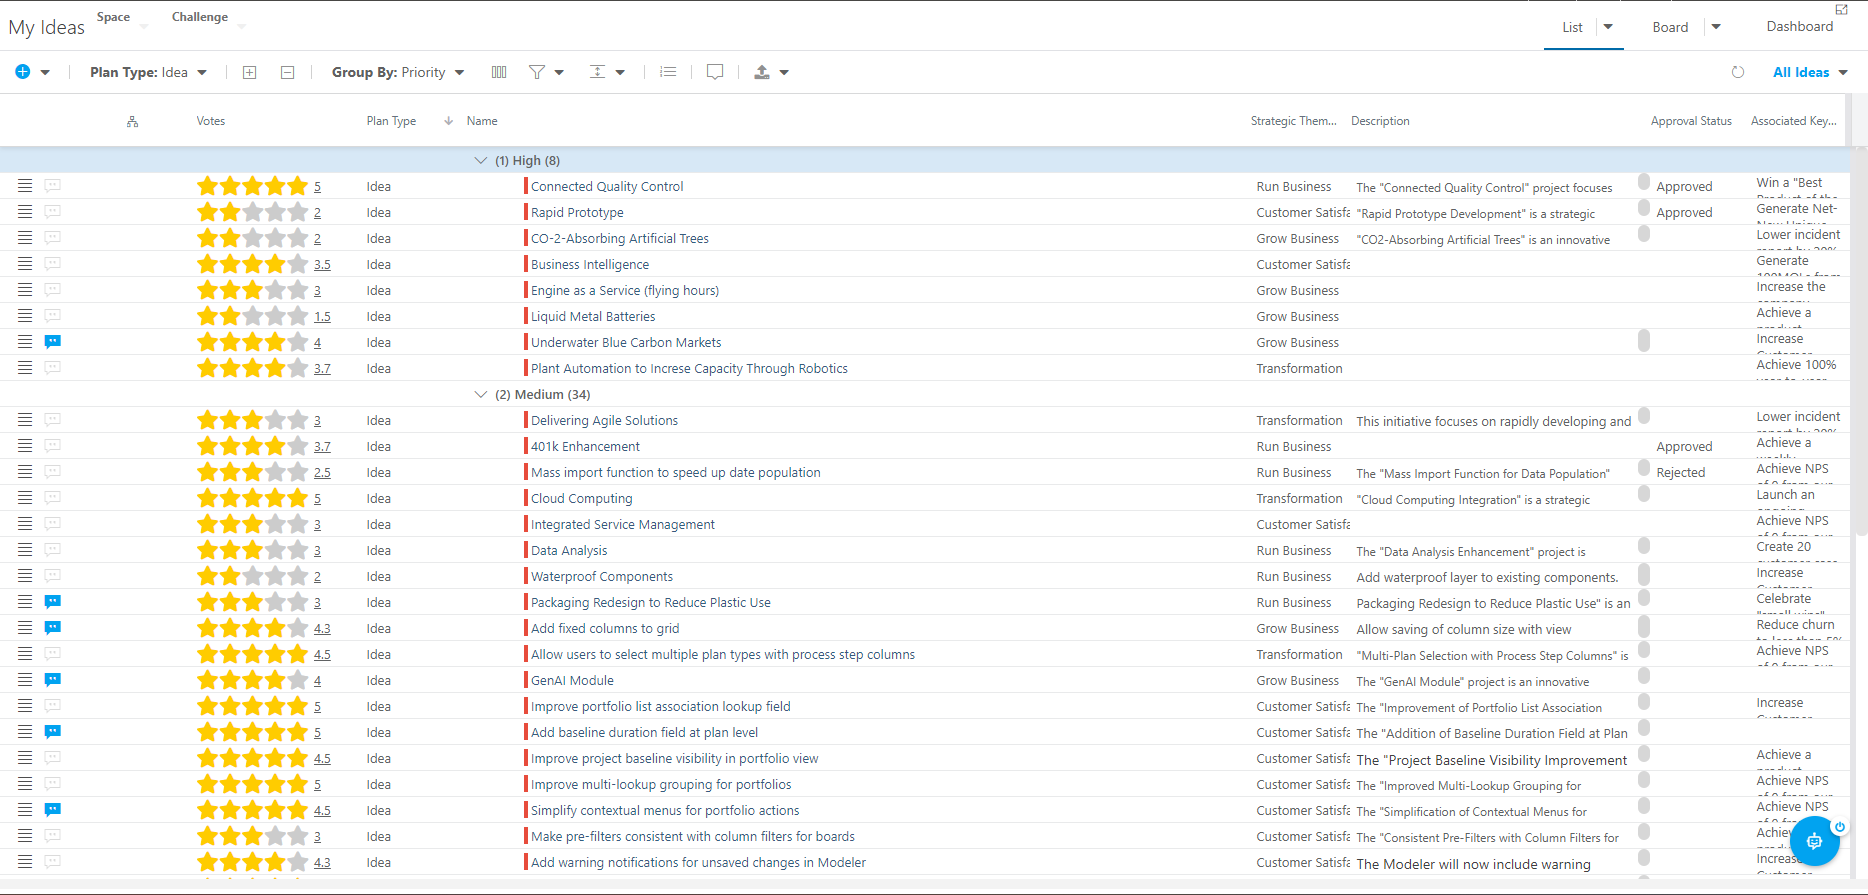
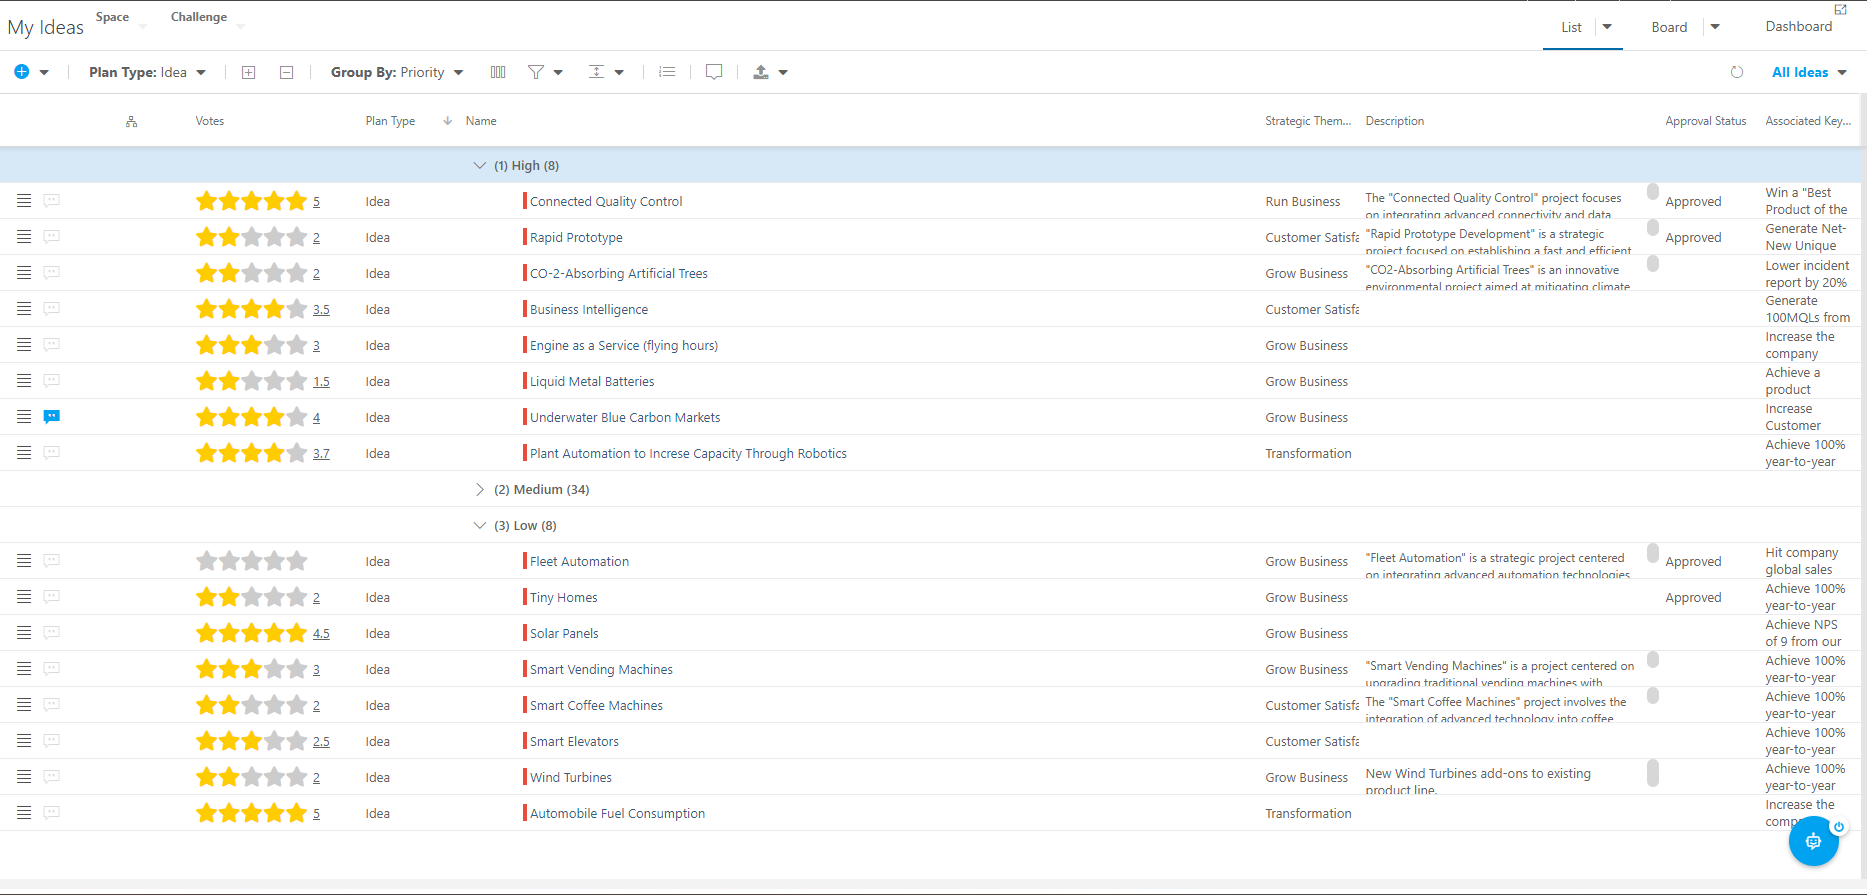
Add Grouping to the view to group items by a selected field. Click the Group By menu, and select the field you would like to group items in the view by.
In this example, I decided to group the items in my view by their Priority.
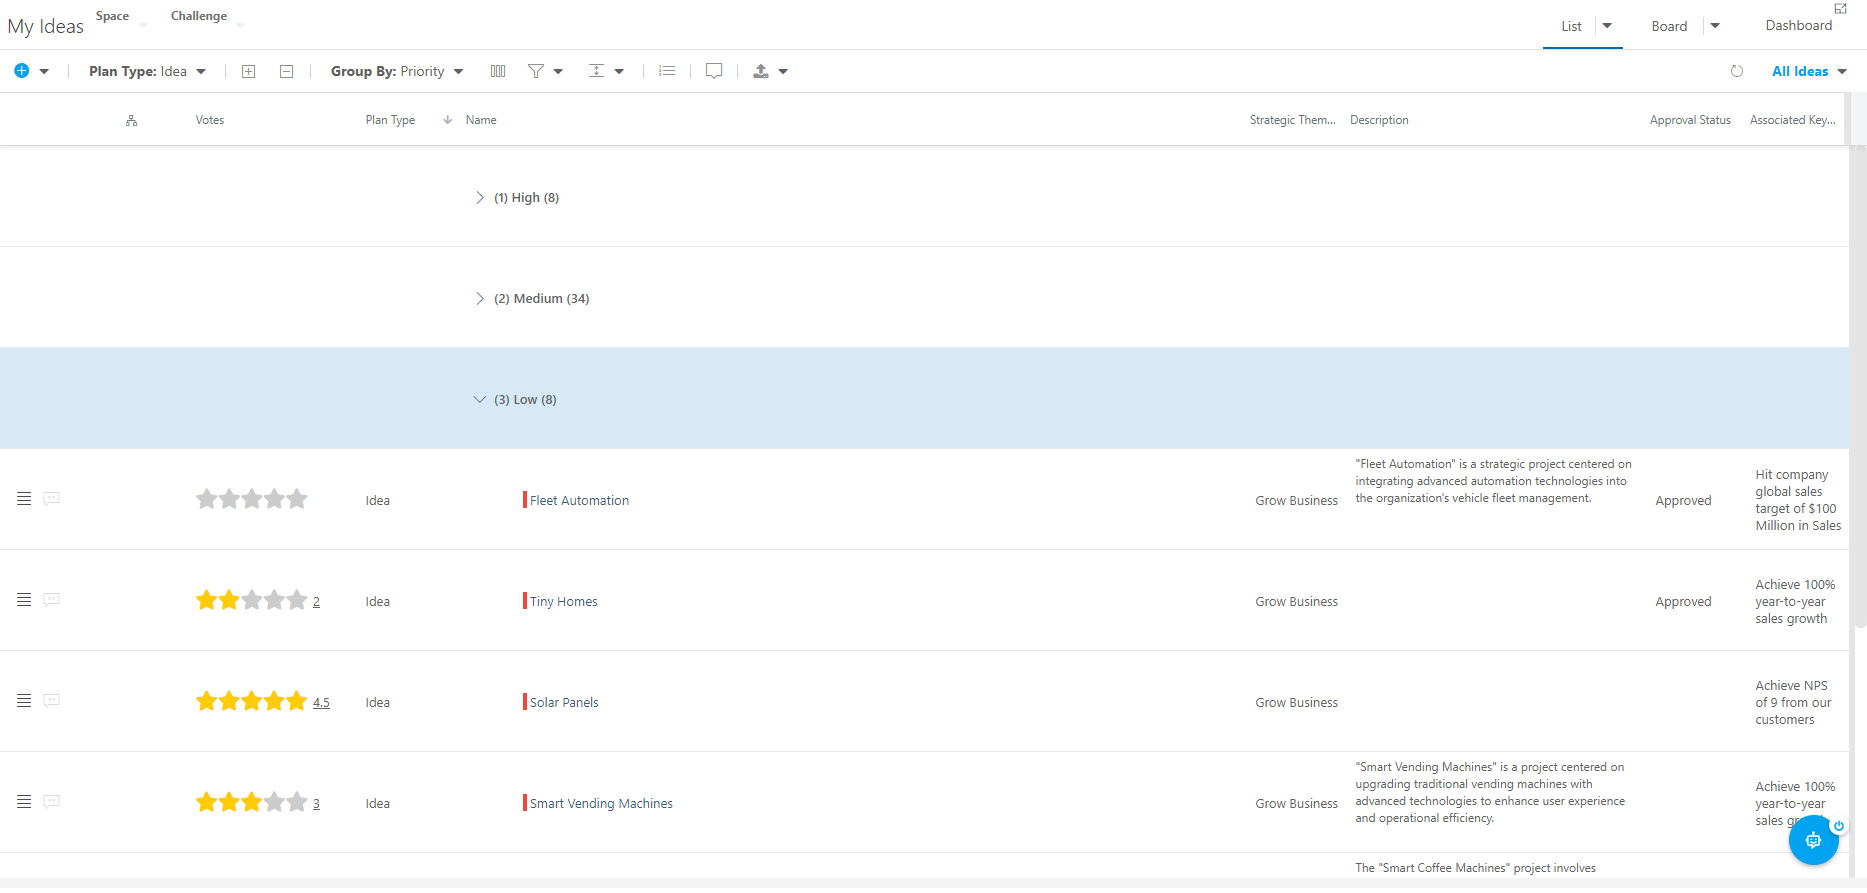
Here you can see the Priority grouping applied to the view.
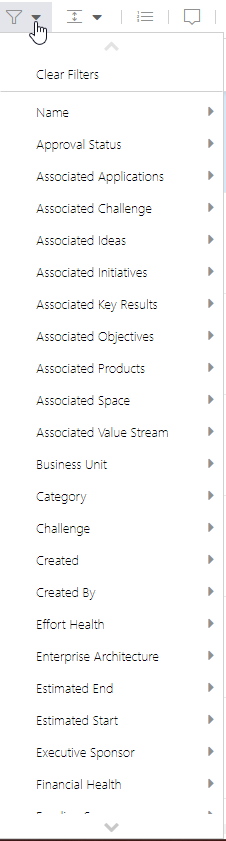
Add Filters to the view to reduce the number of items in the view. Click the Filters icon, then select the field(s) you would like to filter items in the area on.
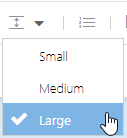
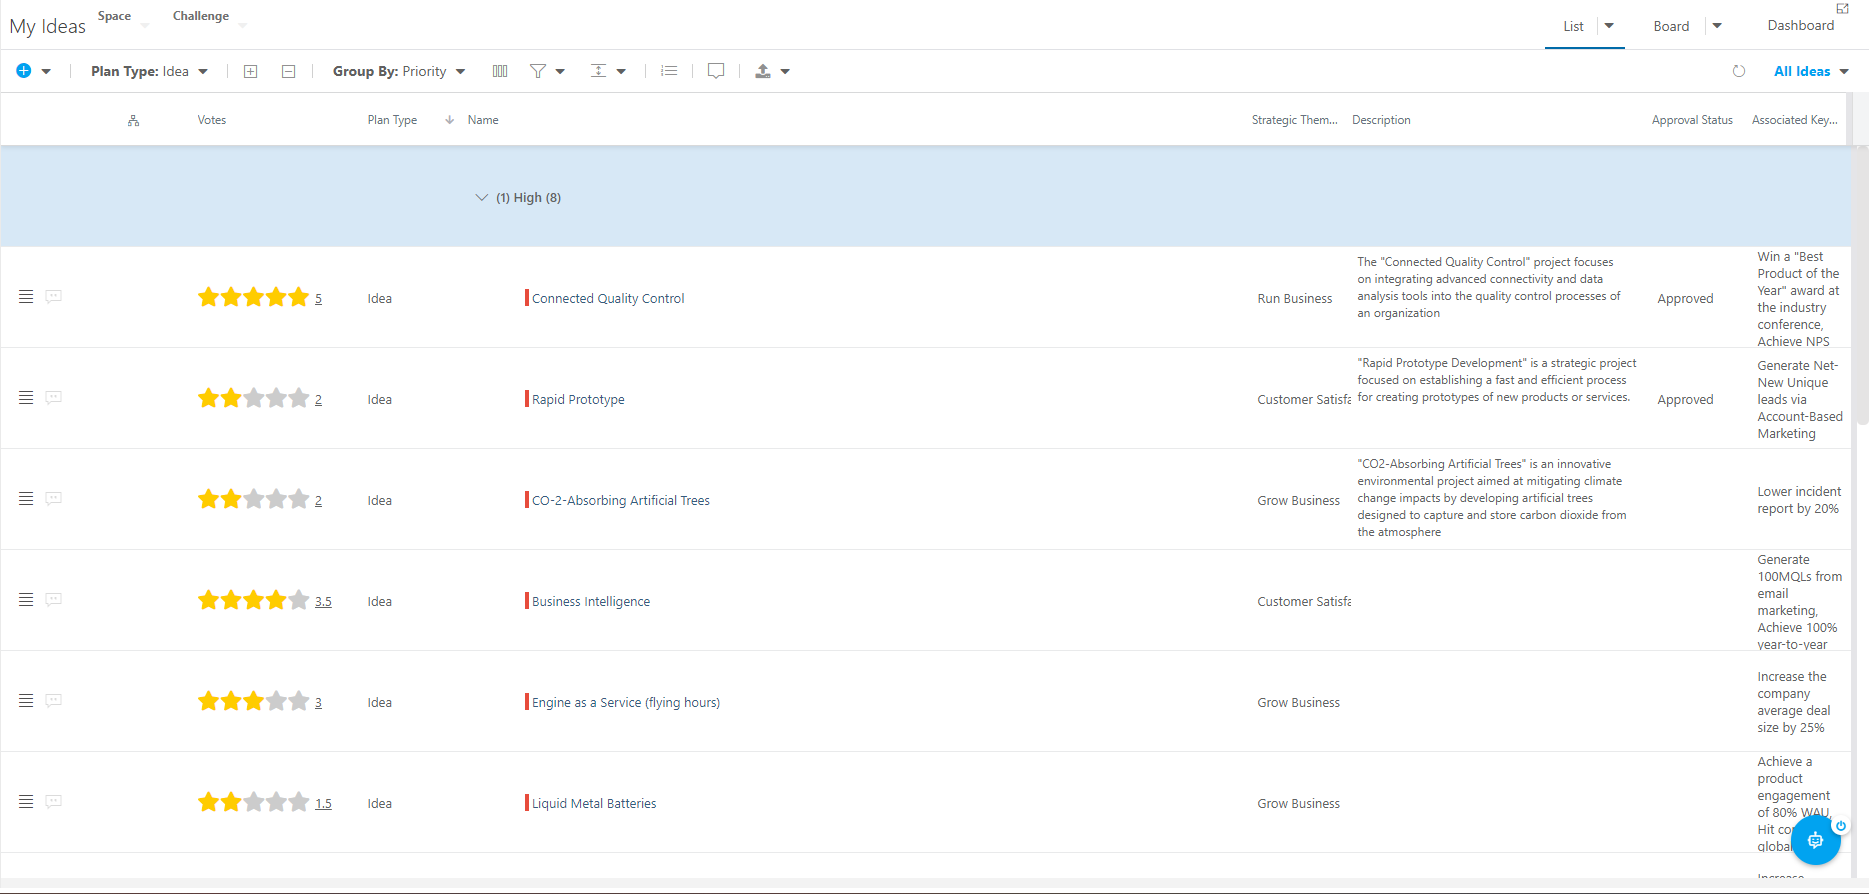
Set the row height. Click the Row Height icon, then select the desired height. Options include Small, Medium, and Large.
Small row height looks like this:
Medium row height looks like this:
Large row height looks like this:
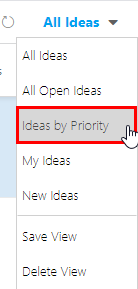
Save the current view for other users to utilize. Click on the Views menu, then select Save View. The Save View form will open.
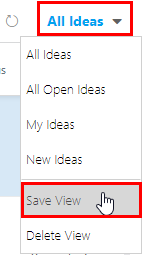
Give your view a name, leave the Personal View check box blank as this will be a global view for all users to utilize, and check the phishing email check box if this view should be the default view for the area. Then click Save.

The new view will now be available from the Views menu.
Configure Plan-Level Notifications for the Innovation App
Since the Innovation App is an additional module that sits on top of the portfolio plan architecture, you can use a lot of the functionality that is available in the Portfolio area, including plan-level notifications for the various plans in the Innovation App area.
See Create and Manage Plan-Level Notifications for instructions.
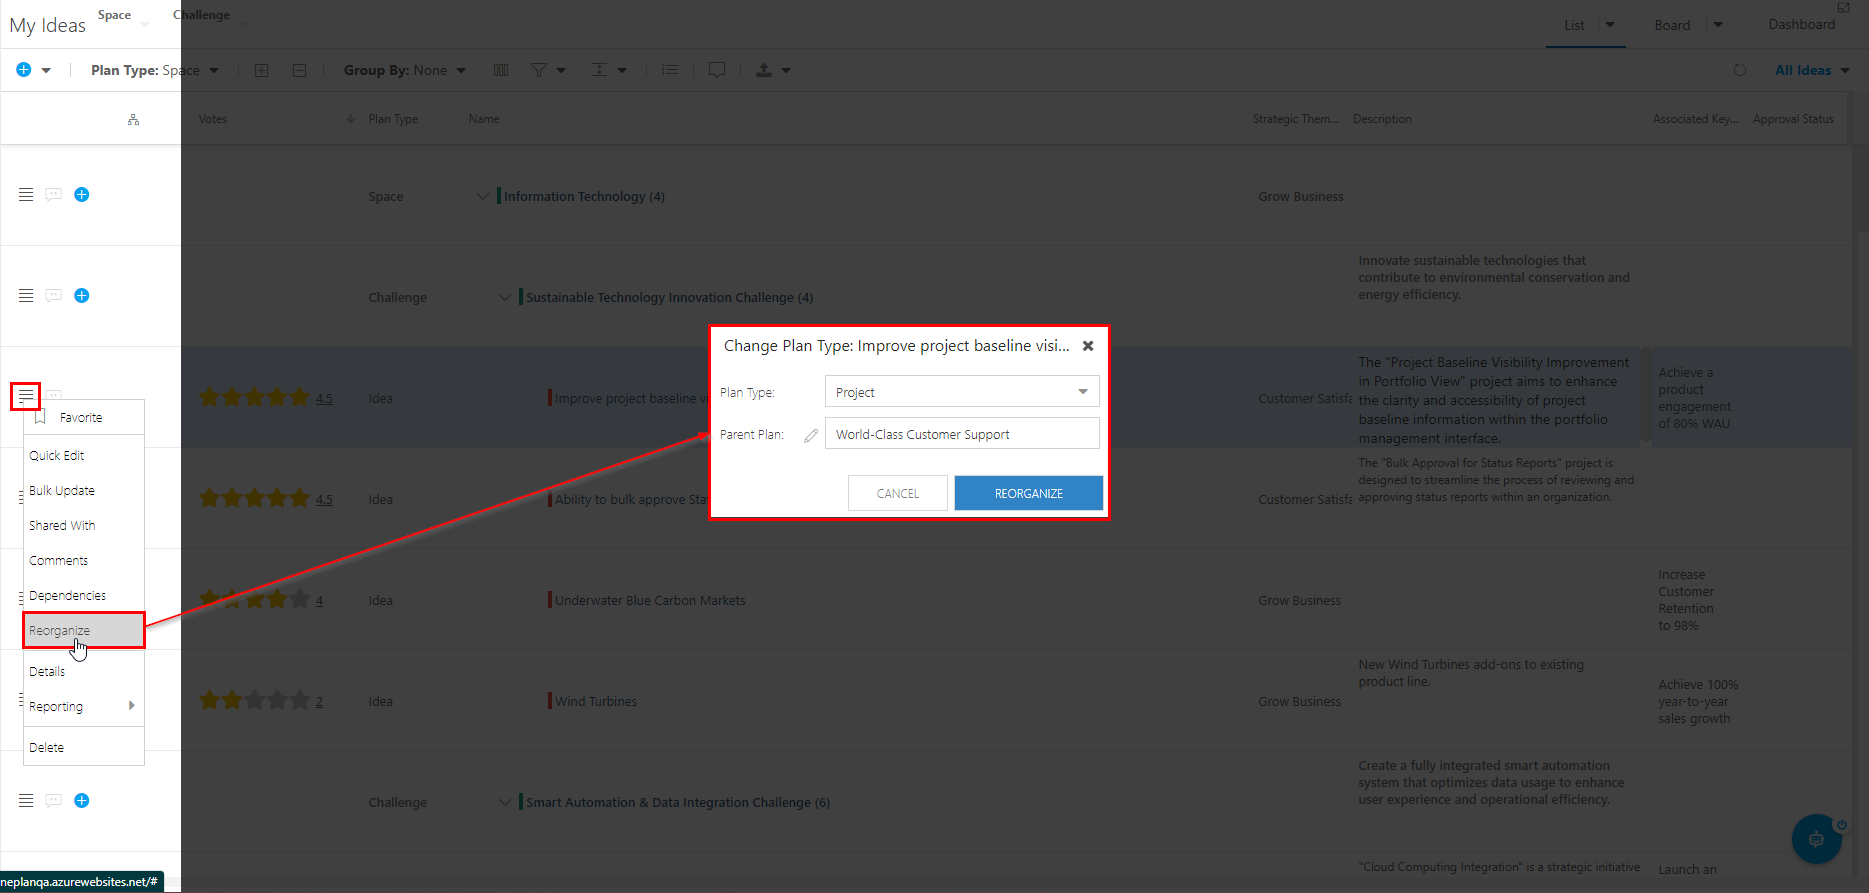
Reorganize or Convert an Idea to Another Plan Type
Once you have reviewed all Ideas (or your organization's preferred plan type), you will likely want to create project plans around the most popular Ideas. In OnePlan, there are a couple of methods to kick off this process.
You can Reorganize the item into another plan type, such as a Project. Click on the contextual (hamburger) menu > Reorganize. Then select the Plan Type you would like to change the Idea into and its parent plan. Then click Reorganize to change the plan type. Reorganizing will completely move the item and all of its data into the new plan type and location in your OnePlan group. There will be no historical data about its origin.
You can also Convert the item into another plan type if plan conversions are configured for your OnePlan group. See Convert a Request into a Plan for instructions. Conversions will leave the original item in place and create a new item of the desired plan type. You can configure links between the two to maintain a historical record of that item's progression.