Manage the Timesheet Settings
This article explains how to configure the timesheet settings for OnePlan. This requires the app 'Time Plan' is installed.
Go to the Admin pages, select Time Plan in the navigation.
Time management
Expand the Time Management topic heading.
In the Time Management topic heading, you can configure time classes and time periods for your timesheets.
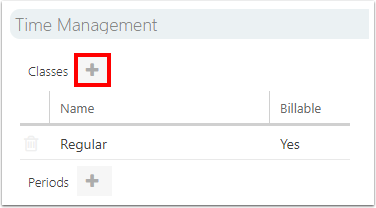
Add a Class
By default, all time goes into one class: Regular. If required, you can create multiple time classes. Once configured, the time classes are visible in the timesheet.
The alternative to timesheet class types would be to use Timesheet Fields. See Create and Manage Timesheet Fields.
To add a time class:
Click the Add Class icon (+).
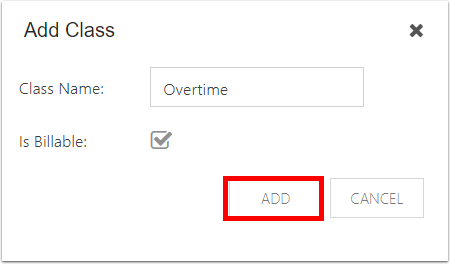
The Add Class form will pop up. Complete the form.
Class Name: Enter the name of your new time class, such as "Overtime".
Is Billable: Check the check box if time recorded in this new time class is billable.
Click ADD.
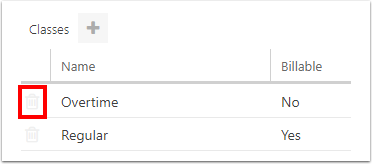
In the timesheet, the new time class should be visible for each class will show for each day in the timesheet period.

Remove a Class
To remove a time class, click on the Remove icon.
Periods
See Create and Manage Timesheet Periods for instructions and details for creating and managing timesheet periods.
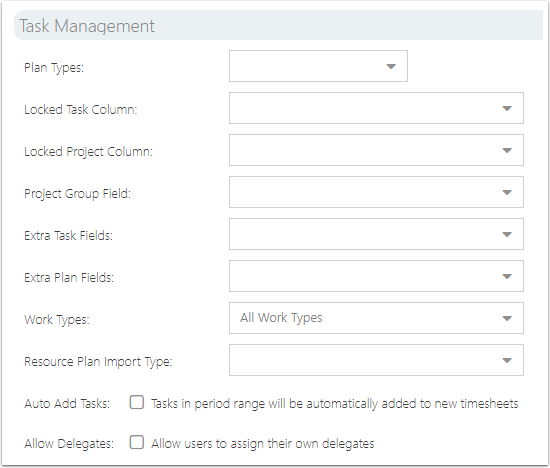
Task Management
Expand the Task Management topic heading. Make selections for the following, if applicable.
Plan Types: Select plan types to pull tasks from in the timesheet.
Locked Task Column: Select a Yes/No task-level field. When that field is set to yes, the task will be locked in the timesheet.
Locked Plan Column: Select a Yes/No plan-level field. When that field is set to yes, the plan (& all tasks for that plan) will be locked in the timesheet.
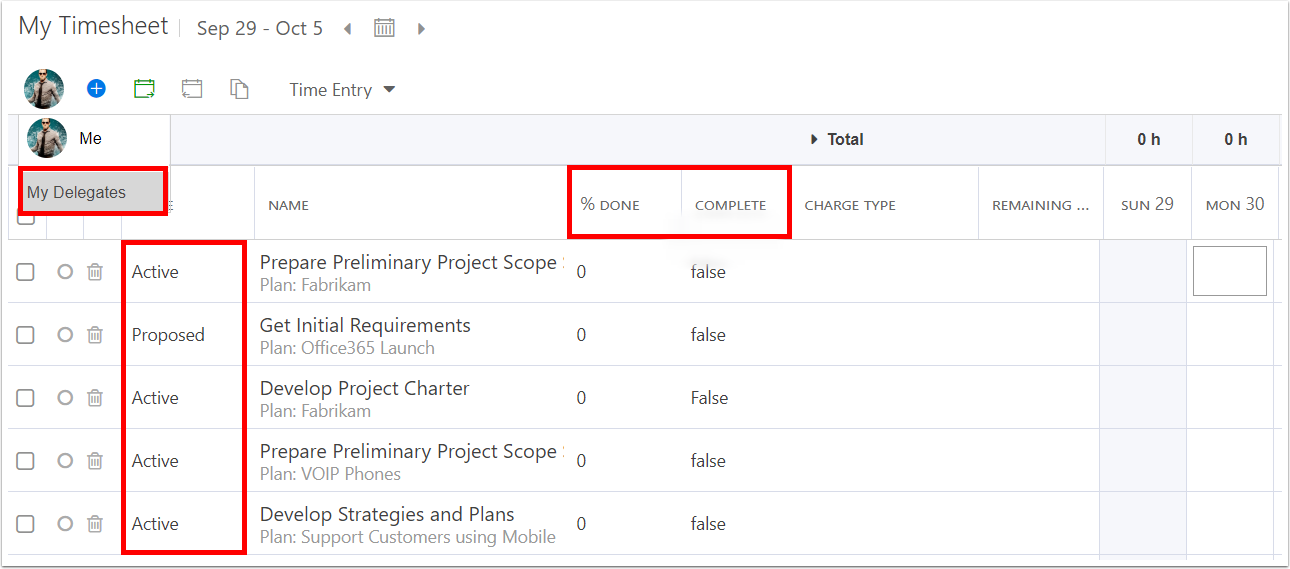
Project Group Field: Select a project-level field to show as an additional column in the timesheet.
Extra Task Fields: Select one or more task-level fields to show in the timesheet. These are for reference (read-only) purposes only.
Extra Plan Fields: Select one or more plan-level fields to show in the timesheet. These are for reference (read-only) purposes only.
Work Types: Select one or more work types to allow in the timesheet. Default is All Work Types.
Resource Plan Import Type: Select a cost type from the drop down. Use this field if you are not using the work planner to assign tasks. This allows users to import plans into their timesheet if they are in the plan's resource plan.
Auto Add Tasks: Check the check box to automatically add tasks in a period range to new timesheets.
Allow Delegates: Check the check box to allow users to assign their own delegates. When allowed, a user can open the My Delegates window to assign user(s) as entry & approval delegates.
Totals
Expand the Totals topic heading. Make selections for the following, if applicable.
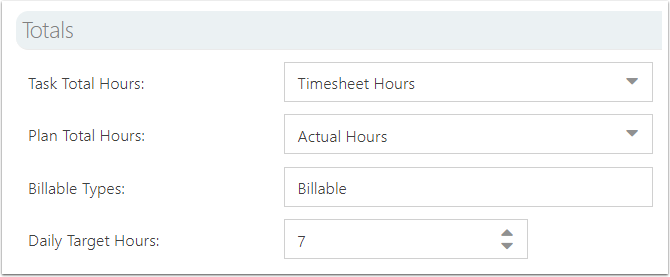
Task Total Hours: Select a task-level field where the total hours for a task will show on the schedule pages.
Note
Task Total hours must use a number field.
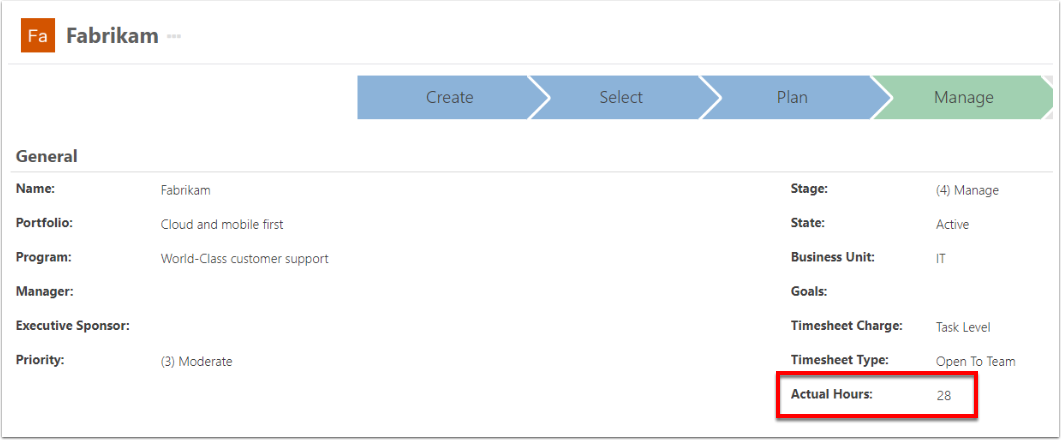
Plan Total Hours: Select a plan-level field where the total hours for a plan will show on the plan details page, portfolios page, etc.
Note
Plan Total hours must use a number field.
Billable Types: Enter one or more field values for which hours are to be counted toward the utilization percentage graph. For more information about configuring the billable settings together see Manage Timesheet Billable Settings.
Daily Target Hours: This number is the basis for 100% on the Utilization graph on the timesheets entry page.
NOTE: The Utilization graph can go over 100%.
Plan Total Hours
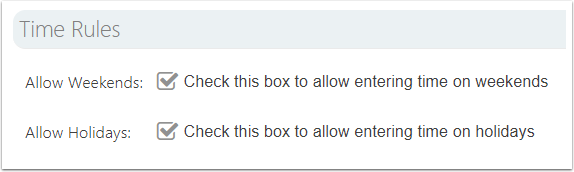
Time rules
Expand the Time Rules topics heading. Make selections for the following, if applicable.
Allow Weekends: Check the check box to allow users to enter time on weekends (Saturdays & Sundays).
Allow Holidays: Check the check box to allow users to enter time on holidays (holidays are managed on the Calendars page: How do I manage the calendar?).
Enable Classes
Enable classes to set different timesheet rules for different resource classes, such as full time and part time employees.
If there are timesheet classes enabled, a resource-level class field shows in the Resource Center. Each resource would need to be associated to a class in the Resource Center. See How do I edit a resource? Then, the specified warnings and/or blocks will apply to that class of resource when submitting time in their timesheets.
NOTE: If no timesheet classes are configured, the timesheet rules apply to all resources.
To enable and create timesheet classes:
Click Enable Classes. Select YES in the warning pop up to continue.
Click Add Class to add a timesheet class.
Enter the class name and details.
Class: Type in the name of the new class.
Daily Soft Min: Enter the minimum number of hours to be entered in per day. The soft minimum give users a warning when submitting a timesheet with fewer hours than prescribed here.
Daily Hard Min: Enter the minimum number of hours to be entered in per day. The hard minimum blocks users from submitting a timesheet with fewer hours than prescribed here.
Daily Soft Max: Enter the minimum number of hours to be entered in per day. The soft maximum gives users a warning when submitting a timesheet with more hours than prescribed here.
Daily Hard Max: Enter the maximum number of hours to be entered in per day. The hard maximum blocks users from submitting a timesheet with more hours than prescribed here.
Period Averaging: Check the check box to take the daily working day hourly averages (per period).
Daily Utilization Target: Enter the target/ideal number of hours to be entered per day.
Repeat steps 2-3 to create as many classes as required.
Click Save to save the classes.


Fields
See Create and Manage Timesheet Fields for instructions and details on creating and managing timesheet fields.
Workflow
See Manage Timesheet Approvals Workflows for instructions and details on workflow approvals settings.
Reporting
Expand the Reporting topics heading. Add a link to a Power BI report directly into the timesheet. Paste the URL to the desired Power BI report into the Power BI Report URL field.
