Create and Edit Plan Fields
This article explains how to create and edit plan fields. Plan fields are top-level metadata fields that show on the Plan Details page and Portfolios page.
Note
Some fields may be created automatically upon installing certain apps. For example, when the Timesheets app, Backlog List app, etc.
Create a New Plan Field
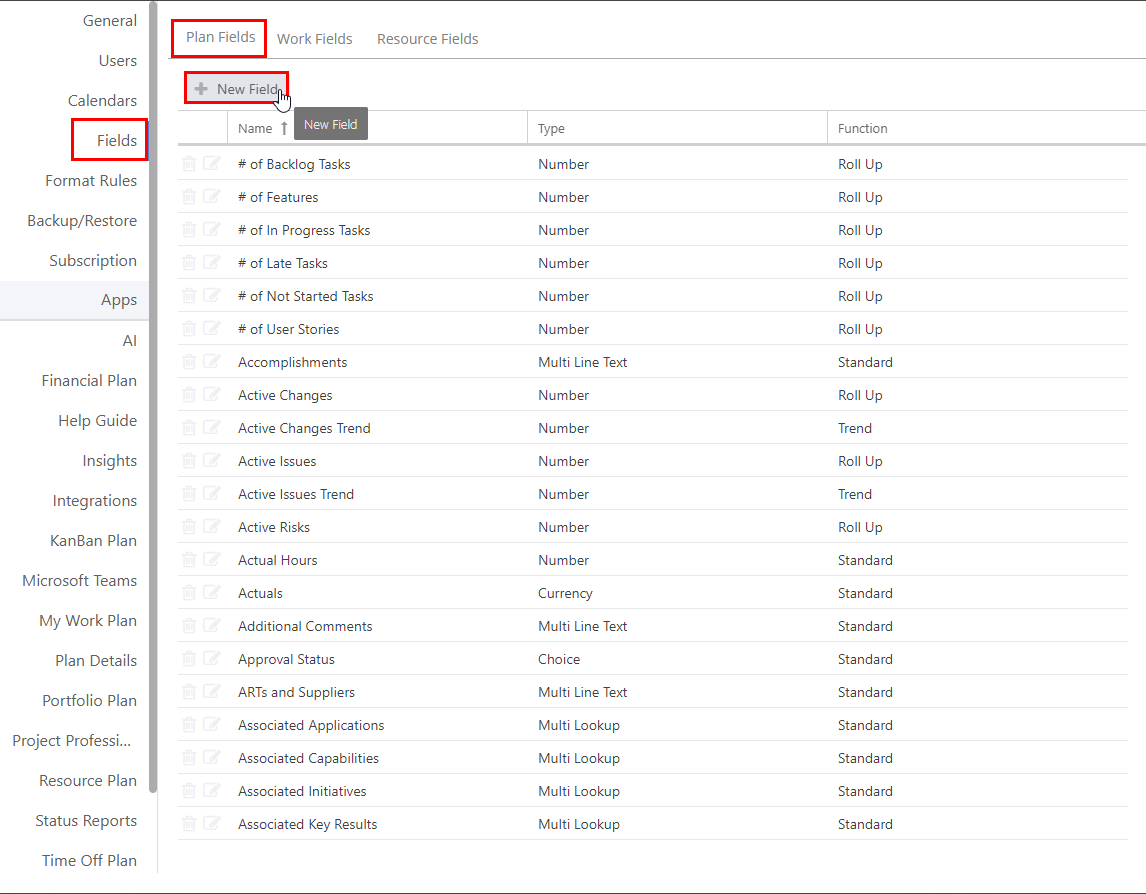
Go to the Admin pages, select Fields in the navigation. Then, click on the Plan Fields tab.
Click the New Field button. The New Plan Field form will open.
Complete the New Plan Field form.
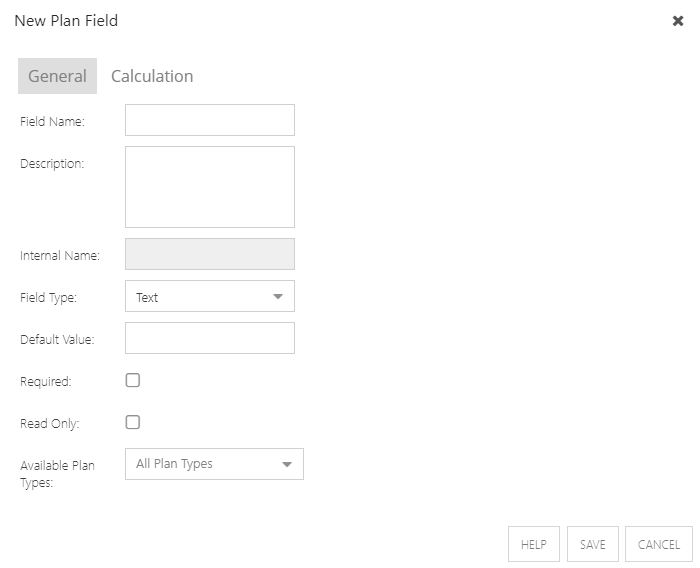
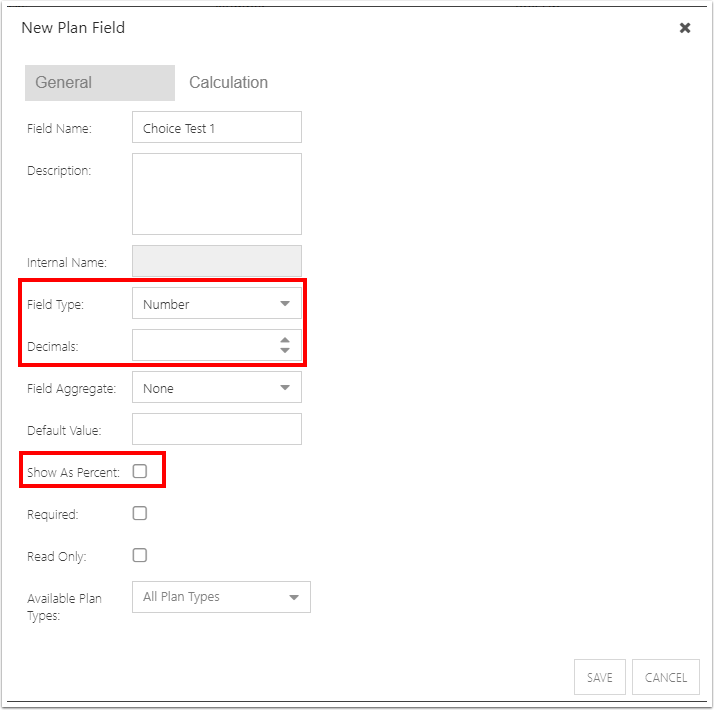
Complete the General tab of the form.
Field Name: Enter a name for the field.
Description: Enter a description of the field function, or how the user should interact with the field. This text will appear as a tooltip when a user interacts with the field.
Internal Name: Will display the internal (back-end) field name when applicable. This field will auto-populate once you save the new field.
Field Type: Select the field type. See Plan Field Types for more details.
Default Value: Enter a default value if applicable.
Required: Check the check box if the field is required.
Read Only: Check the check box if the field is read-only.
Available Plan Types: Select one or more plan types where the field is available. If no plan type is selected, it will be available for all plan types.
(Optional) If you would like the new plan field to be a calculated field, complete the Calculation tab of the form. See Manage Field Calculations for instructions on configuring field calculations.
Once the field configuration is complete, click Save.
Plan Field Types
Text: Users can enter one line of free form text.
Date: Users can select a date from a calendar pop up.
Number: Users can enter a numeric value. The admin can set how many decimal places are allowed. See Number Fields for more detail.
Currency: Select a currency. The admin can set up multiple currencies if your organization works cross-nationally. To configure currencies and exchange rates, see What are the advanced Financial Plan settings?
YesNo: Users can check a check box to indicate Yes or No.
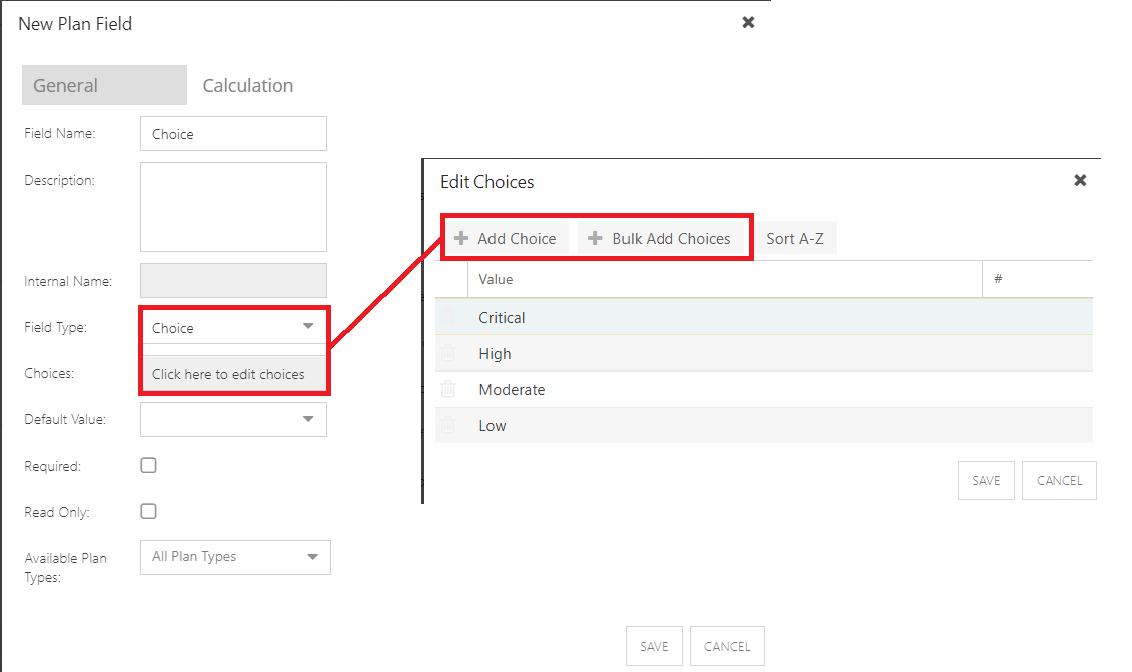
Choice: Enter choices. See Choice Fields for more detail.
User: People picker field, tied to user accounts
Multi Choice: Multi Choice fields allow users to select multiple options from the choice options available.
Multi Line Text: Users can enter multiple lines of free text.
Lookup: Users can create relationships between plans in the system.
Multi Lookup: Users can create relationships between plans in the system.
Hyperlink: Users can insert a hyperlink to easily access resources from the internet.
Image: Users can insert a link to an image that is publicly available on the internet. The image will display when the field is used.
For additional details about the Lookup fields types, refer to the article: How do I configure lookup fields?
Field Aggregate
Based on the field type selected, the Field Aggregate may show.
For date fields, select No, Min, or Max.
For number and currency fields, select None, Sum, Average, Min or Max.
Choice Fields
You may manually enter each choice field, or bulk upload the choices.
Multi Choice Fields
Multi Choice fields are configured just like regular choice fields. You may manually enter each choice field, or bulk upload the choices.
Number Fields
If the field type is Number, you may specify the number of decimal places allowed (between 0-5) and whether to show the number as a percent.
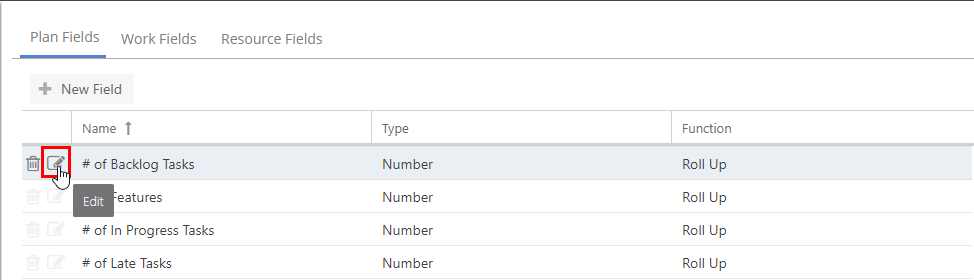
Update a Plan Field
Note
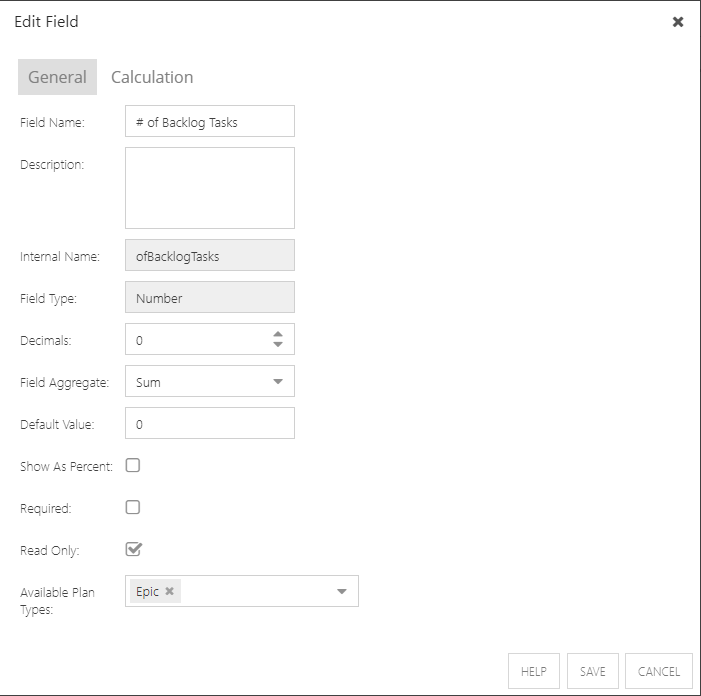
The field type cannot be edited after a field is created.
Click the Edit icon next to the plan field you would like to update. The Edit Field form will open.
Complete the Edit Field form.
Once the field updates are complete, click Save.
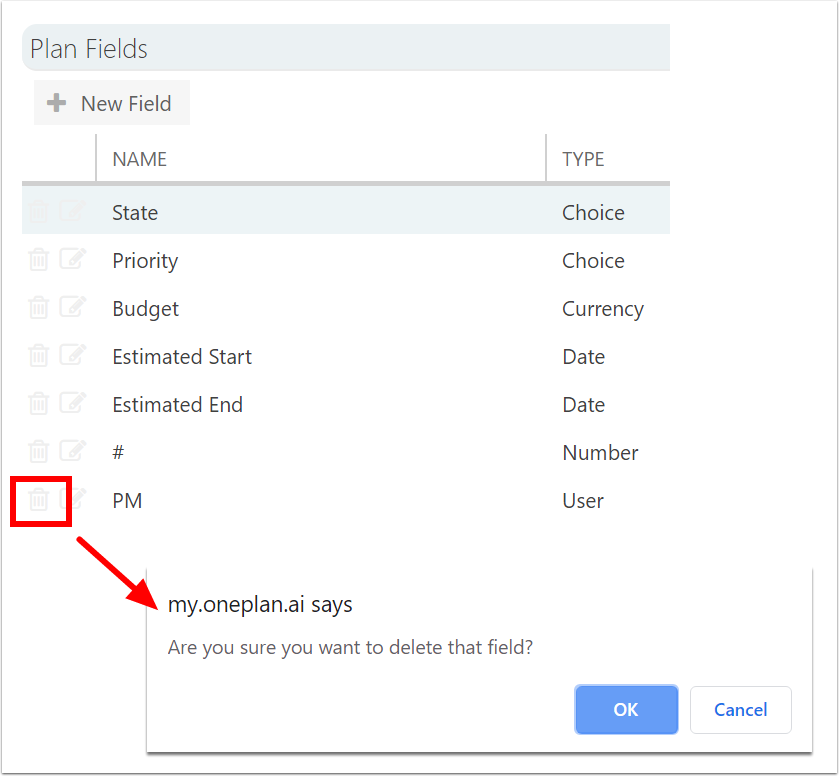
Delete a Plan Field
Warning
If you delete a field, any data entered in that field will also be deleted. So, be sure you are certain you want to delete it before you delete a field.
Click the Delete trash can icon to delete a field. Confirm deletion.