Create and Manage Timesheet Periods
This article explains how to create and manage timesheet periods for OnePlan. This requires the app 'Time Plan' is installed.
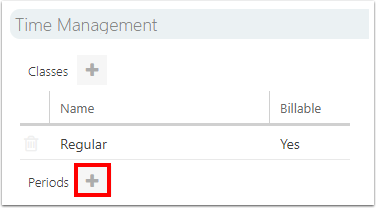
Go to the Admin pages, select Time Plan in the navigation.
Add Timesheet Periods
When the Time Plan app is installed, the Timesheets feature is nearly ready to begin using. At minimum, you must add timesheet periods. You may add them as single periods or bulk add. Be sure to create periods carefully as you go.
Do not create too many periods out in the future, as users will see the periods in the drop down for navigating and adding time. If you do create periods far out in the future, perhaps lock those periods so users can add time too far out in the future.
It is advised to INCLUDE weekend days in your periods. There is another separate Timesheet setting where you may allow/disallow time to be tracked on weekends. This way, if your organization changes its mind to allow in the future, the periods will not need to be deleted one-by-one and recreated.
To add a time period:
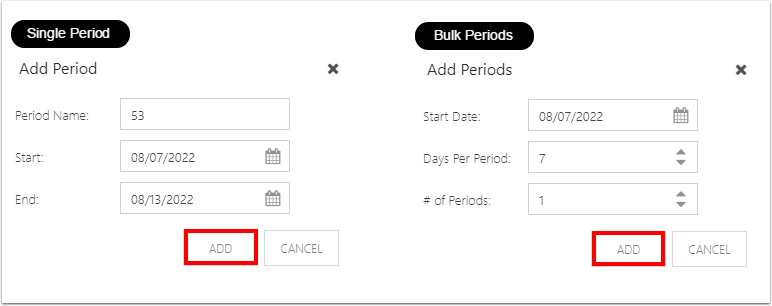
Click the Add Period icon (+).
Select the type of period to add from the dropdown. Select Single or Bulk.
The Add Period form will pop up. Complete the form.
Add a Single Period:
Period Name: Enter the name of the time period.
Start: Select the start date of the time period.
End: Select the end date of the time period.
Add Bulk Periods:
Start Date: Select the start date for the periods.
Days Per Period: Enter the number of days in each period.
# of Periods: Enter the number of periods.
Click ADD.
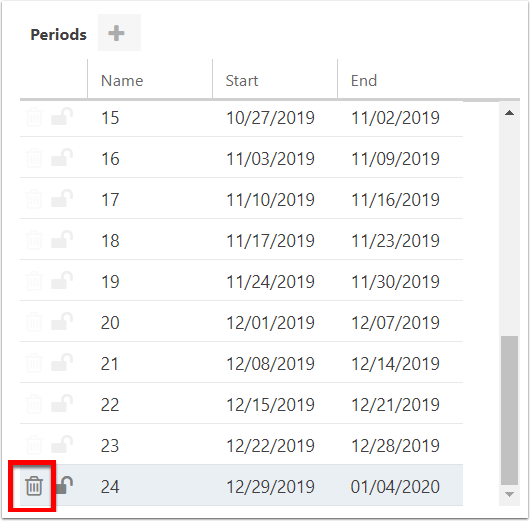
Delete Periods
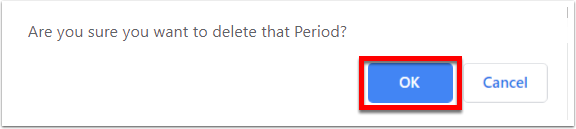
Timesheet periods cannot be edited. If needed, they can be deleted one at a time. Only the last timesheet period can be deleted. If you made a mistake in your creation or need to make a change, you may need to delete the last period. It is advisable to NOT delete periods with data, unless it was for training or testing purposes.
An example to delete a period could be at year's end, to have a shorter period so the year's data is contained. Delete the last period and create a single new period with the desired dates to finish at the end of the year.
Lock/Unlock Periods
Select a period to lock or unlock it. When periods are unlocked, the icon will show as an unlocked/open padlock. When locked, the icon will show as a locked/closed padlock.
When time for a specific period has been reviewed and/or approved, locking that period will prevent any changes be made to time. For example, once month-end review and invoicing for the previous month has been done, lock the previous month's timesheet periods.
Another example when to lock periods is if you have bulk added periods in the future, but don't want users to add time to future periods yet. You may lock the future periods.
Locked periods DO NOT show on the periods drop down.