Use the Visualizer Runway View
This article explains how to use the Runway view of the Visualizer module.
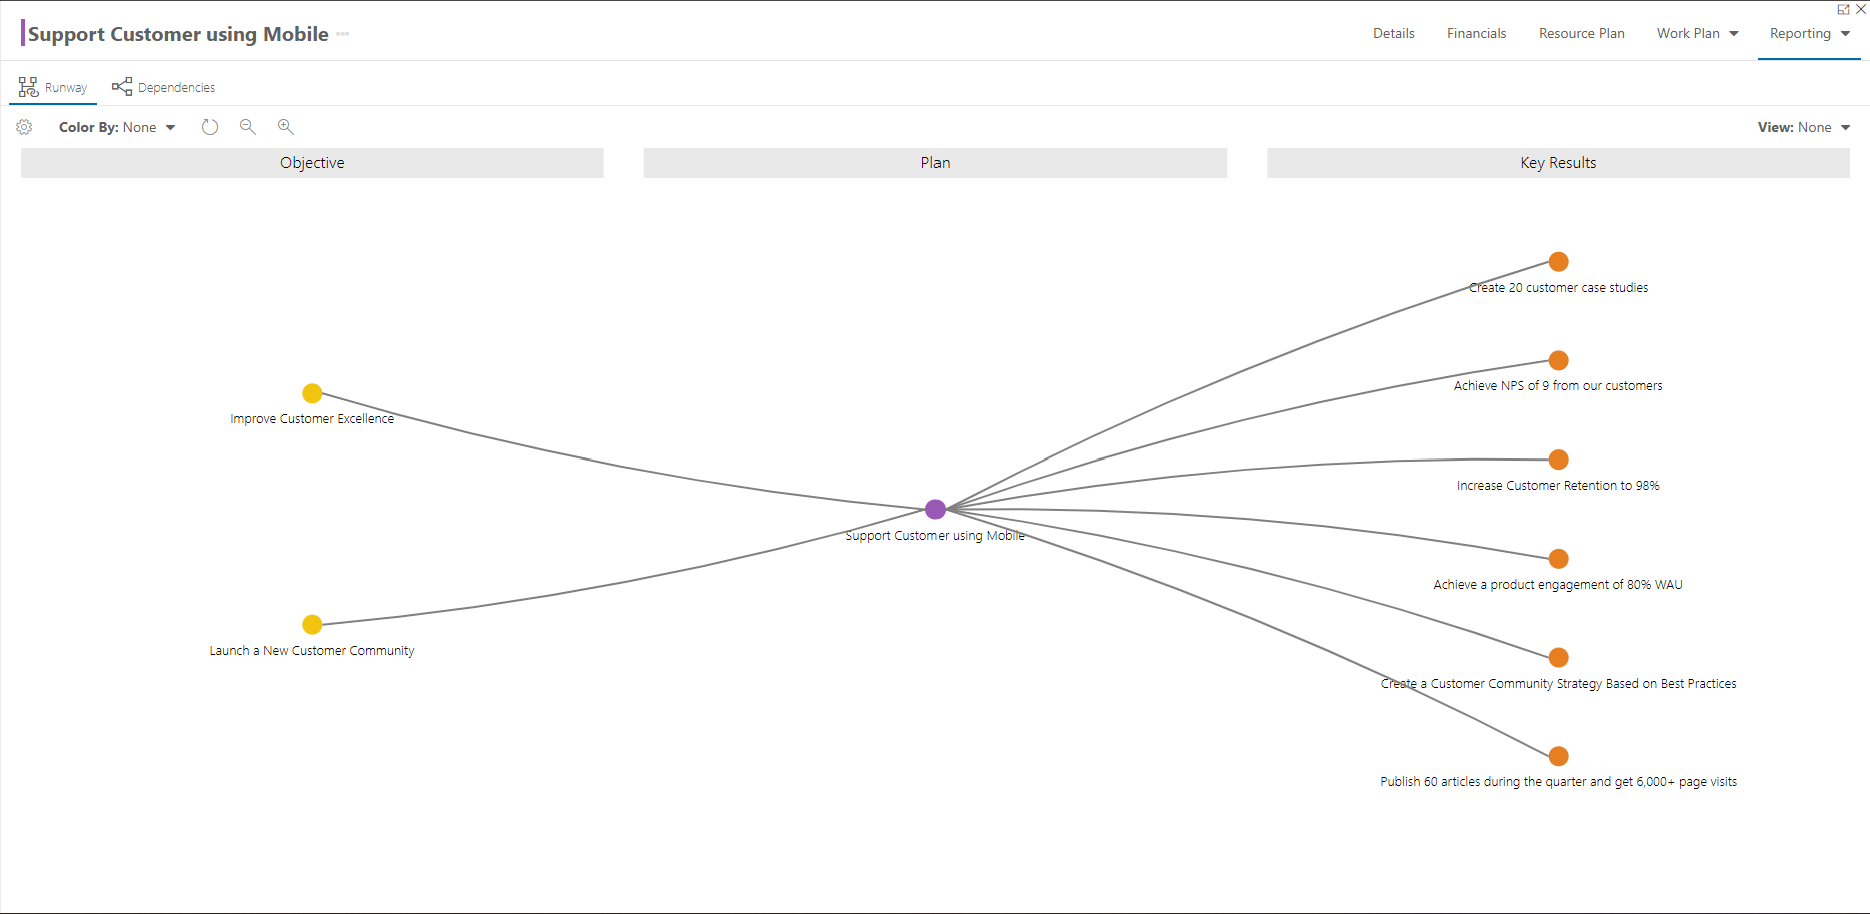
The Runway view allows you to better visualize relationships between other plans. For example, you could visualize all of the Objectives, Key Results, Value Streams, Products etc. that are associated to your Project.
The dots within each column represent a plan in your OnePlan portfolio.
The lines represent the relationship between the plans in your portfolio.

Configure the Columns
The columns in the Runway view are configurable so you can view the relationships that are important to you.
Add Columns
Click on the Configure icon
 . The Configure form will open.
Click the Add icon to create a new column. The Add Column form will open. Complete the form.
Display Name: Enter the display name for the new column.
Plan Types: Select the plan type(s) you would like to display.
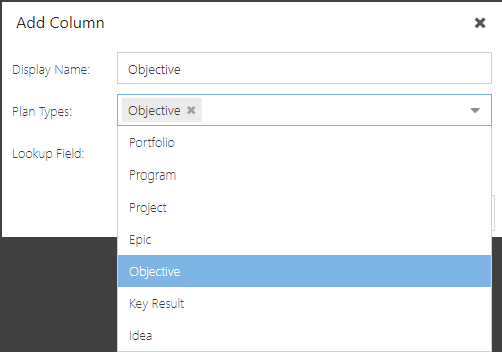
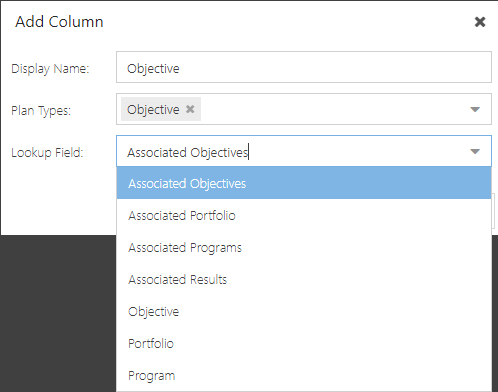
Lookup Field: Select the lookup field that associates your current plan with the selected plan type.
For example, I am adding an Objective column that will show objectives related to the current plan. These objectives are associated to the current plan through the Associated Objectives field.
Click Ok to create your new column.
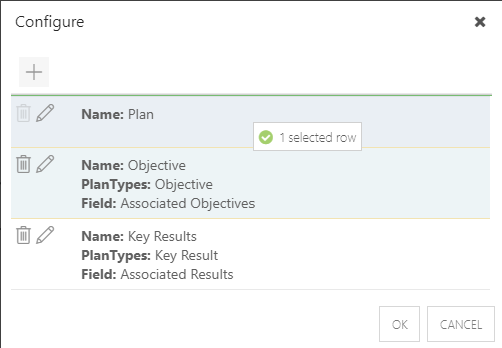
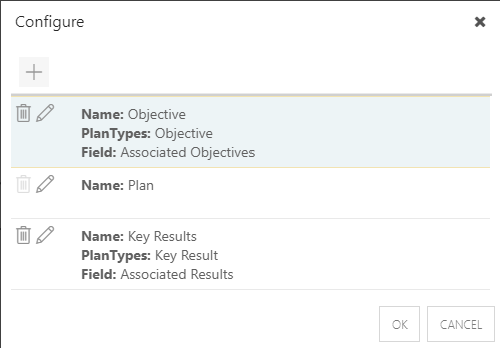
To rearrange the column display order, select a column from the Configure form, and drag and drop it into the desired location. The top column in the list will be on the left of the screen, and the last column will be on the right of the screen.
When your configuration is complete, click OK. Your new column configuration will display in the Visualizer.
Edit Columns
Click on the Configure icon
. The Configure form will open.You can drag and drop columns in the Configure form to update their display order.
To edit the details of a column, click the Edit icon
 next to the desired column. The Edit Column form will open.
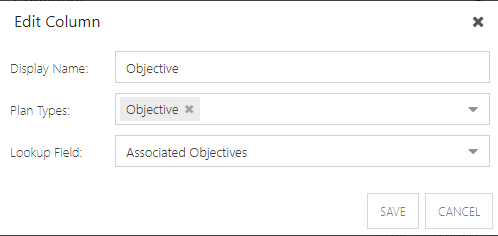
Update the column details as necessary. Click Save to apply the changes.
Custom Views
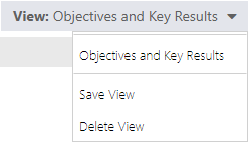
You can save custom views of the Visualizer for easy access using the Views menu.
Save Views
Complete Configure the Columns.
Click the Views menu, and select Save View.The Save View form will open.
Complete the Save View form.
View Name: Enter a name for the new view.
Default View: Check the check box if this will be the default view for the Visualizer.
Personal View: Check the check box if this is a personal view for your use only.
Click Save. The view will now be available for use from the Views menu.
Delete Views
Go to the Views menu and select a view. The view will load in the Visualizer.
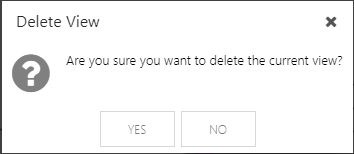
Go to the Views menu and select Delete View. A confirmation will pop up. Click Yes to delete the view.
Contextual Menu Actions
Click on a dot to access the contextual menu. From this menu, you can access the plan's Quick Edit form, or drill through for more dependency information.
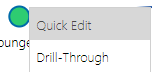
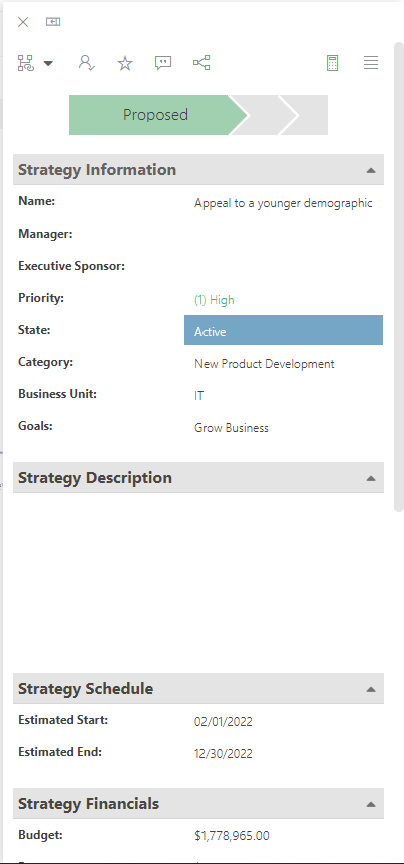
Quick Edit
Select Quick Edit from the contextual menu to open the Quick Edit form for the plan. The Quick Edit form will open on the right side of the screen.
Drill-Through
Select Drill-Through from the contextual menu to view the dependencies for the selected plan in the Visualizer. This will place the selected plan in the Plan column of the Visualizer, and display the plan's predecessors and successors.