Share a Plan
This article explains how to share a plan in OnePlan. OnePlan enables collaborative work by allowing you to share your plan with your team, and even coworkers who might not be part of your project team. In this article, we will discuss how to manage the users on your plans using OnePlan.
Video length - 2:19
Access Plan Shared With Information
There are many ways to access the Share With information for your plan.
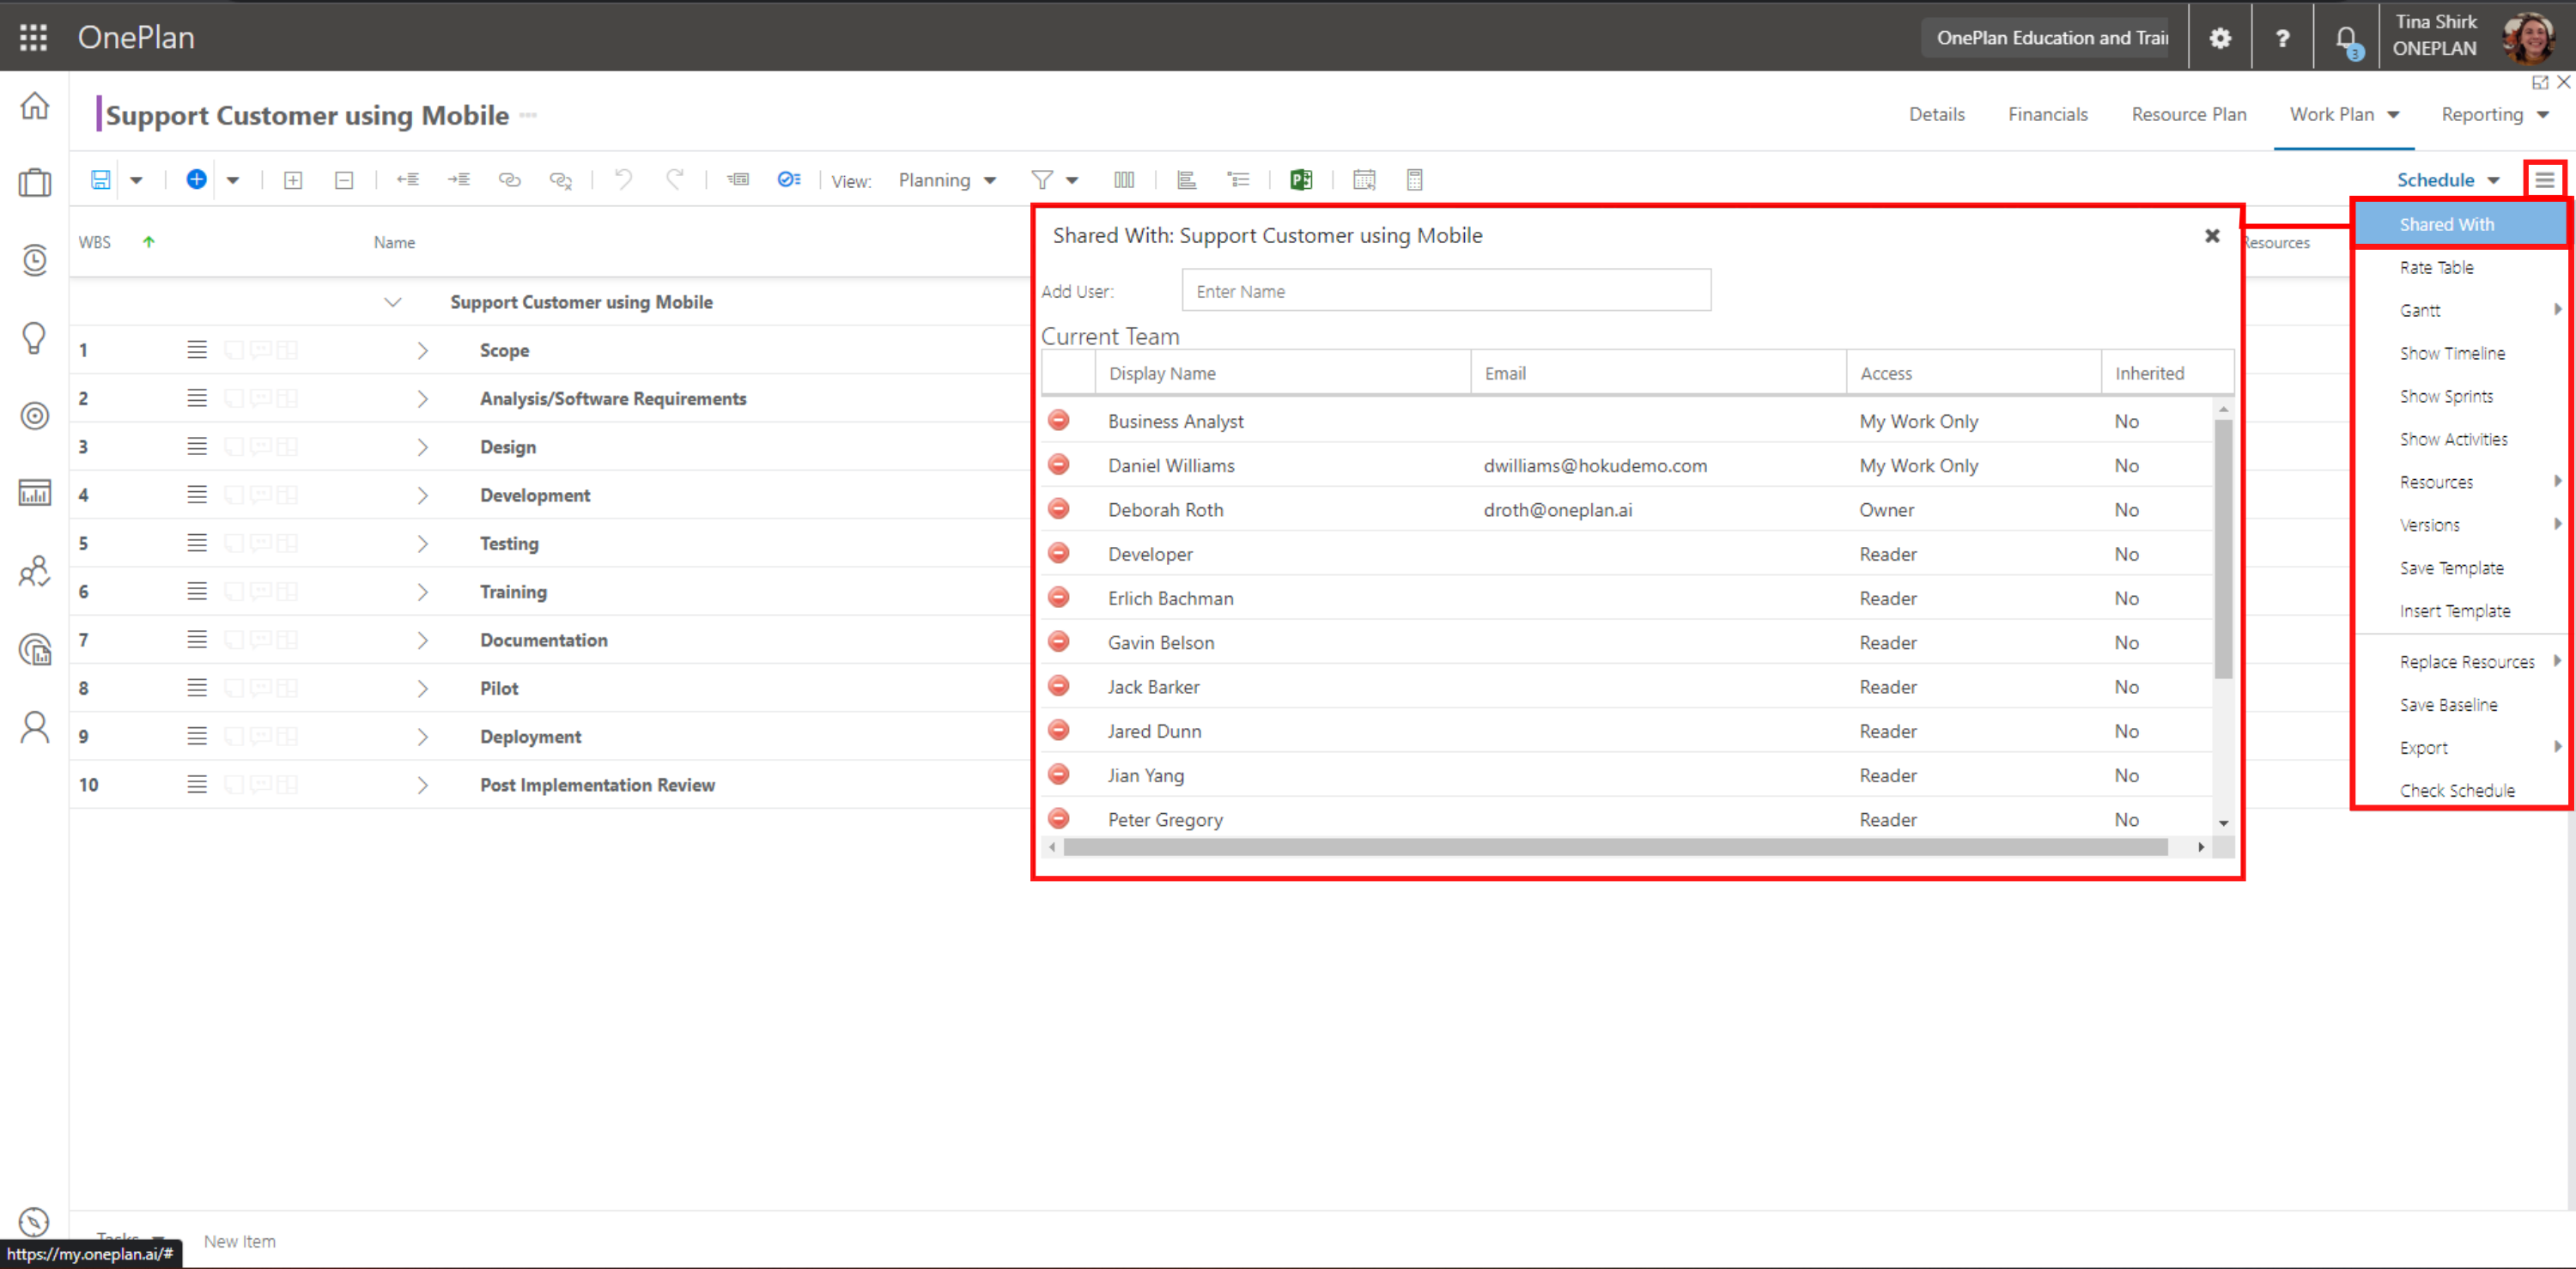
From the plan Work Plan list: Open the Grid Options menu. Select Shared With.
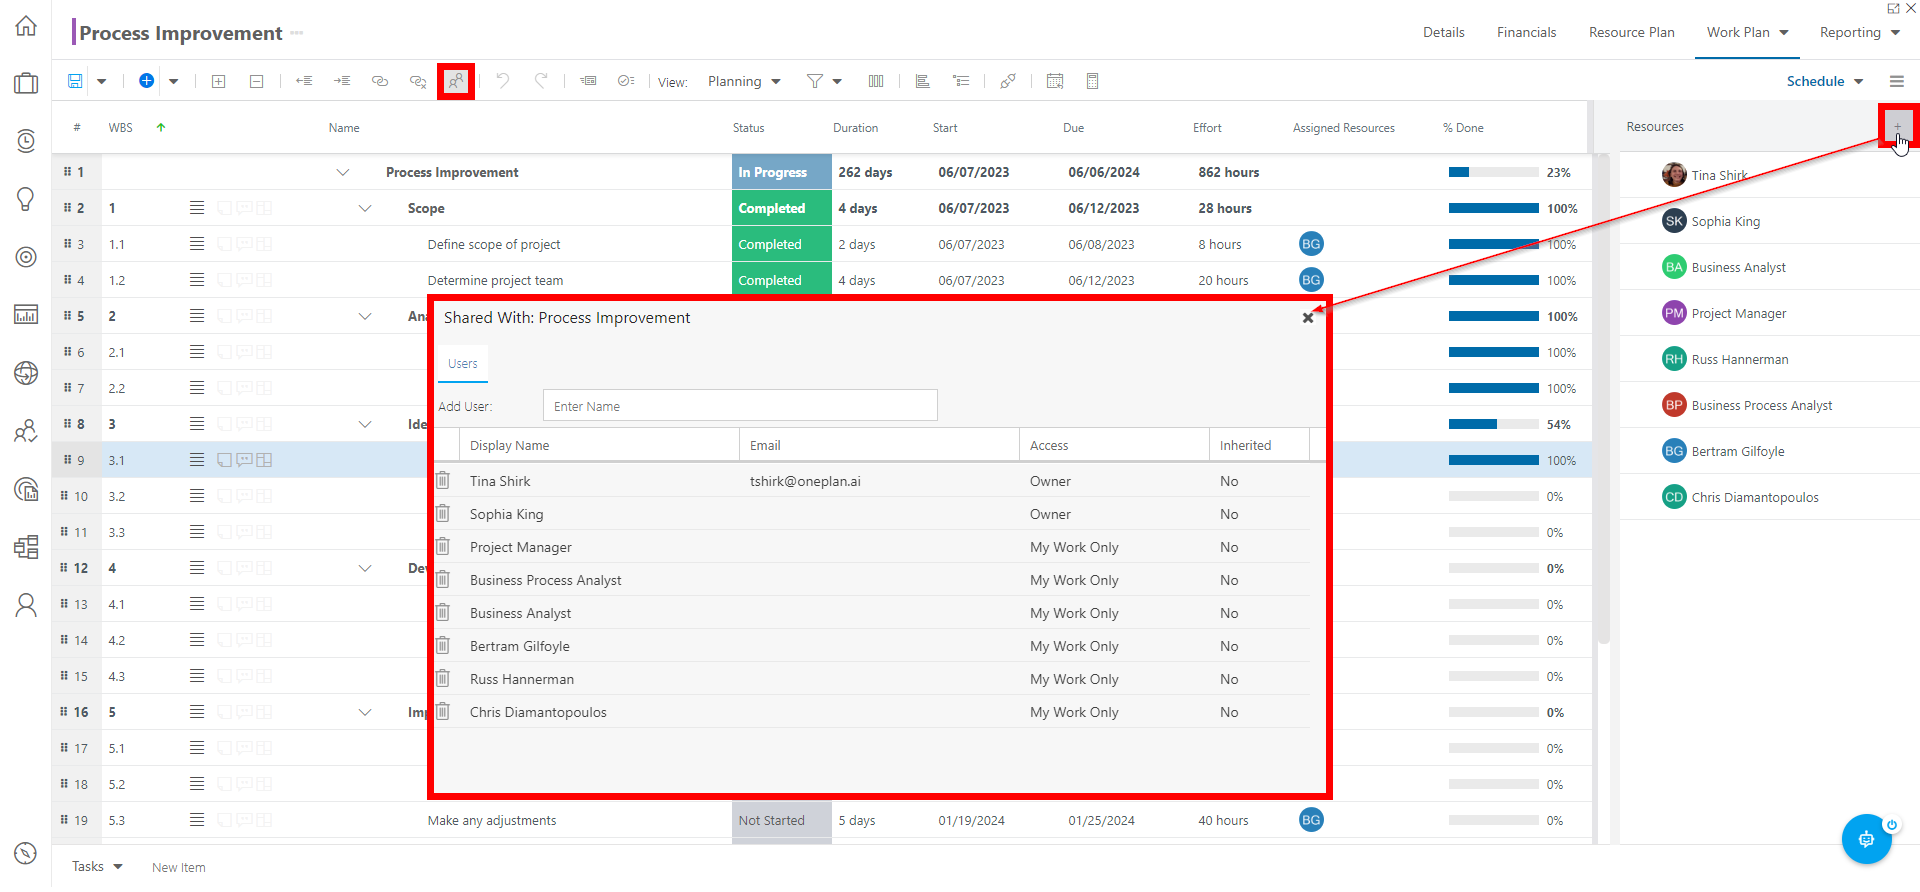
From the plan Resource Side Panel: Click on the Resources icon from the Work Plan header. Then click the (+) icon to open the Share With form.
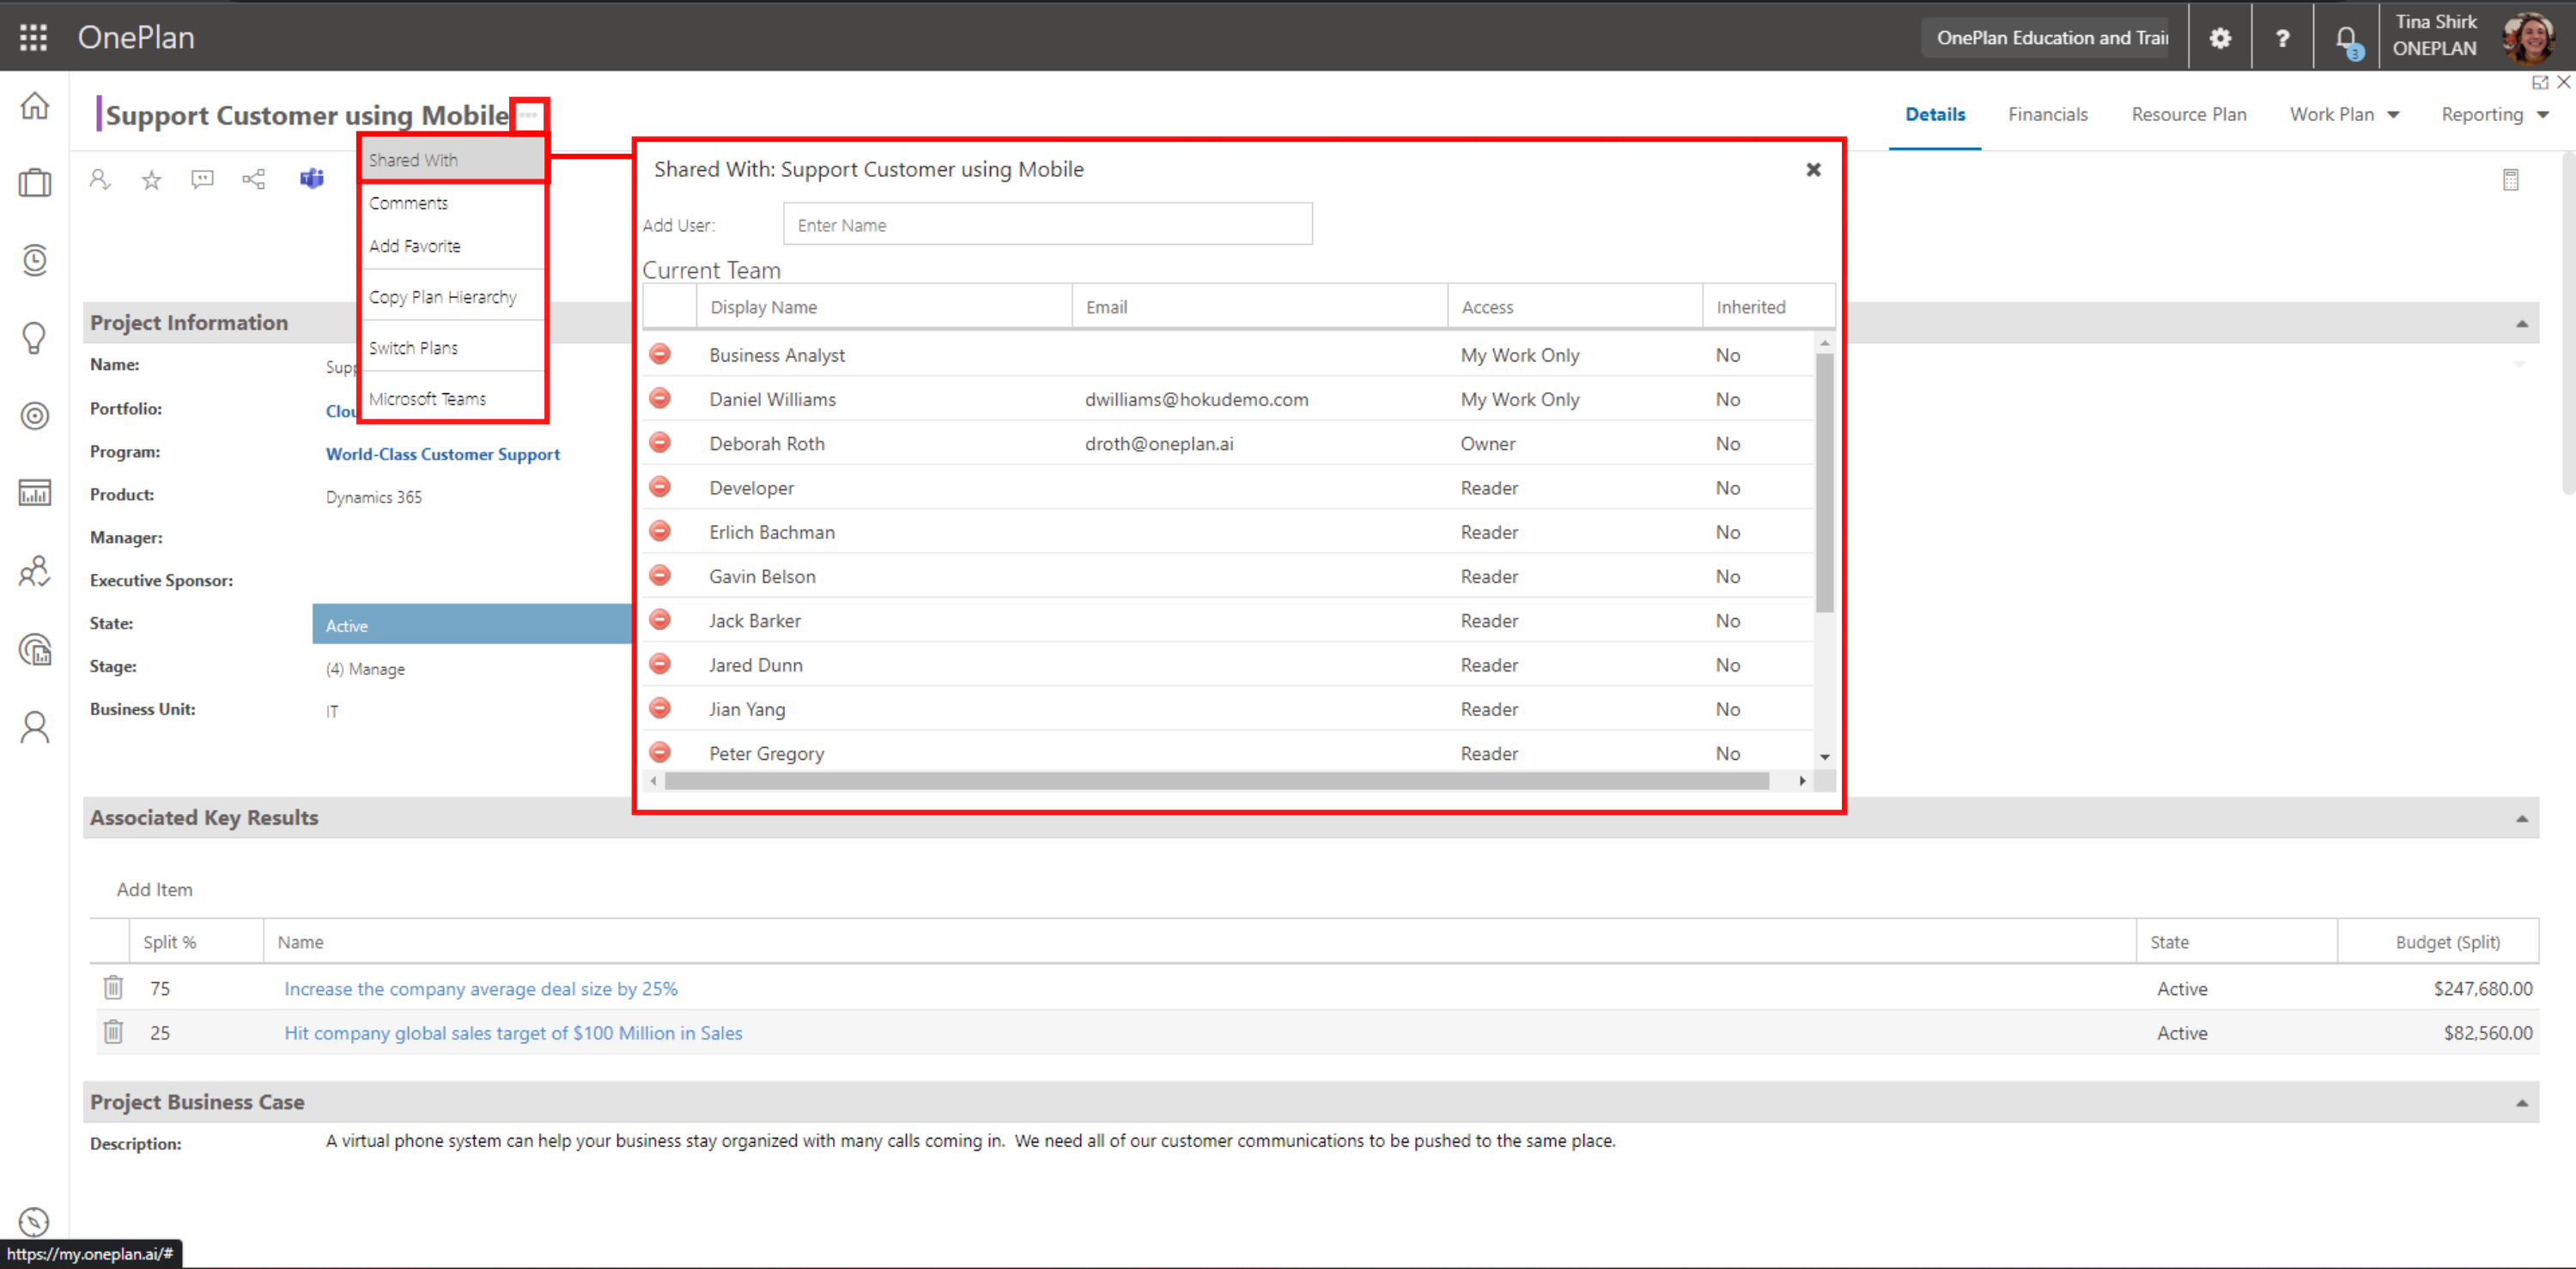
From the plan action menu: Click the ellipsis and select Shared With.
From My Portfolios: open the plan contextual menu, and select Shared With.

From the Home Page Plans panel: open the plan contextual menu, and select Shared With.
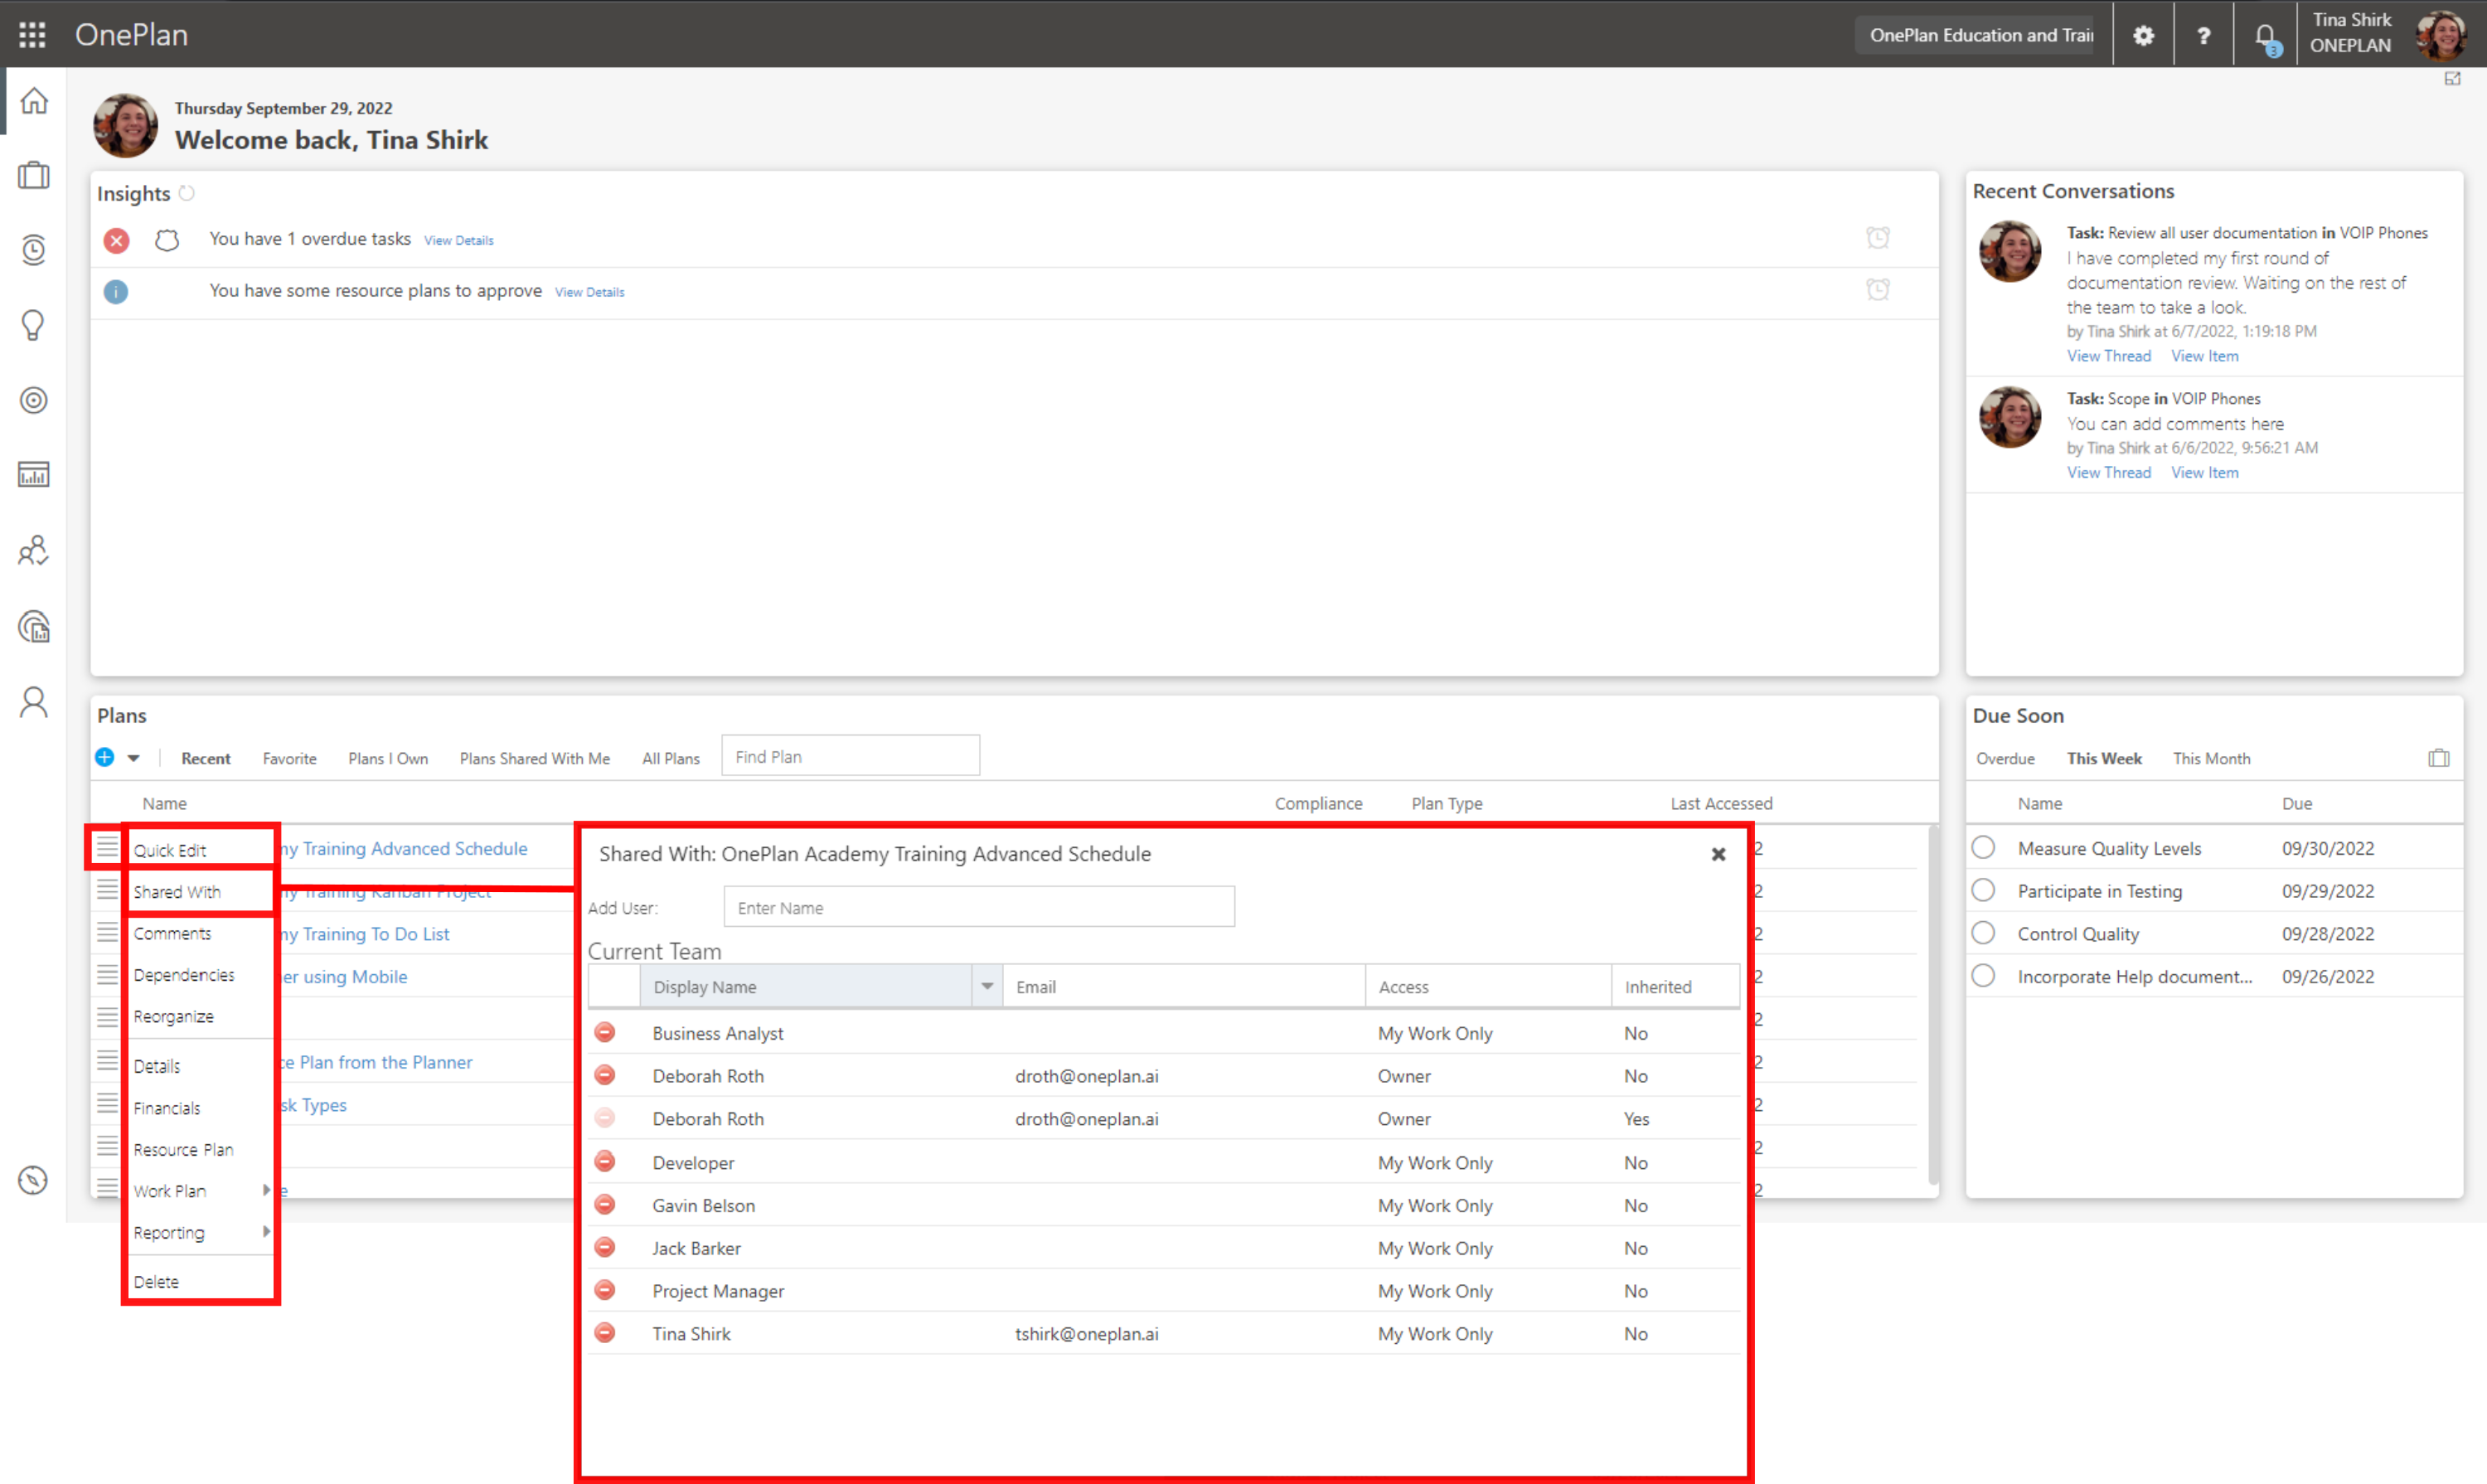
The Shared With form shows the plan team with each user's Name, Email address and Access level.

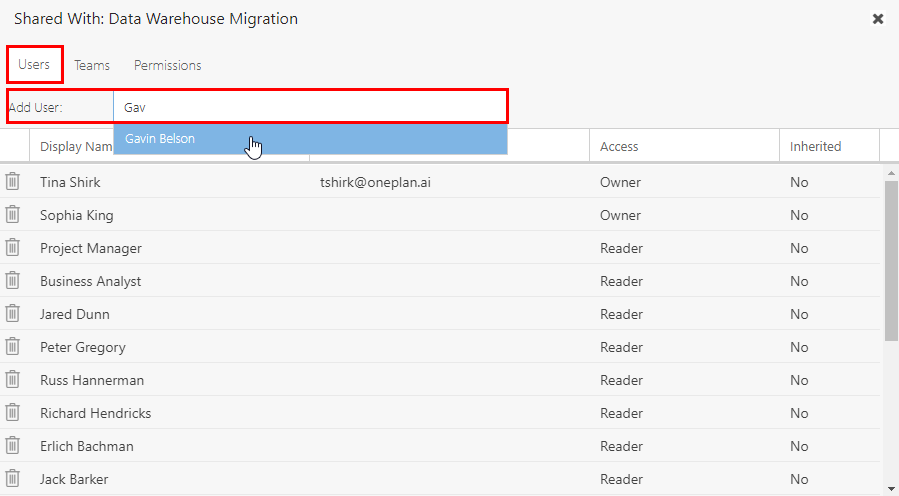
Add a User to the Plan
Now that we’re in the Shared With form, you can add a user to your plan. Make sure you are in the Users tab of the Shared With form, then type the user's name into the Add User field. Once you type 3 or more characters, matching users will show for selection based on the directory of users in the Resource Center.
Newly added users will be added to the team as a Reader, so adjust the access level as necessary. See Edit User Access Levels for the Plan.
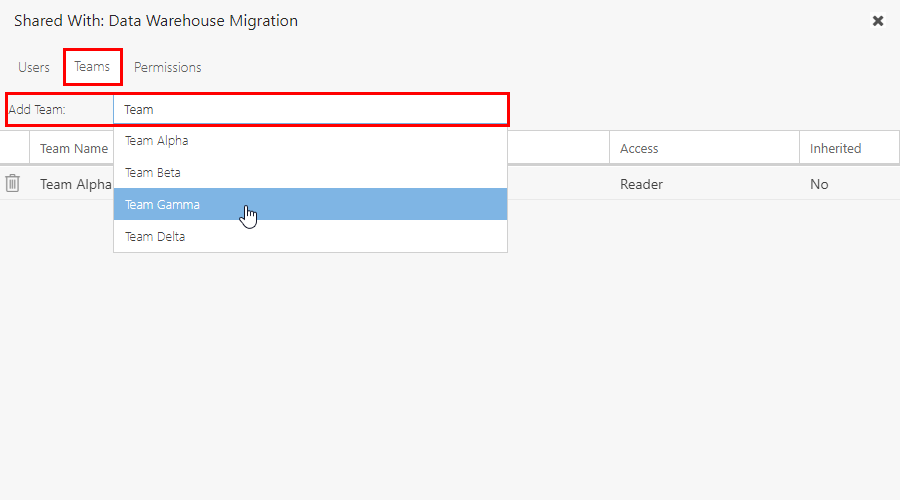
Add a Team to the Plan
You can also add entire teams of resources to plans. Go to the Teams tab of the Shared With form, then type the team's name into the Add Team field. Once you type 3 or more characters into the field, matching teams will show for selection based on the directory of teams in the Resource Center.
Newly added teams will be added to the plan as Readers. so adjust the access level as necessary.
Note
If you add a resource to a team, that user will automatically have access to all plans that have been shared with that team.
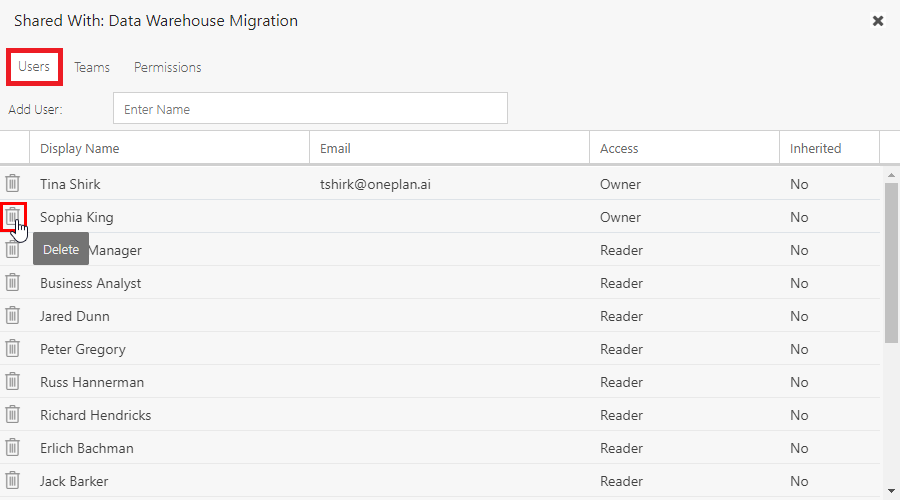
Delete a User from the Plan
To remove a user from your plan, go to the Users tab of the Shared With form. Then click the Delete icon  to the left of the user.
Note
This does not delete the user from OnePlan, just from your plan.
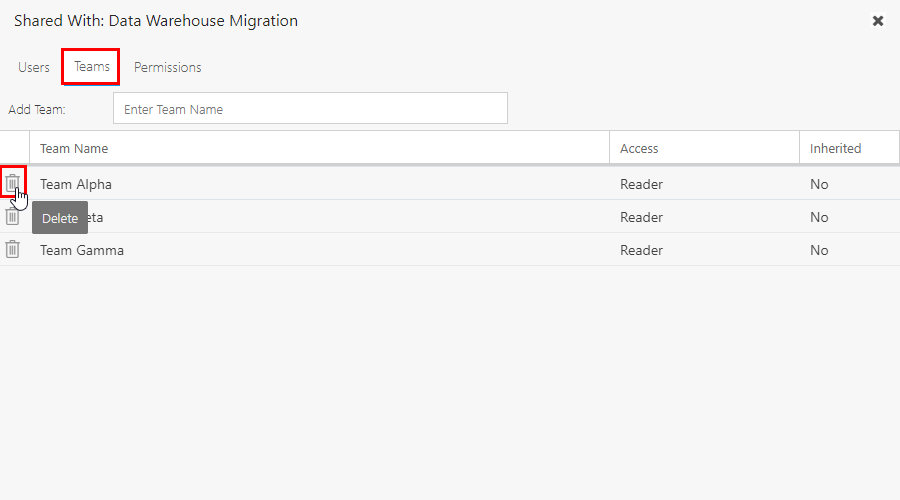
Delete a Team from the Plan
To remove a team from your plan, go to the Teams tab of the Shared With form. Then click the Delete icon to the left of the team.
Note
This does not delete the team from OnePlan, just from your plan.
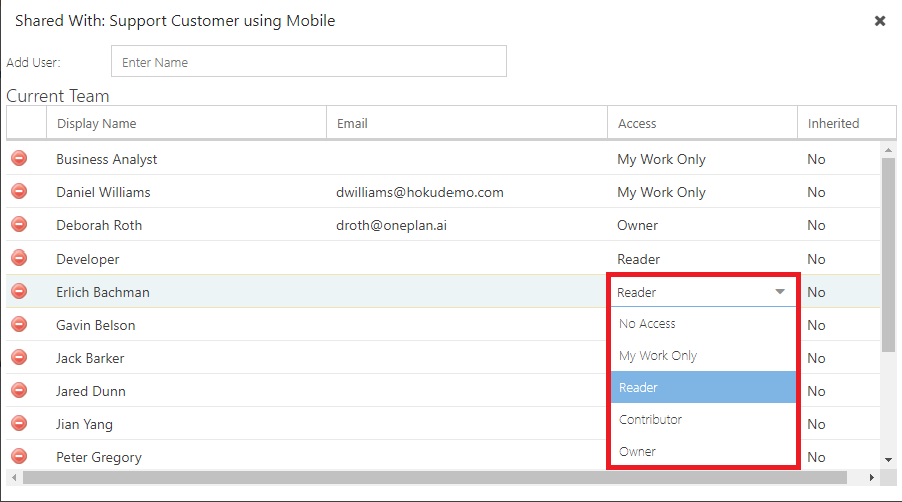
Edit User Access Levels for the Plan
To edit a user’s access level, go to the Users tab of the Shared With form. Then click in the Access column for the desired user. Select the access level from the drop-down. Options include:
No Access: The user will not have access to the plan, and will not see assigned work items in My Work. The user can be assigned to tasks by the Plan Manager.
My Work Only: The user will not have access to the plan. The user will see all assigned work items in their My Work area.
Reader: The user has read-only access to the plan. The user will see all assigned work items in their My Work area.
Contributor: The user has edit access to the plan. The user cannot delete or archive the plan.
Owner: The user has full edit rights to the plan. The user can delete or archive the plan.
What users can access and do with shared plans is dependent on the plan permissions you set, and their OnePlan environment permissions. Higher environment permissions will outweigh restrictions set on the plan level.
We have created a matrix to detail how the environment and share with permissions interact. See OnePlan Plan Permission Hierarchy for more information.
Edit Team Access Levels for the Plan
To edit a user’s access level, go to the Users tab of the Shared With form. Then click in the Access column for the desired user. Select the access level from the drop-down. Options include:
No Access: The user will not have access to the plan, and will not see assigned work items in My Work. The user can be assigned to tasks by the Plan Manager.
My Work Only: The user will not have access to the plan. The user will see all assigned work items in their My Work area.
Reader: The user has read-only access to the plan. The user will see all assigned work items in their My Work area.
Contributor: The user has edit access to the plan. The user cannot delete or archive the plan.
Owner: The user has full edit rights to the plan. The user can delete or archive the plan.
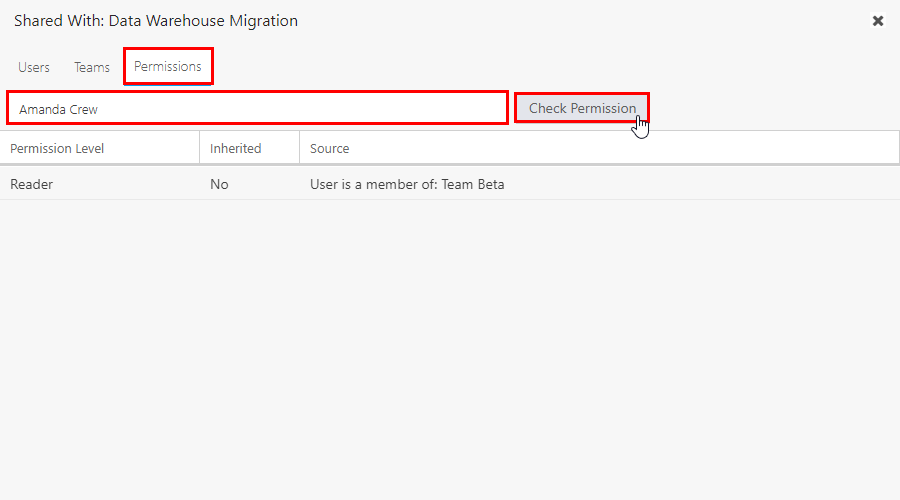
Check User Permission Levels for the Plan
Because you can add both individual users and teams of users to your plans, determining their level of access/permissions to your plan can be confusing. You can use the Permissions tab of the Shared With form to check the permissions for the users on your plan team.
To check a user's permissions, go to the Permissions tab of the Share With form. Then type in the user's name into the Enter Name field. Once you type 3 or more characters into the field, matching users will show for selection based on the directory of users in the plan's Shared With. Select the user from the drop-down. Then that user's permission level and where those permissions come from show in the form below.