Create a Model Scenario
This article explains how to create a scenario in a Modeler model.
Open the Analyze panel.
Enter your target cost and benefit values in the Current Target row for the. These fields are then color coded based on which items are "In" or "Out" in the list below.
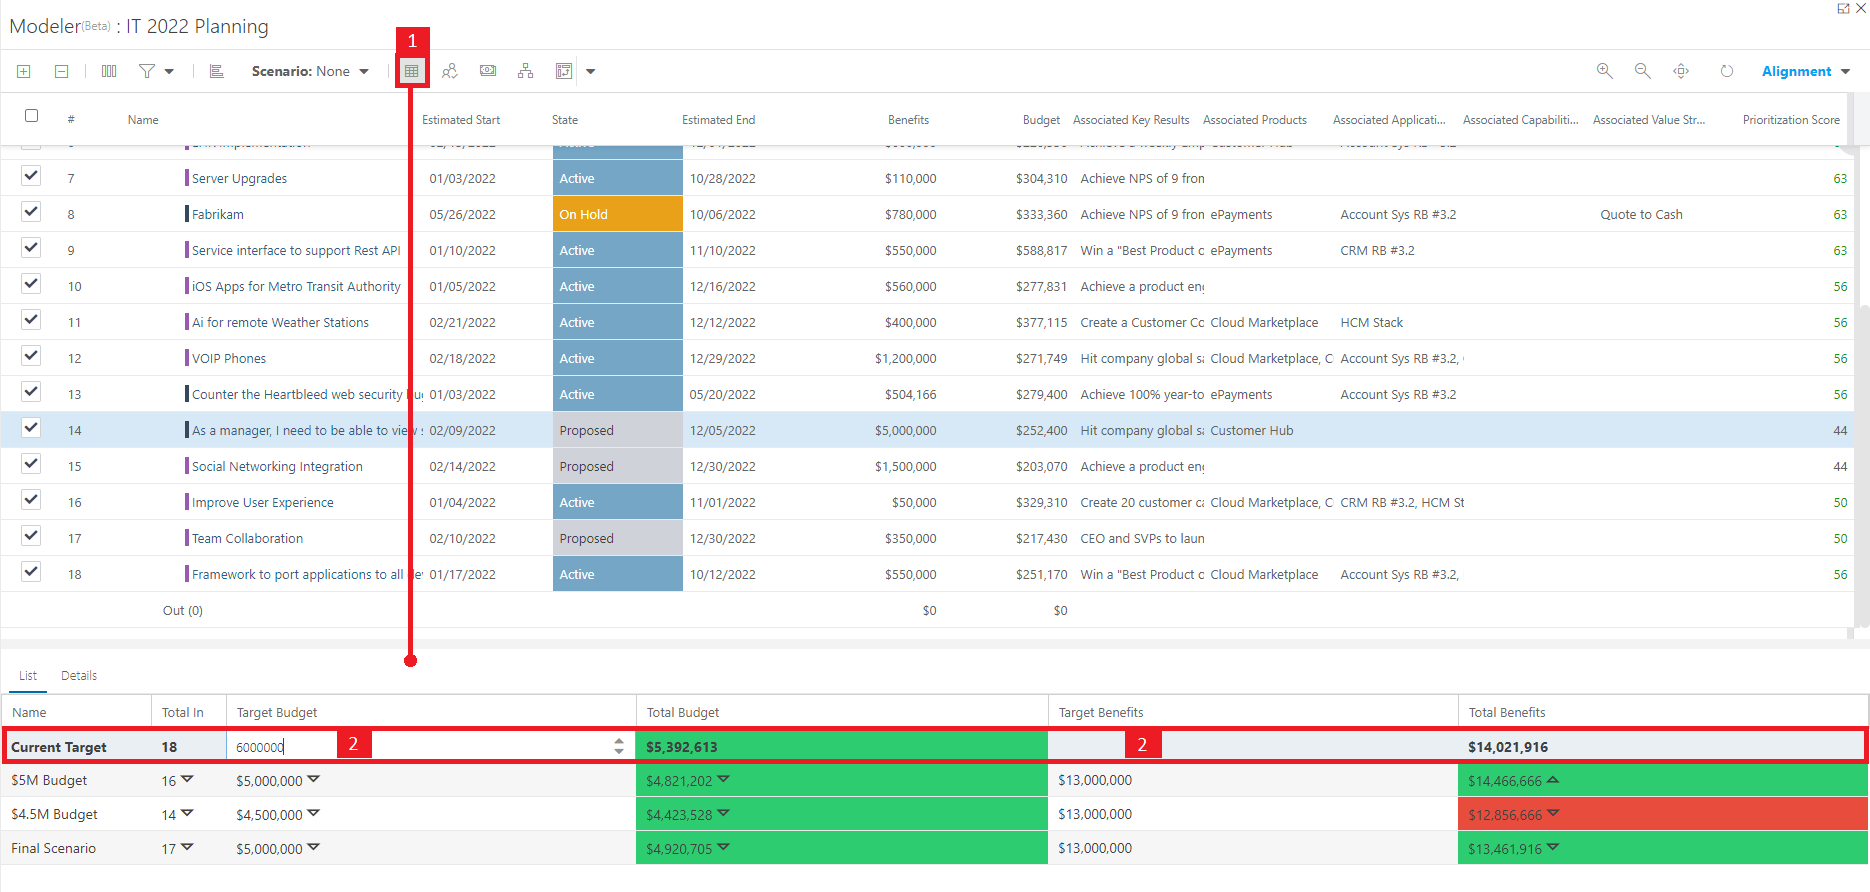
The cost field will be green if the rolled up costs of the "In" items is less than the set target cost value. It will become red if the rolled up costs become greater than the target.
The benefit field will be green if the rolled up benefits of the "In" items is greater than the set target benefits value. It will become red if the rolled up benefits become less than the target.

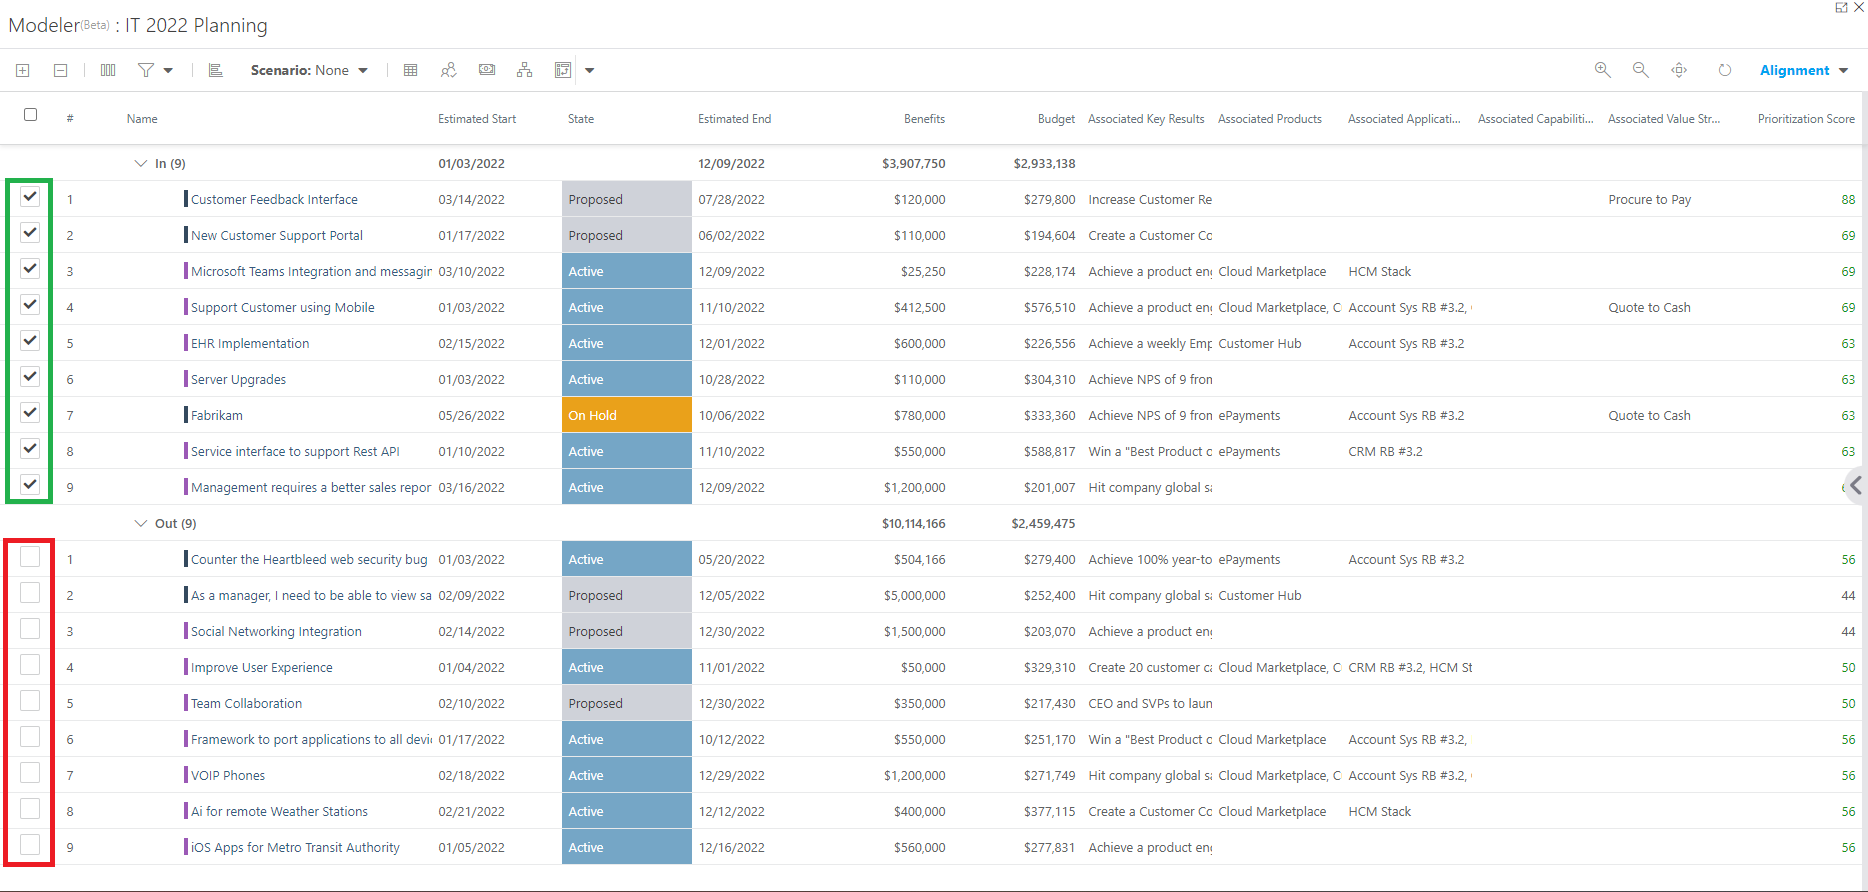
Check the checkbox next to an item to mark it as "In" for the scenario. Items that are "In" are included in the roll up calculation for the cost and benefits.
Uncheck the checkbox next to an item to mark it as "Out" for the scenario. Items that are "Out" are not included in the roll up calculation for the cost and benefits.
Once you are happy with the target values, and the items that are "In" and "Out", save the scenario. To save a scenario:
Click the Scenario menu in the header. Then select Save Scenario. The Save Scenario form will open.
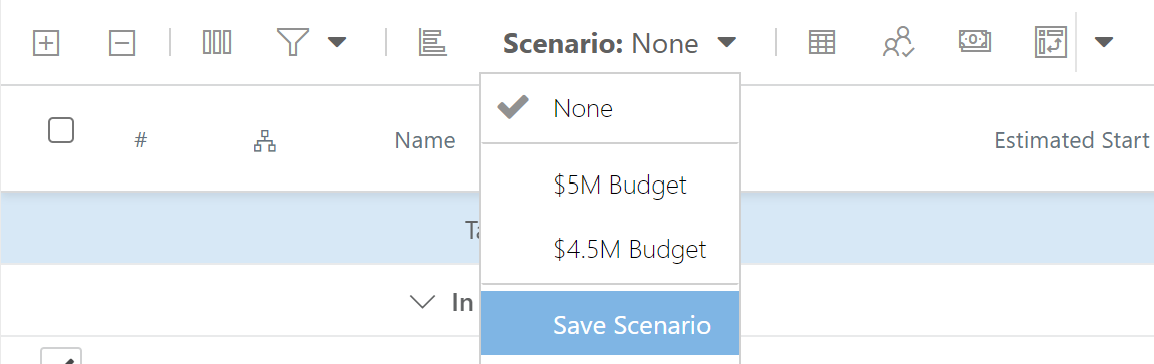
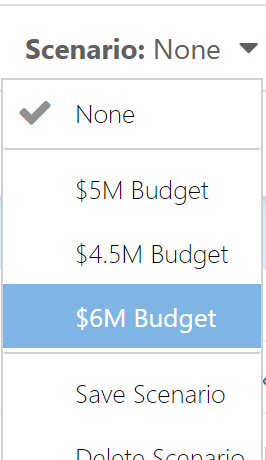
Enter a name for the new scenario. Then click Save to save the new scenario. This scenario will now be available in the Scenario menu, and in the Analyze panel (see Analyze Model Scenarios for more information).

Important
If you update a scenario (drag and drop, or update in or out), and try to navigate away from the model before saving, you will be prompted to save before leaving.